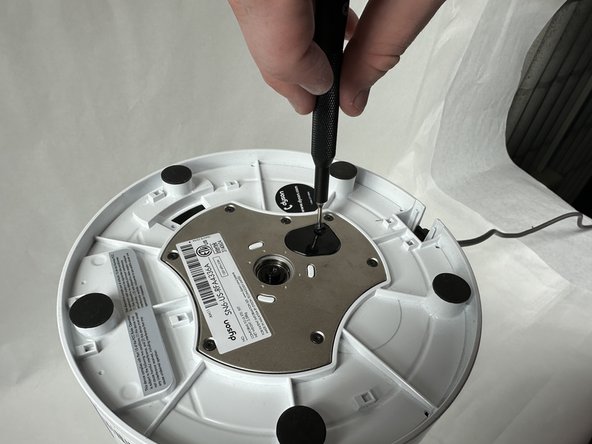
メインコンテンツにスキップ

Dyson Pure Cool AM11 Power Cord Replacement

必要な工具と部品

  1. Dyson Pure Cool AM11 Power Cord Replacement, Power Cord: 手順 1、 2の画像 1 Dyson Pure Cool AM11 Power Cord Replacement, Power Cord: 手順 1、 2の画像 2
    • Using a Phillips screwdriver, carefully remove the screws securing the base.

  2. Dyson Pure Cool AM11 Power Cord Replacement: 手順 2、 2の画像 1 Dyson Pure Cool AM11 Power Cord Replacement: 手順 2、 2の画像 2
    • Gently pry open the base.

    • Be cautious not to apply too much force.

  3. Dyson Pure Cool AM11 Power Cord Replacement: 手順 3、 1の画像 1
    • Inside the base, you'll find the power cord connected to the motherboard.

  4. Dyson Pure Cool AM11 Power Cord Replacement: 手順 4、 2の画像 1 Dyson Pure Cool AM11 Power Cord Replacement: 手順 4、 2の画像 2
    • Place the base back onto the device. Make sure it fits snugly.

    • Reinsert the previously removed screws and tighten them using the Phillips #00 screwdriver. Ensure they are tight, but do not over-tighten as this can damage the plastic.

    • Turn on your Dyson Pure Cool AM11 to ensure it's functioning correctly.

ゴール

作成者

1人の作成者と共同作成されました。

Zepei

メンバー登録日: 11/01/23

255 ポイント

2のガイドは作成済み

チーム

UMass Dartmouth, Team 2-7, Gulbrandsen Fall 2023 UMass Dartmouth, Team 2-7, Gulbrandsen Fall 2023人のメンバー

UMASSD-GULBRANDSEN-F23S2G7

3 メンバー

5のガイドは作成済み

0 件のコメント

コメントを追加

統計データ:

過去 24時間: 0

過去 7 日: 4

過去 30 日: 28

今までの合計 89