メインコンテンツにスキップ

DualShock 4 CHU-ZCT2U Joystick Covers Replacement

必要な工具と部品

  1. DualShock 4 CHU-ZCT2U Joystick Covers Replacement, Remove the rear panel screws: 手順 1、 2の画像 1 DualShock 4 CHU-ZCT2U Joystick Covers Replacement, Remove the rear panel screws: 手順 1、 2の画像 2
    • Use a Phillips screwdriver to remove the four 6.4 mm-long screws from the rear panel.

  2. DualShock 4 CHU-ZCT2U Joystick Covers Replacement, Separate the rear panel: 手順 2、 2の画像 1 DualShock 4 CHU-ZCT2U Joystick Covers Replacement, Separate the rear panel: 手順 2、 2の画像 2
    • Four fragile plastic clips hold the panels together. You can see their locations more clearly in this guide.

    • The clips help hold the seams together. If you break these clips, the controller will still work.

    • Insert an opening tool into the crease where the front and rear panel meet, starting from the outside edge of either handle.

    • Gently pry the rear panel off of the front panel until they become partially separated.

  3. DualShock 4 CHU-ZCT2U Joystick Covers Replacement, Release the plastic clips: 手順 3、 3の画像 1 DualShock 4 CHU-ZCT2U Joystick Covers Replacement, Release the plastic clips: 手順 3、 3の画像 2 DualShock 4 CHU-ZCT2U Joystick Covers Replacement, Release the plastic clips: 手順 3、 3の画像 3
    • Use the opening tool to separate the panels by releasing the plastic clips around the perimeter of the controller.

  4. DualShock 4 CHU-ZCT2U Joystick Covers Replacement, Remove the rear panel: 手順 4、 2の画像 1 DualShock 4 CHU-ZCT2U Joystick Covers Replacement, Remove the rear panel: 手順 4、 2の画像 2
    • Lift the rear panel directly away from the controller.

    • Do not completely remove the rear panel. It is still attached to the controller by a ribbon cable.

  5. DualShock 4 CHU-ZCT2U Joystick Covers Replacement: 手順 5、 2の画像 1 DualShock 4 CHU-ZCT2U Joystick Covers Replacement: 手順 5、 2の画像 2
    • Use your fingers to gently pull the ribbon cable straight out of its connector on the motherboard.

    • Since this cable's pull tab is too small to grab with fingers or tweezers, grab the cable itself. Otherwise utilize pull tabs whenever possible.

    • During reassembly, grab the ribbon cable by the blue tab and gently press the cable straight into the connector. Push the blue tab rather than the ribbon cable itself.

  6. DualShock 4 CHU-ZCT2U Joystick Covers Replacement, Remove the battery: 手順 6、 2の画像 1 DualShock 4 CHU-ZCT2U Joystick Covers Replacement, Remove the battery: 手順 6、 2の画像 2
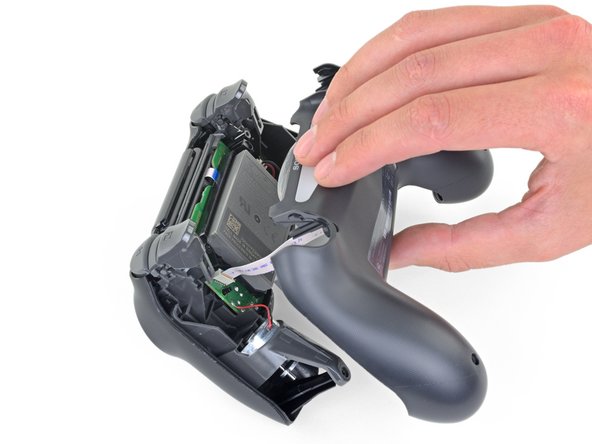
    • Use a pair of tweezers to pull the battery's power connector straight up from the motherboard.

  7. DualShock 4 CHU-ZCT2U Joystick Covers Replacement: 手順 7、 2の画像 1 DualShock 4 CHU-ZCT2U Joystick Covers Replacement: 手順 7、 2の画像 2
    • Remove the battery.

  8. DualShock 4 CHU-ZCT2U Joystick Covers Replacement, Remove the motherboard: 手順 8、 2の画像 1 DualShock 4 CHU-ZCT2U Joystick Covers Replacement, Remove the motherboard: 手順 8、 2の画像 2
    • Use a Phillips screwdriver to remove the 6.4 mm-long screw securing the battery bracket.

  9. DualShock 4 CHU-ZCT2U Joystick Covers Replacement: 手順 9、 2の画像 1 DualShock 4 CHU-ZCT2U Joystick Covers Replacement: 手順 9、 2の画像 2
    • Remove the battery bracket.

  10. DualShock 4 CHU-ZCT2U Joystick Covers Replacement: 手順 10、 2の画像 1 DualShock 4 CHU-ZCT2U Joystick Covers Replacement: 手順 10、 2の画像 2
    • Use a pair of tweezers to disconnect the touch panel ribbon cable.

    • Pull the ribbon cable directly away from its connector on the motherboard by the blue pull tab, not by the cable itself.

  11. DualShock 4 CHU-ZCT2U Joystick Covers Replacement: 手順 11、 2の画像 1 DualShock 4 CHU-ZCT2U Joystick Covers Replacement: 手順 11、 2の画像 2
    • Separate the motherboard and midframe assembly from the front panel.

  12. DualShock 4 CHU-ZCT2U Joystick Covers Replacement, Remove the joystick covers: 手順 12、 2の画像 1 DualShock 4 CHU-ZCT2U Joystick Covers Replacement, Remove the joystick covers: 手順 12、 2の画像 2
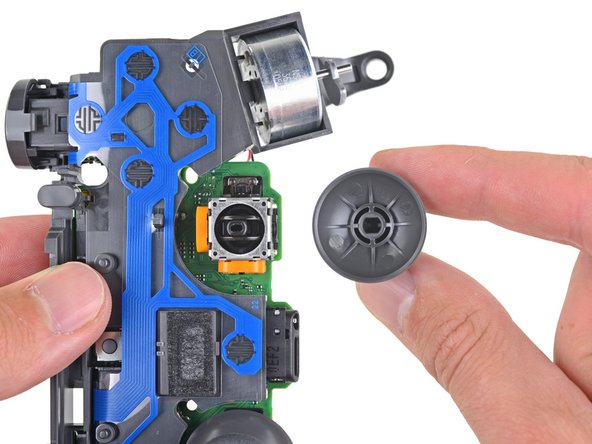
    • Pull the right joystick cover straight off the joystick module to remove it.

  13. DualShock 4 CHU-ZCT2U Joystick Covers Replacement: 手順 13、 2の画像 1 DualShock 4 CHU-ZCT2U Joystick Covers Replacement: 手順 13、 2の画像 2
    • Pull the left joystick cover straight off the joystick module to remove it.

  14. DualShock 4 CHU-ZCT2U Joystick Covers Replacement, Reassembly tip: 手順 14、 2の画像 1 DualShock 4 CHU-ZCT2U Joystick Covers Replacement, Reassembly tip: 手順 14、 2の画像 2
    • During reassembly, ensure the new joystick covers properly align with the shafts on the joystick modules before pressing them into place.

終わりに

To reassemble your device, follow the above steps in reverse order.

Repair didn’t go as planned? Check out our Answers community for troubleshooting help.

30 の人々がこのガイドを完成させました。

作成者

1人の作成者と共同作成されました。

Sam Omiotek

メンバー登録日: 02/25/19

72,547 ポイント

288のガイドは作成済み

コメント 1 件

Are you able to replace the actual joystick with a diffrent one or are we only able to switch out covers?

Grant seward - 返信

コメントを追加

統計データ:

過去 24時間: 9

過去 7 日: 100

過去 30 日: 363

今までの合計 17,475