はじめに
この修理ガイドを参照して、DualShock 4モデル CUH-ZCT1Uのボタン回路用メンブレンを交換します。
必要な工具と部品
-
-
コントローラーの背面に記載されている型番を確認してください。この修理ガイドは、モデルCUH-ZCT1Uを使用して作成されています。他の機種をお使いの場合は、ガイドの手順や交換部品が若干異なる場合があります。
-
-
-
プラスドライバーを使って、リアケースを固定している、長さ6.4mmネジを4本外します。
to re-torque these PH00 screw... i found 19Ncm to be about the max. (since 27Ncm was too much)
Dreamcat 4 - 返信
-
-
-
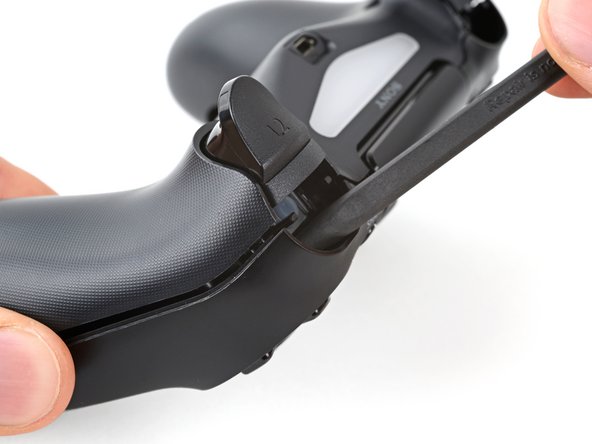
フロントケースとリアケースの間、ハンドルとアクションボタンの中間に、オープニングピックを斜め下に差し込みます。
-
ピックをハンドル方向にスライドさせ、こじ開けると最初のクリップが外れます。
-
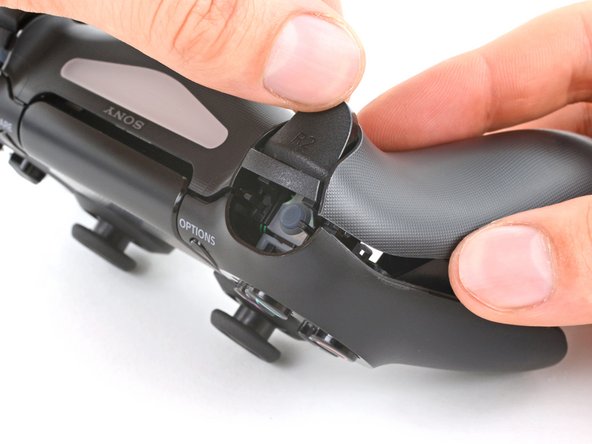
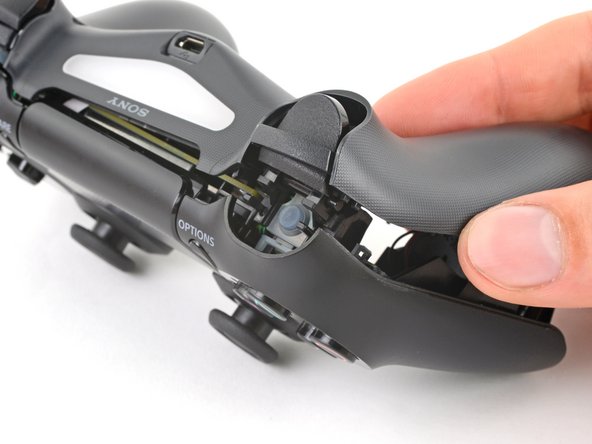
この手順をコントローラーの反対側でも繰り返し、2つ目のクリップを外します。
-
-
-
-
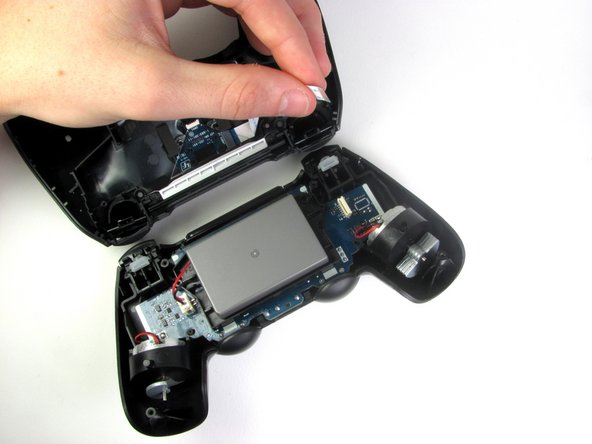
ピンセットまたは指を使って、相互接続ケーブルの青いプルタブを使ってソケットから引き抜いて外します。
On the model CUH-ZCT2E the circuit board is mirrored so that the connection is on the left side. When reassembling the blue tab should be facing inwards.
-
-
-
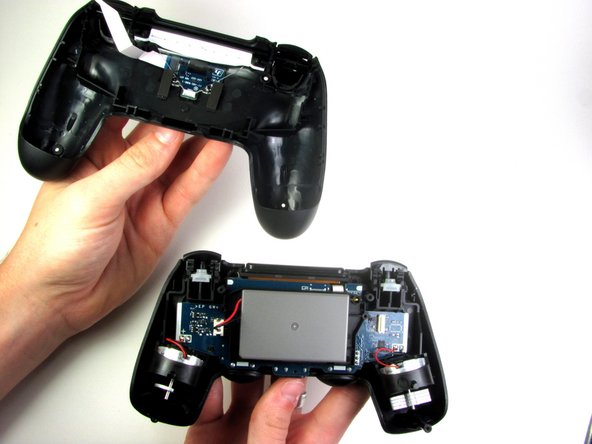
コントローラの2つのパートを接続している、マザーボードのリボンケーブルを、指で引き抜いて取り外します。
-
2つのパートを分離したら、コントローラのトップパートは脇に置きます。
-
-
-
リセットボタンのエクステンションを持ち、バッテリーブラケットの凹部から外します。
On the model CUH-ZCT2E this is part of the battery bracket and not removable. Just skip this step.
-
-
-
バッテリーブラケットをマザーボードに固定している2つのクリップの位置を確認します。
-
スパッジャーの先端を右側ブラケットのクリップ裏の開口部に差し込みます。
-
クリップを押し出して、マザーボードから外します。
-
バッテリーブラケットの右端を持ち上げます。
On the model CUH-ZCT2E the battery bracket is not secured by clips but by a PH #00 screw mid height on the right half of the battery bracket. Just remove the screw and for the next step lift the battery bracket straight up.
-
-
-
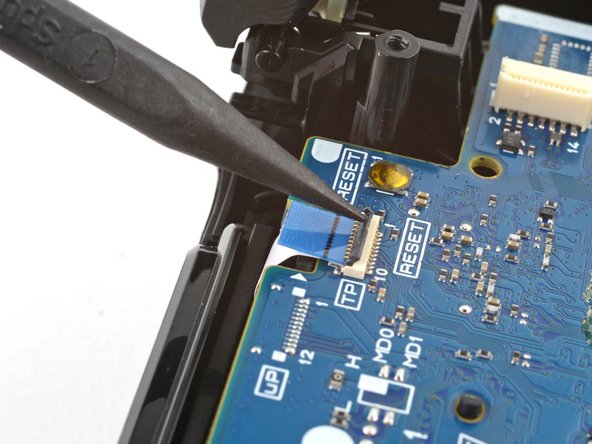
タッチパッドケーブルのZIFコネクタを固定している固定フラップを、スパッジャーの先端で跳ね上げます。
-
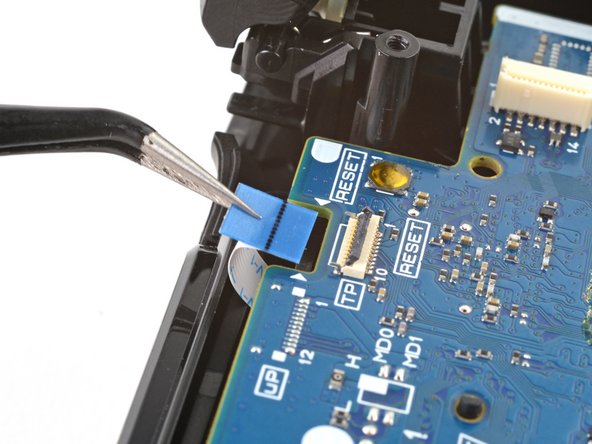
ピンセットや指を使って、青いプルタブを利用してケーブルを外します。
-
-
-
プラスドライバーを使って、マザーボードを固定している6.4mmのネジを外します。
On the model CUH-ZCT2E this screw was removed in step 16. Just skip this step.
-
-
-
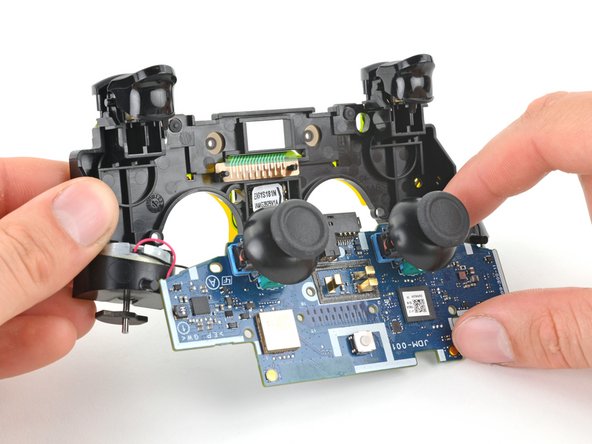
R2ボタンをしっかりと握り、ミッドフレームから各ペグを外します。
-
R2ボタンを外します。
-
-
-
ミッドフレームを裏返しにして、ボタンの向きを揃えます。
-
スプリングは、曲げられた端が上向きになるように、内側にあるペグに被せます。
-
スプリングの片側先端をボタン内の溝に入れます。
-
ボタンをクリップの上に置き、スプリングのもう一方の端をミッドフレームのチャンネルに固定します。
-
最後にボタンのペグにカチッと装着音がするまで、クリップに押し込んでください。
-
-
-
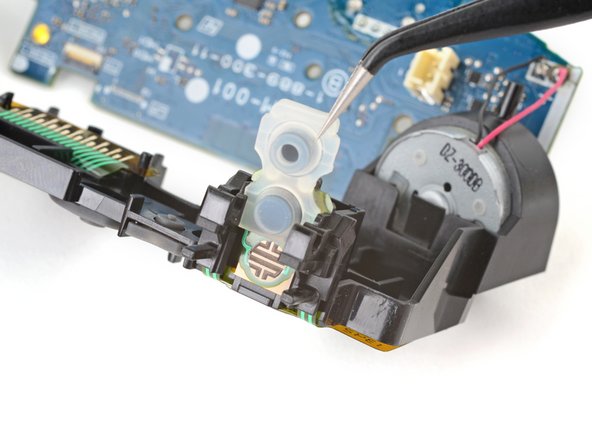
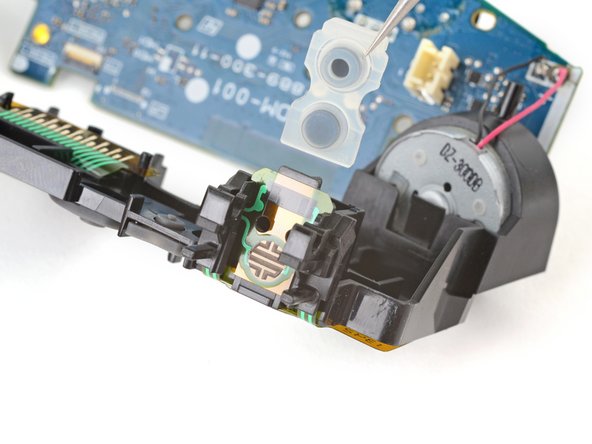
ピンセットもしくはスパッジャーで、ボタン回路メンブレンのあるR1とR2部分の下側を持ち上げます。
-
ミッドフレーム上の固定タブの上にメンブレンをスライドします。
-


オリジナルのパーツと交換用パーツをよく見比べてください。交換用パーツに付いていない残りのコンポーネントや接着シールなどは、インストールする前に新パーツに移植する必要があります。
このデバイスを再組み立てするには、インストラクションを逆の順番に従って作業を進めてください。
e-wasteを処理する場合は、認可済みリサイクルセンターR2を通じて廃棄してください。
修理がうまく進みませんか?ベーシックなトラブルシューティングを試してみるか、このモデルのアンサーコミュニティに尋ねてみましょう。
オリジナルのパーツと交換用パーツをよく見比べてください。交換用パーツに付いていない残りのコンポーネントや接着シールなどは、インストールする前に新パーツに移植する必要があります。
このデバイスを再組み立てするには、インストラクションを逆の順番に従って作業を進めてください。
e-wasteを処理する場合は、認可済みリサイクルセンターR2を通じて廃棄してください。
修理がうまく進みませんか?ベーシックなトラブルシューティングを試してみるか、このモデルのアンサーコミュニティに尋ねてみましょう。
11 の人々がこのガイドを完成させました。
以下の翻訳者の皆さんにお礼を申し上げます:
100%


これらの翻訳者の方々は世界を修理する私たちのサポートをしてくれています。 あなたも貢献してみませんか?
翻訳を始める ›


9 件のコメント
I’ve changed two flex boards from two different sellers, and I keep having a battery drain of about 25mA after i installed them. The battery drain is not present with the original flex board, any ideas?
Alessandro - 返信
Ok no, little update. the battery drain is present even if I disconnect the flex board, the touch connector and the led . It’s something on the main board I think, but I can’t figure out what is it. Is there some insulation that I may have lost when changing the flex board the first time?
That sounds really weird. I don’t remember any insulation on this specific model of controller. I don’t have this anymore as it was a repair for a friend and I also hadn’t noticed or measured such a drain.
Devnol -
The only other thing I can think of is a failure on one of the components soldered on the main board, but 20mA in standby condition are VERY high!
Alessandro - 返信
The warning regarding the rumblers being hard soldered and the wiring is delicate honestly should be in step 4, jiggling joysticks to remove the front cover can easily cause the rumblers to be disconnected and require some time consuming resoldering to reattach them.
Good point! From the fact that I used the word "again" in step 6, I may have had that in at some point but something happened and I accidentally removed it. I'll add it back. Thanks a lot for the feedback!
Devnol -
As of March 14, 2023, this guide has been updated! Comments regarding step procedures may no longer be relevant.
Buenos días. En mi caso cambie el flex, cambie las gomitas conductoras y así y todo sigue sin funcionar el R2. Sabrán cuál es el problema???
Hi! I'm sorry your R2 button doesn't work. You have some options. 1) Look for damage on the silicone button pad. Make sure the R2 button can push the pad onto the button circuit membrane. Look for damage that prevents the button from pressing. 2) Clean the silicone pad where it touches the button circuit membrane. Dirt or dust might block the connection. 3) Follow the connection on the button circuit membrane to where it connects to the motherboard. Clean the contact on the motherboard and look for electrical damage.
If you have more questions, ask the community!
Good luck!