この翻訳は、ソースガイドの最新の更新を反映していない可能性があります。 翻訳の更新に協力してください。 または ソースガイドを参照してください。
はじめに
このガイドに従って、デュアルショック4モデルCUH-ZCT1Uコントローラーのフロントケースを交換してください。
必要な工具と部品
-
-
コントローラーの背面に記載されている型番を確認してください。この修理ガイドは、モデルCUH-ZCT1Uを使用して作成されています。他の機種をお使いの場合は、ガイドの手順や交換部品が若干異なる場合があります。
-
-
-
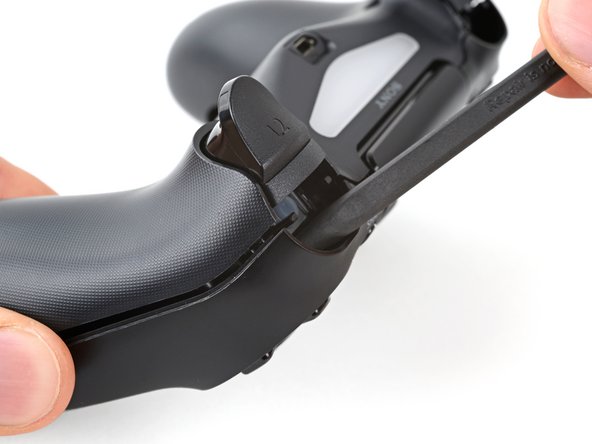
フロントケースとリアケースの間、ハンドルとアクションボタンの中間に、オープニングピックを斜め下に差し込みます。
-
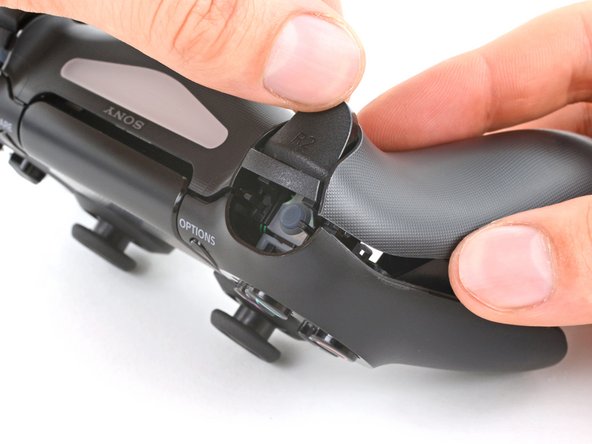
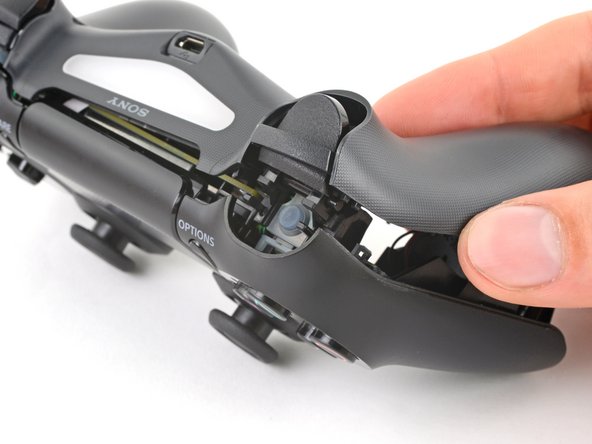
ピックをハンドル方向にスライドさせ、こじ開けると最初のクリップが外れます。
-
この手順をコントローラーの反対側でも繰り返し、2つ目のクリップを外します。
-
-
-
-
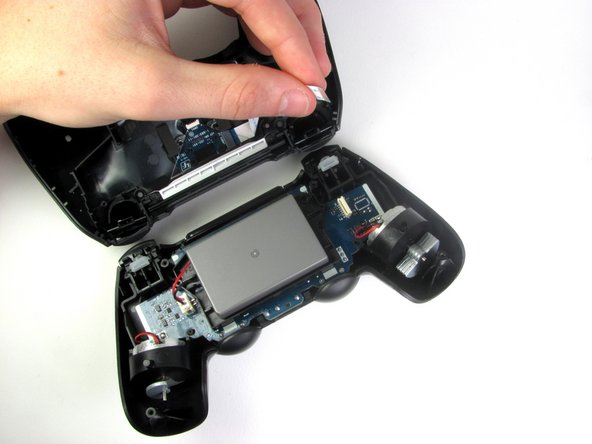
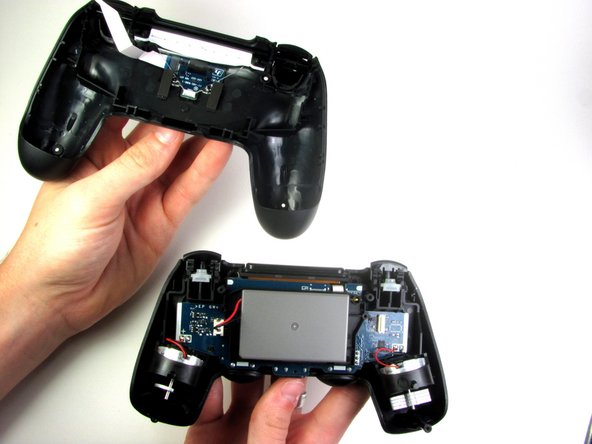
コントローラの2つのパートを接続している、マザーボードのリボンケーブルを、指で引き抜いて取り外します。
-
2つのパートを分離したら、コントローラのトップパートは脇に置きます。
-
-
-
バッテリーブラケットをマザーボードに固定している2つのクリップの位置を確認します。
-
スパッジャーの先端を右側ブラケットのクリップ裏の開口部に差し込みます。
-
クリップを押し出して、マザーボードから外します。
-
バッテリーブラケットの右端を持ち上げます。
-
-
-
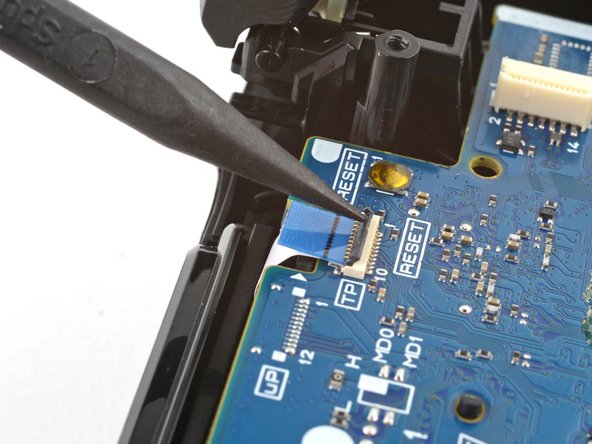
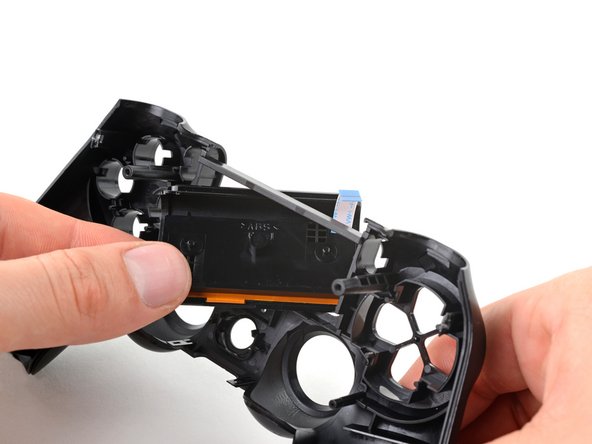
タッチパッドケーブルのZIFコネクタを固定している固定フラップを、スパッジャーの先端で跳ね上げます。
-
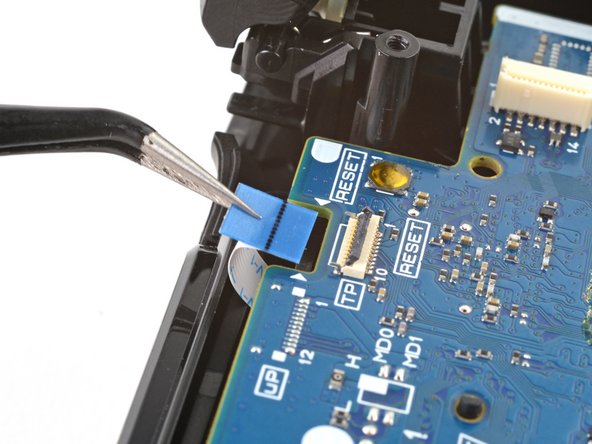
ピンセットや指を使って、青いプルタブを利用してケーブルを外します。
-
-
-
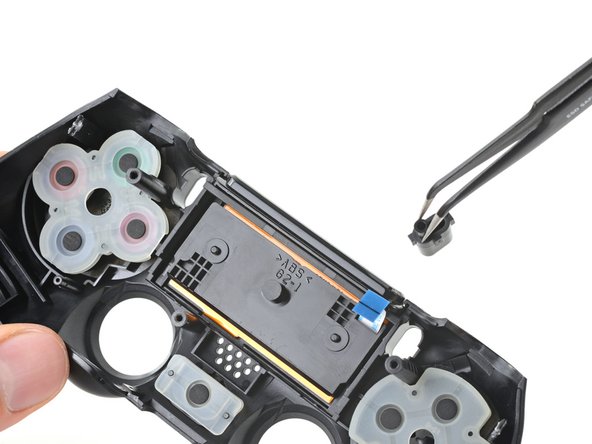
フロントケースのボタンから、3つのシリコンボタンパッドを取り外します。
-
方向キー用の四角形のパッド
-
アクションボタン用の小さなパッド
-
Homeボタン用の小さなパッド
-
タッチパッド、Shareボタン、Optionsボタン用のシリコンボタンパッドを取り外す場合は、 この手順を実行してください。それ以外の場合は、このガイドを続けて、標準的なボタン装着をします。
-


このデバイスを再組み立てするには、インストラクションを逆の順番に従って作業を進めてください。
e-wasteを処理する場合は、認可済みリサイクルセンターR2を通じて廃棄してください。
修理がうまく進みませんか?ベーシックなトラブルシューティングをするか、アンサーコミュニティに尋ねてみましょう。
このデバイスを再組み立てするには、インストラクションを逆の順番に従って作業を進めてください。
e-wasteを処理する場合は、認可済みリサイクルセンターR2を通じて廃棄してください。
修理がうまく進みませんか?ベーシックなトラブルシューティングをするか、アンサーコミュニティに尋ねてみましょう。
32 の人々がこのガイドを完成させました。
以下の翻訳者の皆さんにお礼を申し上げます:
80%


これらの翻訳者の方々は世界を修理する私たちのサポートをしてくれています。 あなたも貢献してみませんか?
翻訳を始める ›


コメント 1 件
As of March 14, 2023, this guide has been updated! Comments regarding step procedures may no longer be relevant.