この翻訳は、ソースガイドの最新の更新を反映していない可能性があります。 翻訳の更新に協力してください。 または ソースガイドを参照してください。
はじめに
このガイドに従って、DualShock 4 (CUH-ZCT1U) コントローラのアナログジョイスティックの交換またはクリーニングを行ってください。
必要な工具と部品
-
-
コントローラーの背面に記載されている型番を確認してください。この修理ガイドは、モデルCUH-ZCT1Uを使用して作成されています。他の機種をお使いの場合は、ガイドの手順や交換部品が若干異なる場合があります。
-
-
-
プラスドライバーを使って、リアケースを固定している、長さ6.4mmネジを4本外します。
to re-torque these PH00 screw... i found 19Ncm to be about the max. (since 27Ncm was too much)
Dreamcat 4 - 返信
-
-
-
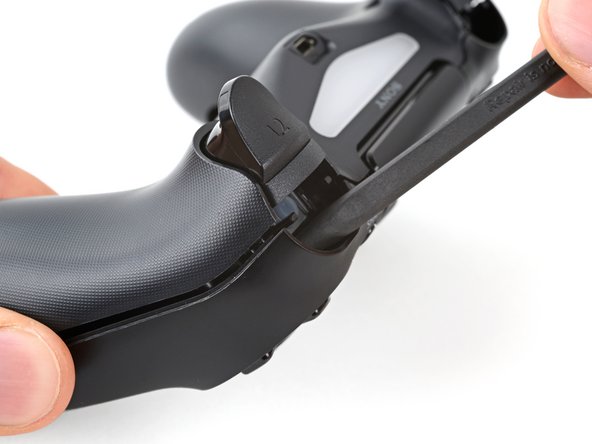
フロントケースとリアケースの間、ハンドルとアクションボタンの中間に、オープニングピックを斜め下に差し込みます。
-
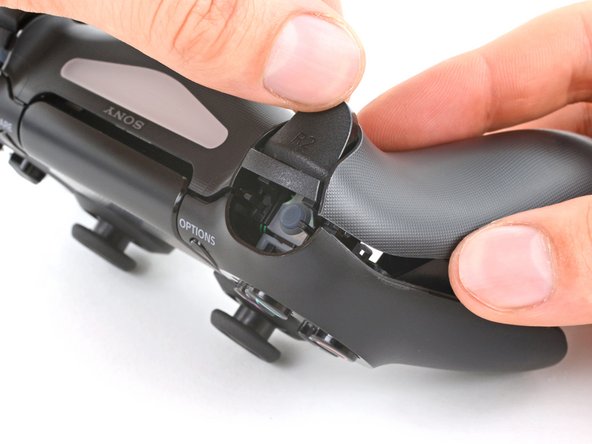
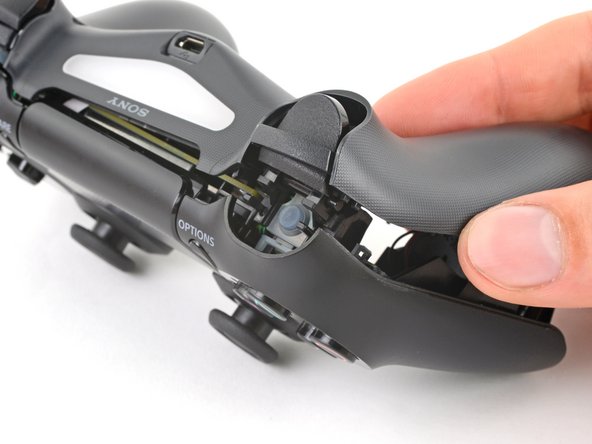
ピックをハンドル方向にスライドさせ、こじ開けると最初のクリップが外れます。
-
この手順をコントローラーの反対側でも繰り返し、2つ目のクリップを外します。
-
-
-
-
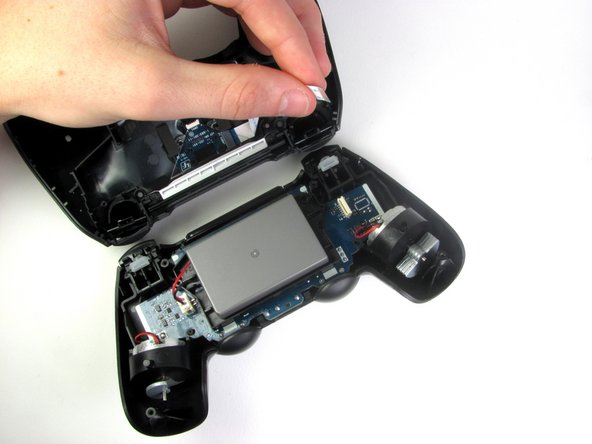
ピンセットまたは指を使って、相互接続ケーブルの青いプルタブを使ってソケットから引き抜いて外します。
On the model CUH-ZCT2E the circuit board is mirrored so that the connection is on the left side. When reassembling the blue tab should be facing inwards.
-
-
-
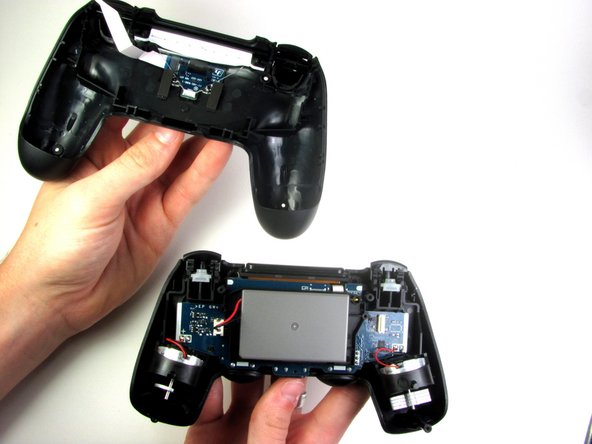
コントローラの2つのパートを接続している、マザーボードのリボンケーブルを、指で引き抜いて取り外します。
-
2つのパートを分離したら、コントローラのトップパートは脇に置きます。
-
-
-
リセットボタンのエクステンションを持ち、バッテリーブラケットの凹部から外します。
On the model CUH-ZCT2E this is part of the battery bracket and not removable. Just skip this step.
-
-
-
バッテリーブラケットをマザーボードに固定している2つのクリップの位置を確認します。
-
スパッジャーの先端を右側ブラケットのクリップ裏の開口部に差し込みます。
-
クリップを押し出して、マザーボードから外します。
-
バッテリーブラケットの右端を持ち上げます。
On the model CUH-ZCT2E the battery bracket is not secured by clips but by a PH #00 screw mid height on the right half of the battery bracket. Just remove the screw and for the next step lift the battery bracket straight up.
-
-
-
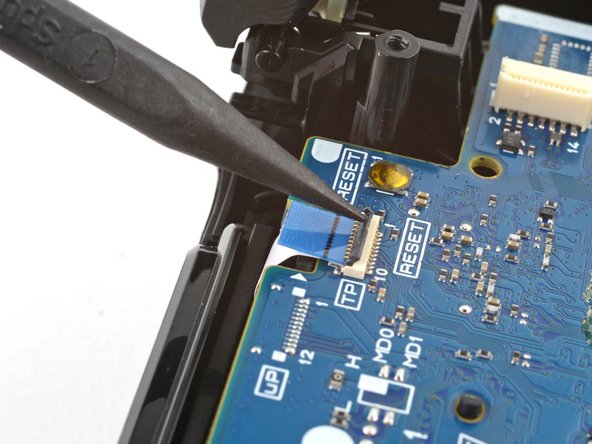
タッチパッドケーブルのZIFコネクタを固定している固定フラップを、スパッジャーの先端で跳ね上げます。
-
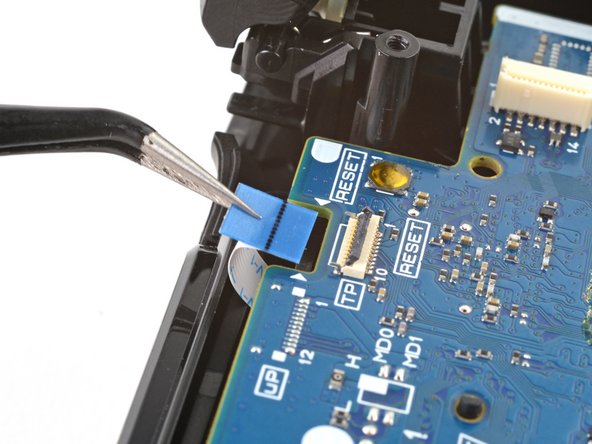
ピンセットや指を使って、青いプルタブを利用してケーブルを外します。
-
-
-
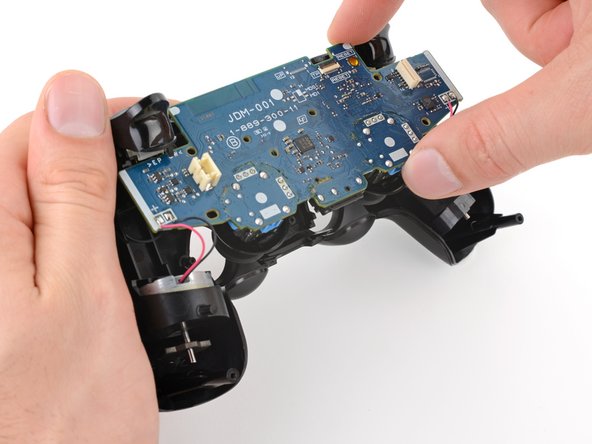
ミッドフレームからマザーボードを持ち上げます。
-
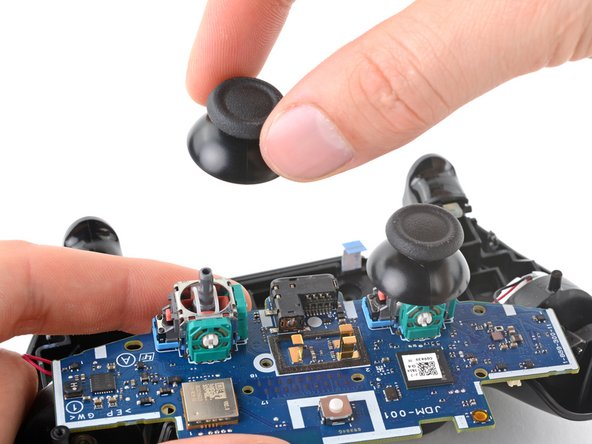
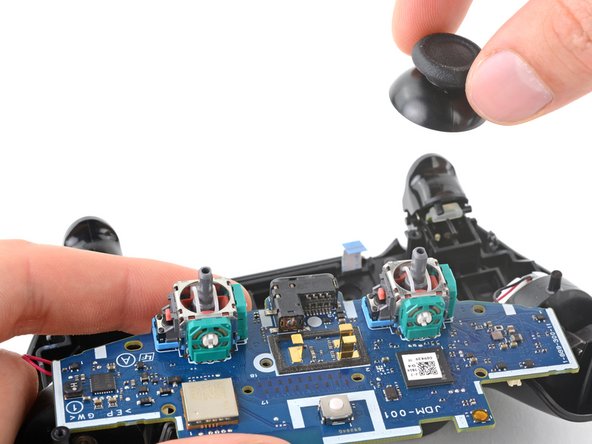
フロントケースないの切り欠きからアナログスティックカバーを通して外します。
-
振動モーターのケーブルを付けたまま、マザーボードをコントローラーの底に裏返します。
-


このデバイスを再組み立てするには、インストラクションを逆の順番に従って作業を進めてください。
e-wasteを処理する場合は、認可済みリサイクルセンターR2を通じて廃棄してください。
修理がうまくいきませんか?ベーシックなトラブルシューティングもしくは、このモデルのアンサーコミュニティを参照してください。
このデバイスを再組み立てするには、インストラクションを逆の順番に従って作業を進めてください。
e-wasteを処理する場合は、認可済みリサイクルセンターR2を通じて廃棄してください。
修理がうまくいきませんか?ベーシックなトラブルシューティングもしくは、このモデルのアンサーコミュニティを参照してください。
133 の人々がこのガイドを完成させました。
以下の翻訳者の皆さんにお礼を申し上げます:
83%


これらの翻訳者の方々は世界を修理する私たちのサポートをしてくれています。 あなたも貢献してみませんか?
翻訳を始める ›


14 件のコメント
So I followed all the steps, got the sticks in. But when I put the controller back together it Wouldent turn on. Do you guys have any clue as to what it could be?
Same exact thing happened to me, just wouldn't turn back on
Me too and all the reconnected cables are connected correctly, but it just won’t work.
Andy Hui -
Hope you guys still keep the parts, since the problem can be resolved by following the post below successfully. :)
Andy Hui -
i think you didn't put a wire in
Does this fix the issue with worn out sticks? Mine currently at idle will get stuck slightly pressing to the left, (in game, I'll be cruising left at a snail's pace) and pressing up/forward or sometimes pressing to the right doesn't fully work (in game this causes me to either not move at all, or move at about 2/3rds speed).
I've had them for about two years now, and they have seen some rigorous use, I tell you what. It is beginning to affect gameplay pretty badly, though.
Thank you for the guide - it helped me fix a beaten up DS4 controller I found on the flea market. However, it would be nice to explain a bit more in detail how to crack the case pieces open. Some detailed pictures with the different inside clips and hinges would be nice. Also, there is no explanation as to how to assemble the L2/R2 triggers back together. Last, but not least, there is no explanation as to how to remove the battery tray, in order to connect the touchpad to the motherboard.
It actually opens quite easily. I'm female with shaky fingers and didn't have a plastic pry tool. Broke the last one opening iPhones. I took a very small flat too screw driver from my electronic tool set, stuck it in at the same spot he showed and just gently pried all around. It opened fairly easily with nothing breaking. When it was almost all the way open I did go to the opposite side and gently loosened up thevither end, just so it would open straight. It's easy as long as you are gentle with it
If parts to the controller should be replaced how would you know? Is there a circuit test proceedure for the mother board? How would you know to replace other items when you are disassembling the controller? Thank you for the assistance with my controller and your time you have taken to help. Have a great one!
Thank you for the guide !
This doesn't look easy and there are opportunities to mess things up. Also, it might be hard to find an unused analog stick cover. I would try silicone joystick caps from eBay before attempting this guide.
Sometimes plastic or rubber items I handle become extremely sticky and can't be cleaned. This is a very annoying problem for me. I remember my stepdad yelling at me because I'd made swimming goggles sticky, and he also thought I'd covered bicycle handlebars with glue to make my hands stick better. Really I think it's just resins and plasticizers leeching out because of my sweat. I had the same problem with my PS4 controller's joysticks. No matter how carefully I wash my hands or clean the controller they're sticky. If I were to sell it for parts I wouldn't want someone to buy my sticky joystick covers.
I bought some silicone joystick caps from eBay and they were easy to install, I just stretched them over my existing joysticks. They've even got some little bumps that help with grip.
As of March 14, 2023, this guide has been updated! Comments regarding step procedures may no longer be relevant.