はじめに
このガイドでは、Dual Shock 4(CUH-ZCT1U) コントローラのボタンの交換をする際に参照ください。
必要な工具と部品
-
-
コントローラーの背面に記載されている型番を確認してください。この修理ガイドは、モデルCUH-ZCT1Uを使用して作成されています。他の機種をお使いの場合は、ガイドの手順や交換部品が若干異なる場合があります。
-
-
-
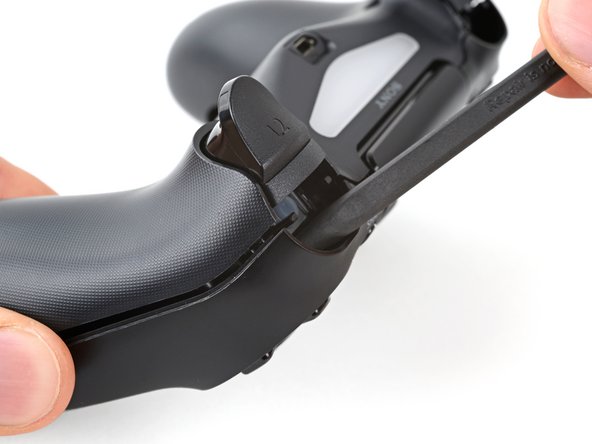
フロントケースとリアケースの間、ハンドルとアクションボタンの中間に、オープニングピックを斜め下に差し込みます。
-
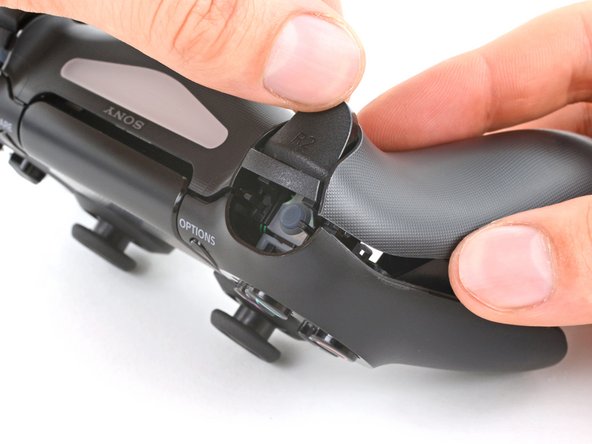
ピックをハンドル方向にスライドさせ、こじ開けると最初のクリップが外れます。
-
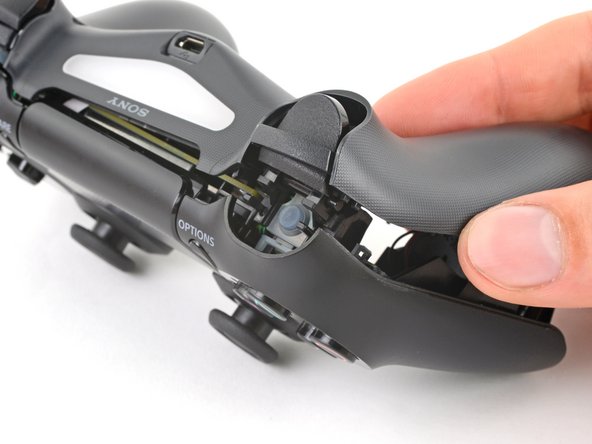
この手順をコントローラーの反対側でも繰り返し、2つ目のクリップを外します。
-
-
-
-
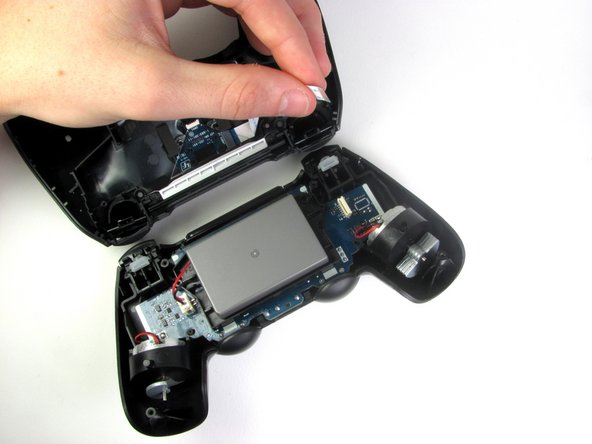
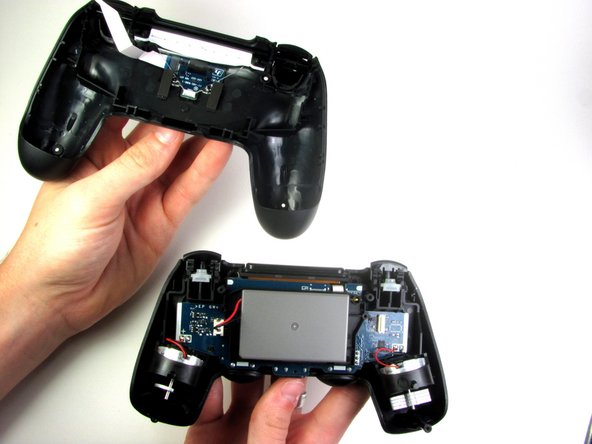
コントローラの2つのパートを接続している、マザーボードのリボンケーブルを、指で引き抜いて取り外します。
-
2つのパートを分離したら、コントローラのトップパートは脇に置きます。
-
-
-
バッテリーブラケットをマザーボードに固定している2つのクリップの位置を確認します。
-
スパッジャーの先端を右側ブラケットのクリップ裏の開口部に差し込みます。
-
クリップを押し出して、マザーボードから外します。
-
バッテリーブラケットの右端を持ち上げます。
-
-
-
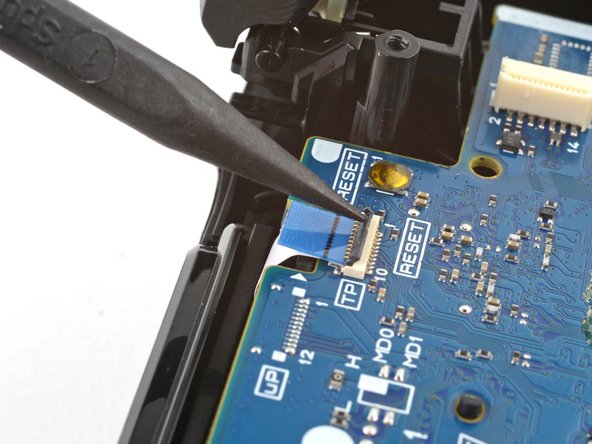
タッチパッドケーブルのZIFコネクタを固定している固定フラップを、スパッジャーの先端で跳ね上げます。
-
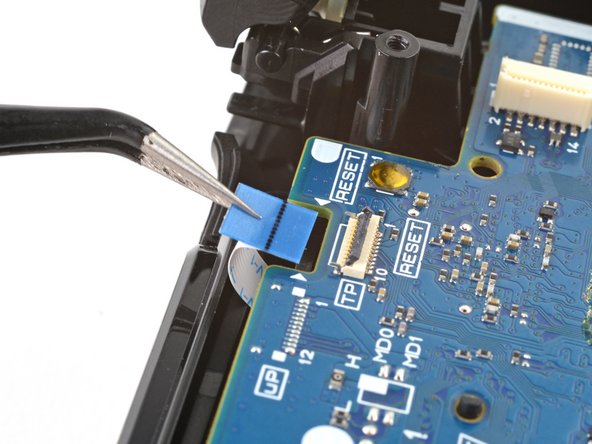
ピンセットや指を使って、青いプルタブを利用してケーブルを外します。
-
-
-
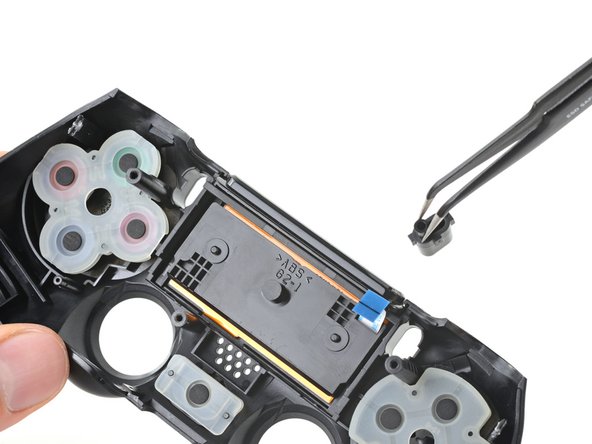
フロントケースからShareとOptionsボタンを外します。
On the model CUH-ZCT2E the share and options buttons are not removable. Skip this step.
-
-
-
フロントケースのボタンから、3つのシリコンボタンパッドを取り外します。
-
方向キー用の四角形のパッド
-
アクションボタン用の小さなパッド
-
Homeボタン用の小さなパッド
-
タッチパッド、Shareボタン、Optionsボタン用のシリコンボタンパッドを取り外す場合は、 この手順を実行してください。それ以外の場合は、このガイドを続けて、標準的なボタン装着をします。
-


オリジナルのパーツと交換用パーツをよく見比べてください。交換用パーツに付いていない残りのコンポーネントや接着シールなどは、インストールする前に新パーツに移植する必要があります。
このデバイスを再組み立てするには、インストラクションを逆の順番に従って作業を進めてください。
e-wasteを処理する場合は、認可済みリサイクルセンターR2を通じて廃棄してください。
修理がうまく進みませんか?ベーシックなトラブルシューティングを試してみるか、アンサーコミュニティに尋ねてみましょう。
オリジナルのパーツと交換用パーツをよく見比べてください。交換用パーツに付いていない残りのコンポーネントや接着シールなどは、インストールする前に新パーツに移植する必要があります。
このデバイスを再組み立てするには、インストラクションを逆の順番に従って作業を進めてください。
e-wasteを処理する場合は、認可済みリサイクルセンターR2を通じて廃棄してください。
修理がうまく進みませんか?ベーシックなトラブルシューティングを試してみるか、アンサーコミュニティに尋ねてみましょう。
119 の人々がこのガイドを完成させました。
以下の翻訳者の皆さんにお礼を申し上げます:
100%


これらの翻訳者の方々は世界を修理する私たちのサポートをしてくれています。 あなたも貢献してみませんか?
翻訳を始める ›


23 件のコメント
I pulled out my touch pad along with the motherboard when it was still attached how can I put this back in
Pull out the ribbon the way the tutorial says and then you can place the touchpad back correctly. It needs to be put in from the inside of the controller, not the outside.
This guide could be enhanced by showing the L1/L2, R1/R2 button cluster in some photos. I needed to replace the silicone grommet underneath the buttons due to Sony's design flaw of having R2/L2 press on the silicone with a blade shaped extension.
What to do If after cleaning some buttons no longer work? I was very careful when disassembling and reassembling the remote.
You might wanna make sure that flimsy plastic lining the buttons push is in its proper place. Sometimes it moves and if it doesn't line up just right it won't work.
I took the "caveman" approach to this tutorial because I spilled soda near the controller and the circle button was sticky. It was an emergency operation done with a Phillips one size too large, a pocket knife for a spudger, and my cigar fingers for forceps. I must say, after some initial confusion, this tutorial helped me put it back together easily without breaking anything (a minor miracle all on its own). Thank for this.
My R2 button is constant being pressed. Even after I opened it and cleaned it. Please help me with this??
I connected it to pc and even removed the R2 button while checking for the buttons on pc,and button 8 (I.e R2 button on controller) shows as pressed all the time even when it's not there.
The “up" button on my d-pad has not been working recently so I followed the tutorial (helpful by the way), found no obvious problems, put it all back together, but the button still will not work. Any tips?
Are the contacts lining up right? That might be the problem.
how to clean the green circuit board because ps button is unresponsive? the true circuit button how to clean or repair it? cause mine is not responding in the motherboard assembly
ruzzyricor - 返信
My vibration motor has fallen out and the wires are disconnected, how can I fix it?
After I did this my right dpad button stopped functioning, is there a way to fix this?
This is the original model. How about an update since there have been about 3 new assemblies and a new version of the DS4?
Eli Hanson - 返信
Here is a solution to a broken R2 button. Really simple fix.
My PS4 is registering R2 button input without me pressing anything on the Dualshock 4. How can I fix it? This is only apparent when I play games… For example, when I play Spiderman where R2 is used for sprinting and web swinging, Spiderman will alternate between running and jogging, without me actually providing any kind of input via R2.
Thank you so much
As of March 14, 2023, this guide has been updated! Comments regarding step procedures may no longer be relevant.