メインコンテンツにスキップ

Dopo Double Power 7 Camera Replacement

必要な工具と部品

  1. Dopo Double Power 7 Camera Replacement, Rear Panel: 手順 1、 1の画像 1
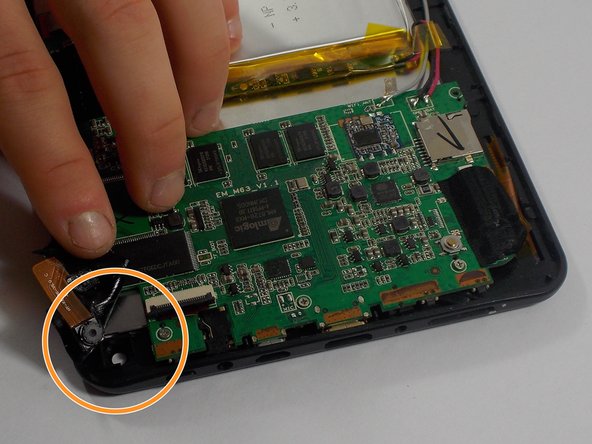
    • The rear panel is secured to the front case and can simply be pried apart without damage.

  2. Dopo Double Power 7 Camera Replacement: 手順 2、 1の画像 1
    • Carefully, wedge the plastic opening tool in-between the seam that separates both halves of the tablet.

  3. Dopo Double Power 7 Camera Replacement: 手順 3、 1の画像 1
    • Run the plastic opening tool along the seam looking for the clips and lift up on the rear panel.

  4. Dopo Double Power 7 Camera Replacement: 手順 4、 1の画像 1
    • The rear panel should come completely off.

  5. Dopo Double Power 7 Camera Replacement, Camera: 手順 5、 1の画像 1
    • Remove any black static tape that may be covering the motherboard.

  6. Dopo Double Power 7 Camera Replacement: 手順 6、 2の画像 1 Dopo Double Power 7 Camera Replacement: 手順 6、 2の画像 2
    • The camera is taped in place.

    • Use the flat end of a spudger to disconnect the front-facing camera cable from its socket on the motherboard.

    • Our cable had previously been cut but yours can be disconnected by lifting up on the black section of the socket, as shown by the arrow, and pulling the cable out.

    • Simply, pull back the tape and remove the camera.

終わりに

To reassemble your device, follow these instructions in reverse order.

ある他の人がこのガイドを完成しました。

作成者

3人の作成者と共同で作成されました。

mike pelosi

メンバー登録日: 10/30/15

682 ポイント

6のガイドは作成済み

チーム

UMass Dartmouth, Team 1-2, Miles Fall 2015 UMass Dartmouth, Team 1-2, Miles Fall 2015人のメンバー

UMASSD-MILES-F15S1G2

4 メンバー

12のガイドは作成済み

0 件のコメント

コメントを追加

統計データ:

過去 24時間: 0

過去 7 日: 3

過去 30 日: 6

今までの合計 160