メインコンテンツにスキップ

Doov v15 Speaker Replacement

必要な工具と部品

  1. Doov v15 Speaker Replacement, Speaker: 手順 1、 1の画像 1
    • Use the Jimmy to crack open the phone's back cover. Slide it under an edge of the phones back cover and carefully loosen the edge. The casing should pop open slightly.

  2. Doov v15 Speaker Replacement: 手順 2、 2の画像 1 Doov v15 Speaker Replacement: 手順 2、 2の画像 2
    • Use an ifixit opening tool to slide around the phones back cover, loosening it and allowing for an easy removal. It should easily separate from the chassis. Make sure to trace it around the entire phone.

    • Note: Make sure to trace it around the entire phone.

  3. Doov v15 Speaker Replacement: 手順 3、 2の画像 1 Doov v15 Speaker Replacement: 手順 3、 2の画像 2
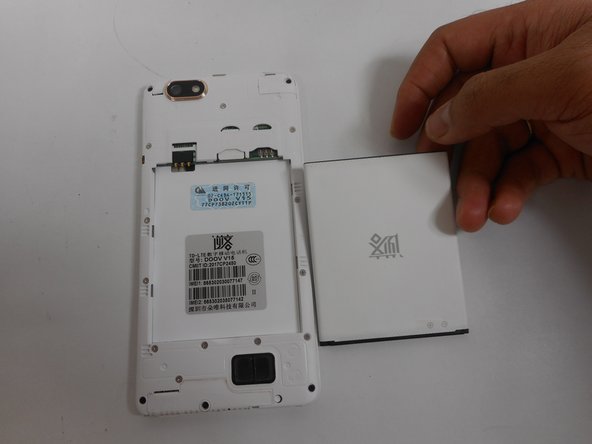
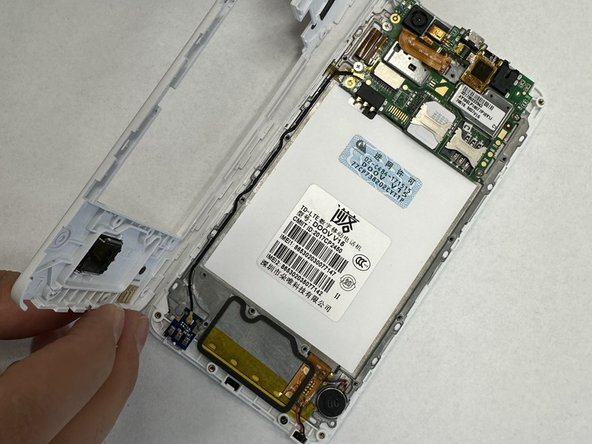
    • Disconnect the Battery: Once the back casing is removed, the battery will be visible. Use the ifixit opening tool to remove the battery. Place the ifixit opening tool at the top of the battery and pull it back, or simply use your hand to remove it.

  4. Doov v15 Speaker Replacement: 手順 4、 3の画像 1 Doov v15 Speaker Replacement: 手順 4、 3の画像 2 Doov v15 Speaker Replacement: 手順 4、 3の画像 3
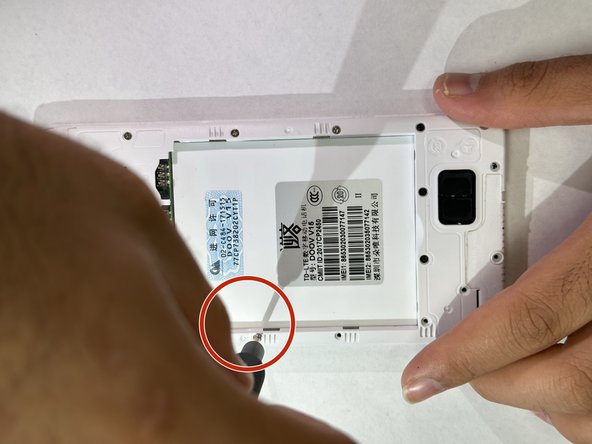
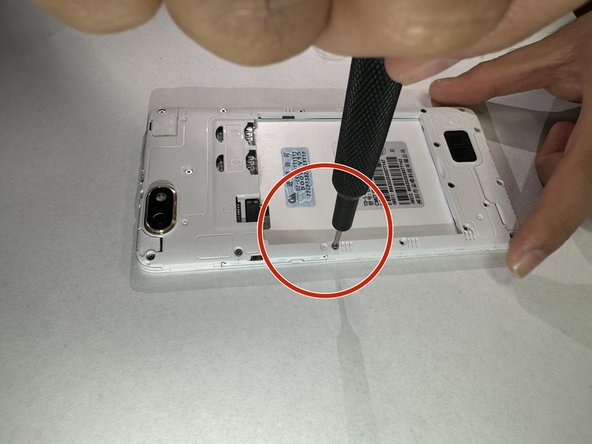
    • Onec you disconnect the battery now use iFixit Precision Bit Driver and iFixit Precision 4 mm Screwdriver Oval Drive Bit (0.5). Place the Screwdriver in the top of screw and rotate it clock wise until the screw comes out.

    • Remember to use magnetic mat to keep those tiny screw safe so that you will not lose it. Repeat the steps and unscrew all the screw.

  5. Doov v15 Speaker Replacement: 手順 5、 3の画像 1 Doov v15 Speaker Replacement: 手順 5、 3の画像 2 Doov v15 Speaker Replacement: 手順 5、 3の画像 3
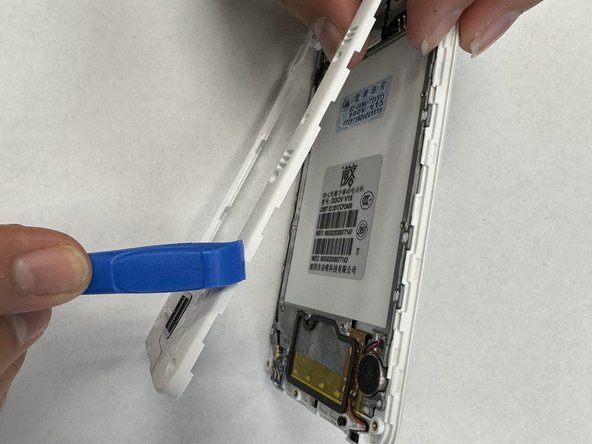
    • After finishing unscrewing, use plastic opening tools to gently pry open the device. Be cautious to avoid damaging internal components.

    • Note: slide it around like you did in step 2 and take out the frame.

  6. Doov v15 Speaker Replacement: 手順 6、 3の画像 1 Doov v15 Speaker Replacement: 手順 6、 3の画像 2 Doov v15 Speaker Replacement: 手順 6、 3の画像 3
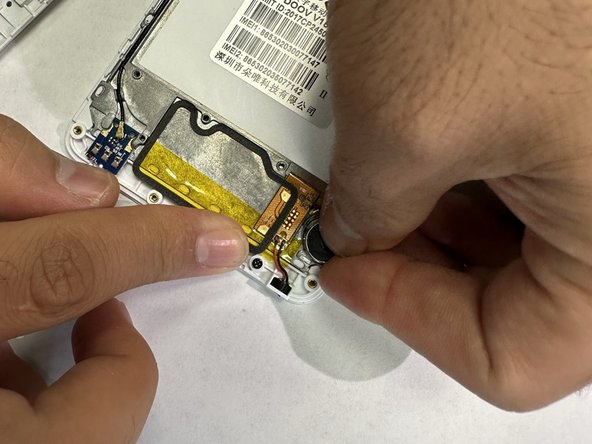
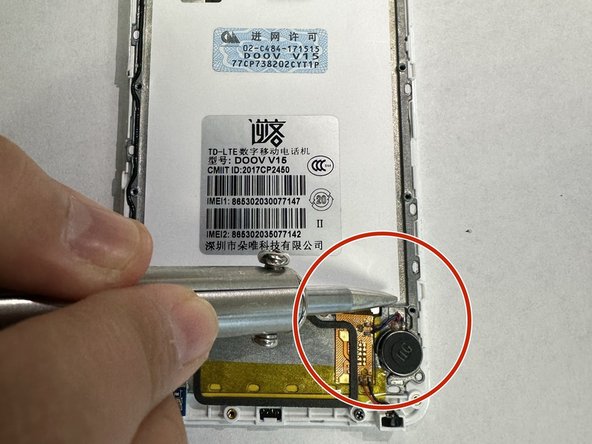
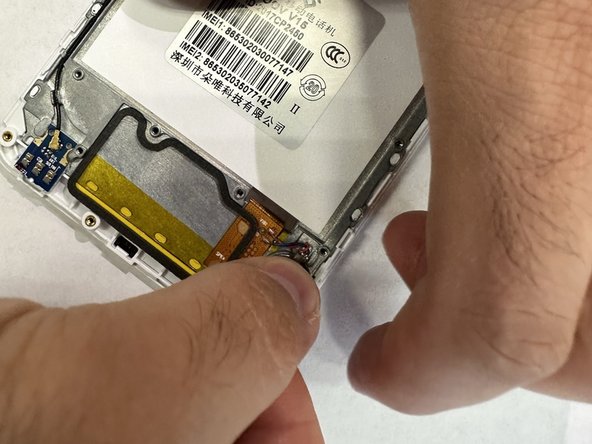
    • Locate and disconnect the old speaker: After taking out the plastic frame on right bottom corner you will see round speaker, you can test it with the help screw driver, you will feel magnetic power.

  7. Doov v15 Speaker Replacement: 手順 7、 3の画像 1 Doov v15 Speaker Replacement: 手順 7、 3の画像 2 Doov v15 Speaker Replacement: 手順 7、 3の画像 3
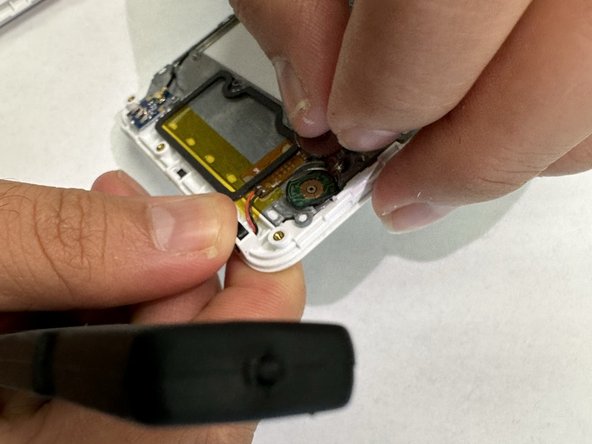
    • Carefully disconnect any cables or connectors attached to it. Remove any screws securing the speaker in place. Gently lift the old speaker out of its position.

    • Replace the new speaker in the place of old speaker and with the help of soldering Gun connect all the cables and any connectors back.

終わりに

To reassemble your device, follow these instructions in reverse order.

作成者

1人の作成者と共同作成されました。

Kumar Pathak

メンバー登録日: 09/08/23

157 ポイント

1ガイドが承認済み

チーム

University of New Orleans, Team 5-3, McDonald Fall 2023 University of New Orleans, Team 5-3, McDonald Fall 2023人のメンバー

UNO-MCDONALD-F23S5G3

4 メンバー

5のガイドは作成済み

0 件のコメント

コメントを追加

統計データ:

過去 24時間: 1

過去 7 日: 8

過去 30 日: 13

今までの合計 72