メインコンテンツにスキップ

Disassembling iRobot Roomba 551 Bumper

必要な工具と部品

  1. Disassembling iRobot Roomba 551 Bumper, Side Brush: 手順 1、 1の画像 1
    • Place your Roomba upside-down on a hard surface.

    If all you need off is the faceplate, skip all of the screwdriver-based steps, and just remove the dirt bin(step 7) and start from step 11 at the rear.

    David Forrest - 返信

  2. Disassembling iRobot Roomba 551 Bumper: 手順 2、 1の画像 1
    • While holding the side brush in place, use a Phillips #1 screwdriver to remove the 4.5mm screw from the center of the brush.

  3. Disassembling iRobot Roomba 551 Bumper: 手順 3、 1の画像 1
    • Gently pull upwards on the brush to remove it.

  4. Disassembling iRobot Roomba 551 Bumper, Bottom Plate: 手順 4、 1の画像 1
    • Rotate the Roomba upside-down so the bottom is facing towards you.

  5. Disassembling iRobot Roomba 551 Bumper: 手順 5、 2の画像 1 Disassembling iRobot Roomba 551 Bumper: 手順 5、 2の画像 2
    • Using a Phillips #2 screwdriver, remove the captive screws that hold the bottom plate in place.

  6. Disassembling iRobot Roomba 551 Bumper: 手順 6、 1の画像 1
    • Carefully lift the bottom plate.

    • The battery is only secured in place by the bottom plate, and may fall out once the bottom plate is removed.

  7. Disassembling iRobot Roomba 551 Bumper, Bumper: 手順 7、 3の画像 1 Disassembling iRobot Roomba 551 Bumper, Bumper: 手順 7、 3の画像 2 Disassembling iRobot Roomba 551 Bumper, Bumper: 手順 7、 3の画像 3
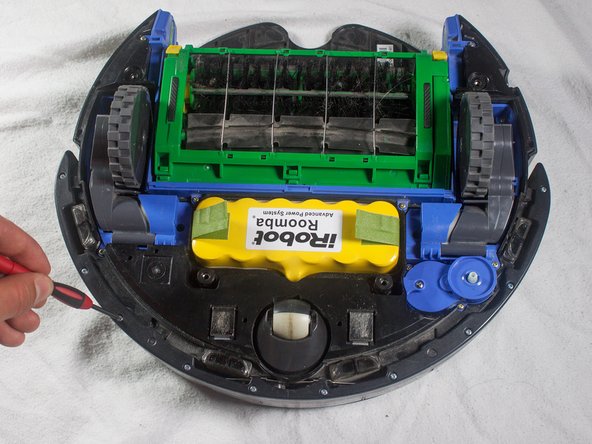
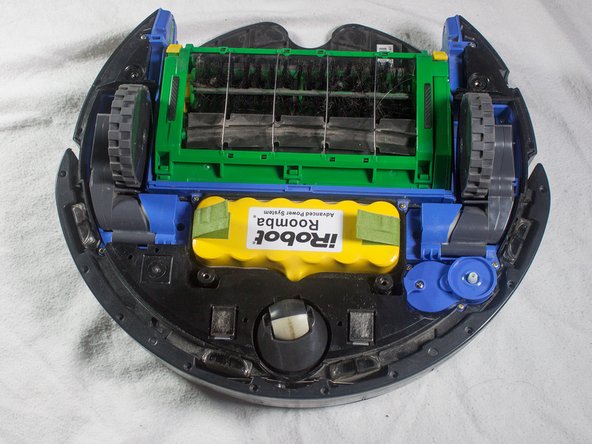
    • With a Phillips #1 screwdriver, remove the ten 12mm screws located along the bottom of the bumper.

  8. Disassembling iRobot Roomba 551 Bumper: 手順 8、 1の画像 1
    • Lift the bottom cover and set it to the side.

  9. Disassembling iRobot Roomba 551 Bumper: 手順 9、 2の画像 1 Disassembling iRobot Roomba 551 Bumper: 手順 9、 2の画像 2
    • Flip the Roomba over, grasp the bumper, and gently lift to remove.

    • The battery is not secured in place once the bottom plate has been removed, and may fall out when the Roomba is turned right-side up.

終わりに

To reassemble your device, follow these instructions in reverse order.

ある他の人がこのガイドを完成しました。

作成者

3人の作成者と共同で作成されました。

Cody Rhoads

メンバー登録日: 01/16/14

348 ポイント

2のガイドは作成済み

チーム

Cal Poly, Team 13-14, Regan Winter 2014 Cal Poly, Team 13-14, Regan Winter 2014人のメンバー

CPSU-REGAN-W14S13G14

4 メンバー

19のガイドは作成済み

コメント 1 件

Mine had a wire leading from the body to the bumper. The bumper end was held on by two small Phillips screws, which I undid to disconnect it (the bit it screws on to falls off the top of the bumper).

When putting it back together, make sure to put it on again the right way round, with the wire towards the front of the roomba (i.e. furthest from the main body), otherwise you will find the wire gets in the way of the bumper working, and you'll have to take it all apart again, like I did!

Nikki Locke - 返信

コメントを追加

統計データ:

過去 24時間: 0

過去 7 日: 1

過去 30 日: 3

今までの合計 2,595