メインコンテンツにスキップ

Disassembling Toshiba Satellite A65-S126 Upper and Lower Assemblies

必要条件のみ
この修理ガイドは、他のガイドの前提条件として使用されます。それ自体は不完全で、単独で使用されることはありません。

必要な工具と部品

  1. Disassembling Toshiba Satellite A65-S126 Upper and Lower Assemblies, Battery: 手順 1、 1の画像 1
    • Flip the laptop over so the bottom is facing up.

    • Slide each of the three tabs on the bottom half of the assembly into the unlocked position.

  2. Disassembling Toshiba Satellite A65-S126 Upper and Lower Assemblies: 手順 2、 1の画像 1
    • Gently lift the battery out of the computer.

  3. Disassembling Toshiba Satellite A65-S126 Upper and Lower Assemblies, Upper Assembly: 手順 3、 1の画像 1
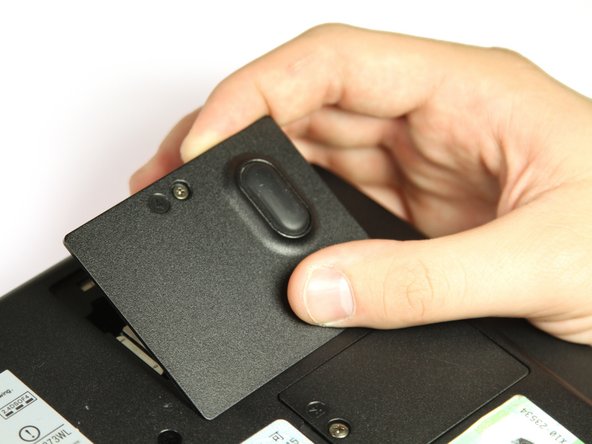
    • Remove the single 3mm Phillips #00 screw that secures the wireless card cover.

  4. Disassembling Toshiba Satellite A65-S126 Upper and Lower Assemblies: 手順 4、 1の画像 1
    • Remove the WIFI module cover. It will pull right off.

  5. Disassembling Toshiba Satellite A65-S126 Upper and Lower Assemblies: 手順 5、 2の画像 1 Disassembling Toshiba Satellite A65-S126 Upper and Lower Assemblies: 手順 5、 2の画像 2
    • Unplug the white and black wires from the WiFi module.

  6. Disassembling Toshiba Satellite A65-S126 Upper and Lower Assemblies: 手順 6、 1の画像 1
    • Remove the twelve 8mm button head Phillips #00 B8 screws.

    • Remove the two 14 mm button head Phillips #00 B14 screws.

    • Remove the two 10 mm Phillips #00 battery compartment screws.

    • Remove the two 8 mm Phillips #00 screws.

  7. Disassembling Toshiba Satellite A65-S126 Upper and Lower Assemblies: 手順 7、 1の画像 1
    • Remove the seven 4mm flat Phillips #00 screws.

    • Remove the seven 20mm button head Phillips #00 screws.

  8. Disassembling Toshiba Satellite A65-S126 Upper and Lower Assemblies: 手順 8、 1の画像 1
    • Use the plastic opening tool to pry the two halves apart.

終わりに

To reassemble your device, follow these instructions in reverse order.

作成者

9人の作成者と共同で作成されました。

Geoff Wacker

メンバー登録日: 09/30/13

89,934 ポイント

89のガイドは作成済み

0 件のコメント

コメントを追加

統計データ:

過去 24時間: 0

過去 7 日: 0

過去 30 日: 0

今までの合計 232