メインコンテンツにスキップ

Disassembling Samsung S730 Logic Board

必要な工具と部品

  1. Disassembling Samsung S730 Logic Board, Logic Board: 手順 1、 3の画像 1 Disassembling Samsung S730 Logic Board, Logic Board: 手順 1、 3の画像 2 Disassembling Samsung S730 Logic Board, Logic Board: 手順 1、 3の画像 3
    • Remove the batteries, memory card, and wrist strap if so equipped.

    • Remove the four screws on the bottom.

    • Remove the two screws on the right hand side

  2. Disassembling Samsung S730 Logic Board: 手順 2、 3の画像 1 Disassembling Samsung S730 Logic Board: 手順 2、 3の画像 2 Disassembling Samsung S730 Logic Board: 手順 2、 3の画像 3
    • Remove the two screws from the left hand side

    • The screws are identical in length. No reason to keep them separate

    • Split the case from the battery compartment down. You can use an opening tool or your fingernails to accomplish that.

  3. Disassembling Samsung S730 Logic Board: 手順 3、 3の画像 1 Disassembling Samsung S730 Logic Board: 手順 3、 3の画像 2 Disassembling Samsung S730 Logic Board: 手順 3、 3の画像 3
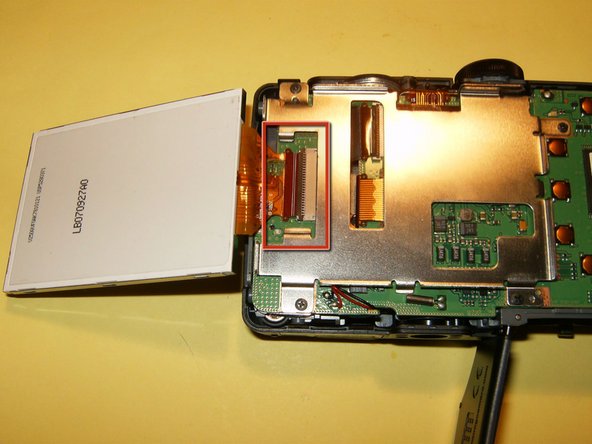
    • With the case split, you can see the LCD in its holder. The LCD is simply laid into the holder.

    • Gently remove the LCD from the holder and just flip it to the side. Do not remove it yet. You will have to loosen the clip on the connector. Use your fingernails to move it in the opposite direction from the LCD, this will open it up.

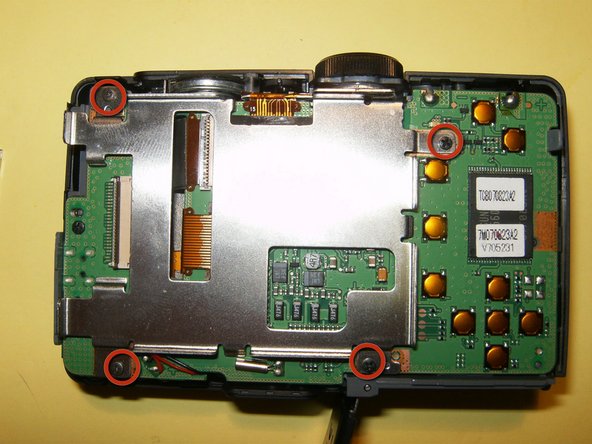
    • Remove the four screws from the LCD holder.

  4. Disassembling Samsung S730 Logic Board: 手順 4、 3の画像 1 Disassembling Samsung S730 Logic Board: 手順 4、 3の画像 2 Disassembling Samsung S730 Logic Board: 手順 4、 3の画像 3
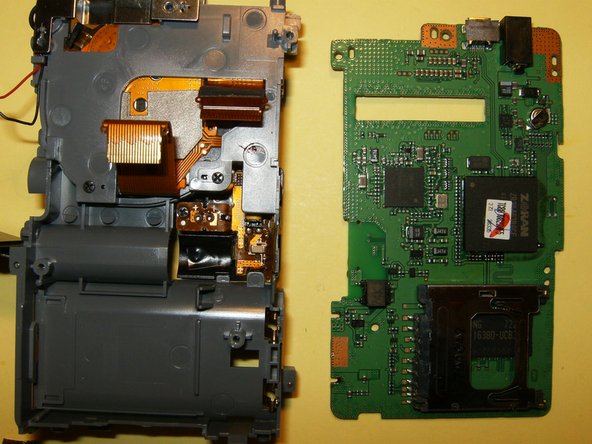
    • LCD holder removed from logic board

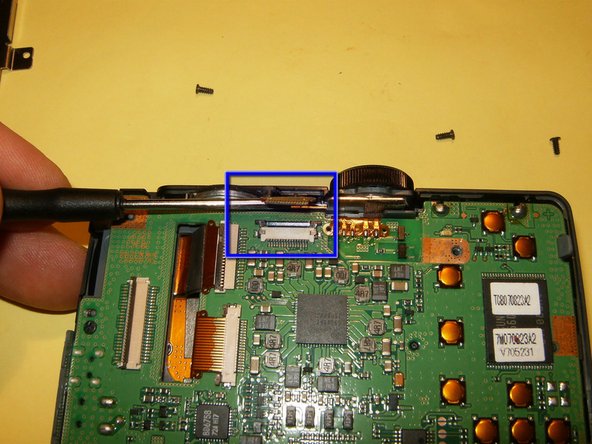
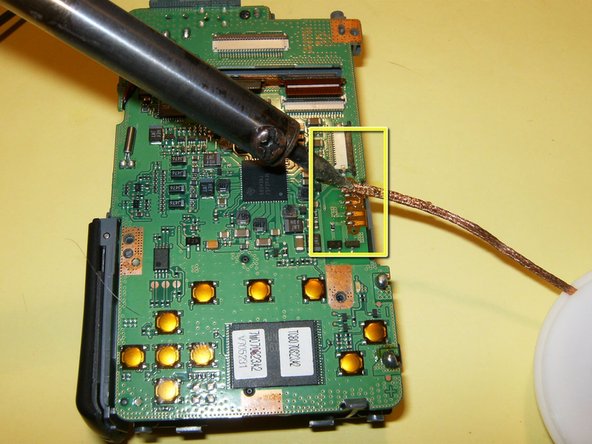
    • disconnect the ribbon cable from the logic board. This one requires to move the brown tabs on the left and right hands side in an upward direction. They should just slide up by about an 1/8th of an inch. this will free the ribbon cable.

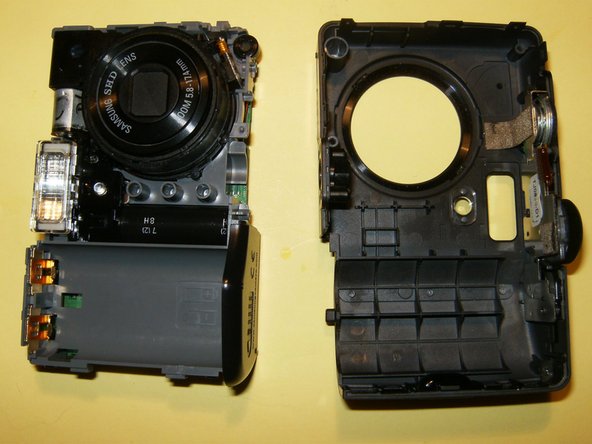
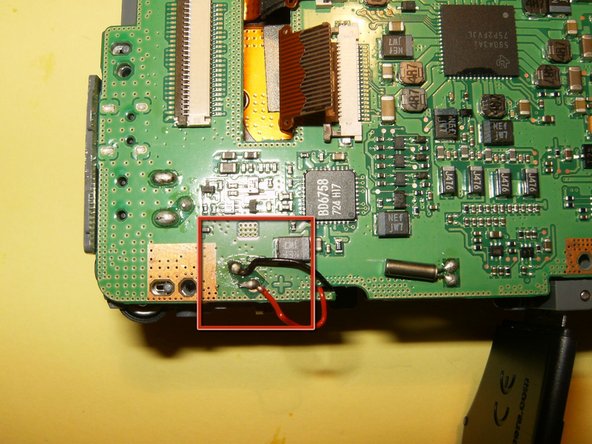
    • With the ribbon cable disconnected, remove the front case.

  5. Disassembling Samsung S730 Logic Board: 手順 5、 3の画像 1 Disassembling Samsung S730 Logic Board: 手順 5、 3の画像 2 Disassembling Samsung S730 Logic Board: 手順 5、 3の画像 3
    • Remove the CCD and the lens ribbon cable from the connectors.

    • To release the CCD cable, gently slide the brown clips on either side to the left. This will release the cable.

    • Desolder the connector from the top PCB. Use a soldering wick and flux to make the task easier.

  6. Disassembling Samsung S730 Logic Board: 手順 6、 3の画像 1 Disassembling Samsung S730 Logic Board: 手順 6、 3の画像 2 Disassembling Samsung S730 Logic Board: 手順 6、 3の画像 3
    • Desolder the battery connectors.

    • Desolder the black and red wire.

    • Remove the logic board from the midframe.

終わりに

To reassemble your device, follow these instructions in reverse order.

2 の人々がこのガイドを完成させました。

oldturkey03

メンバー登録日: 09/29/10

781,610 ポイント

119のガイドは作成済み

チーム

Global Fixers Global Fixers人のメンバー

Community

32 メンバー

531のガイドは作成済み

0 件のコメント

コメントを追加

統計データ:

過去 24時間: 0

過去 7 日: 5

過去 30 日: 9

今までの合計 1,304