メインコンテンツにスキップ

このバージョンは誤った内容を含んでいる可能性があります。最新の承認済みスナップショットに切り替えてください。

必要な工具と部品

  1. この手順は未翻訳です。 翻訳を手伝う。

    : 手順 1、 2の画像 1 : 手順 1、 2の画像 2
    • Make sure the toaster is unplugged before dissembling.

    • Turn the toaster over and remove the rubber bumper feet.

  2. この手順は未翻訳です。 翻訳を手伝う。

    : 手順 2、 2の画像 1 : 手順 2、 2の画像 2
    • Use a Phillips #2 screwdriver to remove four 12 mm screws at the base of the toaster shell.

  3. この手順は未翻訳です。 翻訳を手伝う。

    : 手順 3、 3の画像 1 : 手順 3、 3の画像 2 : 手順 3、 3の画像 3
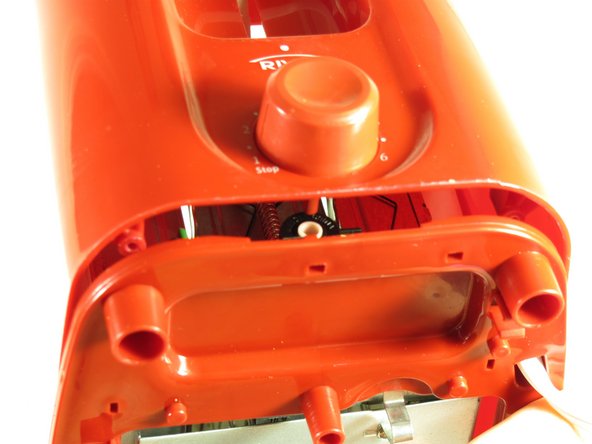
    • With the dial facing you, push the toaster base up and away until the base is just over the lip of the shell. This will disconnect the browning dial from the rest of the toaster.

    • When reassembling the toaster, make sure that the back of the dial lines up with the slot, both in position and orientation (the dial and slot are not perfect circles - they have a notch).

    • The only object holding the shell onto the toaster now is the grey part of the lever.

  4. この手順は未翻訳です。 翻訳を手伝う。

    : 手順 4、 1の画像 1
    • Reach into the shell and grab the back white part of the lever.

    • Hold the grey lever with both your index finger and middle finger. Next, pull it.

    • Pulling too hard will break the mechanism that holds the grey handle onto the white lever.

    • Remove the shell.

ゴール

9 の人々がこのガイドを完成させました。

作成者

13人の作成者と共同で作成されました。

Naomi Willis

メンバー登録日: 09/26/12

80 ポイント

1ガイドが承認済み

チーム

Cal Poly, Team 2-8, Propen Fall 2012 Cal Poly, Team 2-8, Propen Fall 2012人のメンバー

CPSU-PROPEN-F12S2G8

5 メンバー

6のガイドは作成済み

0 件のコメント

コメントを追加

統計データ:

過去 24時間: 1

過去 7 日: 6

過去 30 日: 20

今までの合計 3,860