メインコンテンツにスキップ

Disassembling RCA CC310 Left Cover

必要な工具と部品

  1. Disassembling RCA CC310 Left Cover, Disassembling RCA CC310 Left Cover: 手順 1、 2の画像 1 Disassembling RCA CC310 Left Cover, Disassembling RCA CC310 Left Cover: 手順 1、 2の画像 2
    • Remove the six 7.9mm Phillips #0 screws on the back and bottom.

    • Remove the one 3.8mm Phillips #0 screw on the bottom.

    • Remove the two 7.5mm Phillips #0 screws on the back and bottom.

  2. Disassembling RCA CC310 Left Cover: 手順 2、 2の画像 1 Disassembling RCA CC310 Left Cover: 手順 2、 2の画像 2
    • Remove 5.8mm Phillips #1 screw from the side button panel.

    • Slide the viewfinder all the way to the right and remove the 7.9mm Phillips #0 screw.

  3. Disassembling RCA CC310 Left Cover: 手順 3、 2の画像 1 Disassembling RCA CC310 Left Cover: 手順 3、 2の画像 2
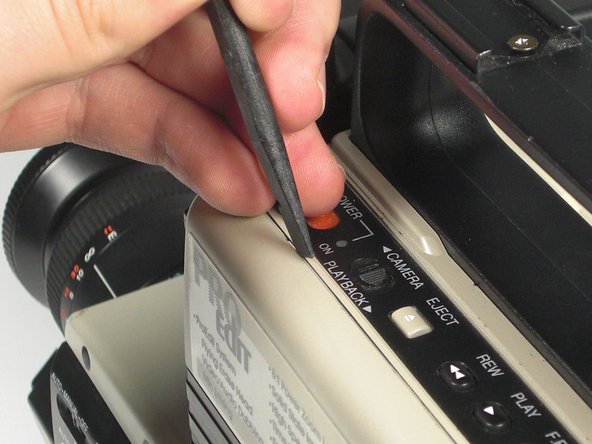
    • Pry along the seam on the top side near the buttons with a spudger.

  4. Disassembling RCA CC310 Left Cover: 手順 4、 2の画像 1 Disassembling RCA CC310 Left Cover: 手順 4、 2の画像 2
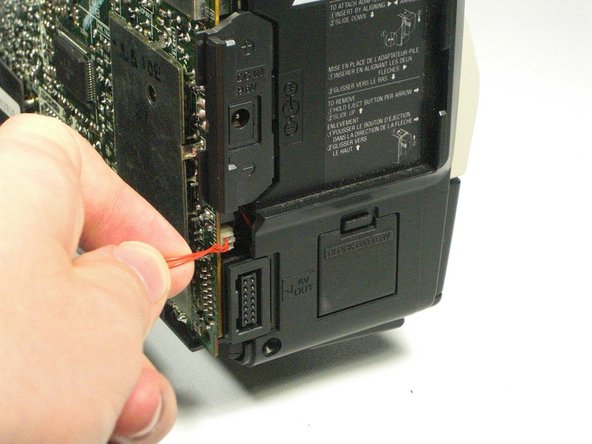
    • Pull the left panel away from the rest of the camcorder.

    • Unplug the red speaker cable located at the rear of the device.

    • Be careful to not pull too hard. The speaker cable is still connected to the panel and it can rip.

終わりに

To reassemble your device, follow these instructions in reverse order.

作成者

6人の作成者と共同で作成されました。

Ashley Katchadourian

メンバー登録日: 01/20/11

133 ポイント

1ガイドが承認済み

チーム

Cal Poly, Team 5-20, Amido Winter 2011 Cal Poly, Team 5-20, Amido Winter 2011人のメンバー

CPSU-AMIDO-W11S5G20

4 メンバー

7のガイドは作成済み

0 件のコメント

コメントを追加

統計データ:

過去 24時間: 0

過去 7 日: 1

過去 30 日: 5

今までの合計 919