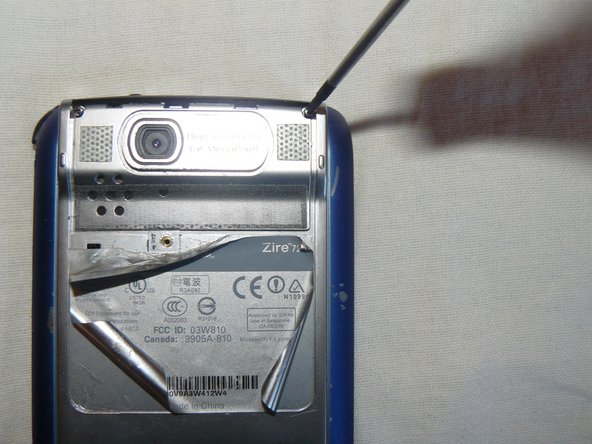
メインコンテンツにスキップ

Disassembling Palm Zire 72v1

アーカイブされたガイド
このガイドは将来的な使用のためにのみ保存されてます。ご自身の修理作業には更新バージョンをご利用ください。

必要な工具と部品

  1. Disassembling Palm Zire 72v1, Zire 72v1: 手順 1、 1の画像 1
    • Power off your Zire 72 and turn the unit over.

    • Remove the two screws on the bottom of the rear of the unit.

    • Peel back the information sticker.

    • Remove the one screw that connects the metal panel to the body of the Zire72.

    • Use the tip of your screwdriver to pop the metal panel off the top of the rear of the unit to expose two more screws on the top corners.

  2. Disassembling Palm Zire 72v1: 手順 5、 2の画像 1 Disassembling Palm Zire 72v1: 手順 5、 2の画像 2
    • Remove the two top screws.

    • Insert the tip of your screwdriver in the seam where the front frame meets the body of the unit and pry the frame up to pop it off. Remove it.

  3. Disassembling Palm Zire 72v1: 手順 7、 1の画像 1
    • Pull the back panel off the body of the unit to expose the motherboard in the body.

    • Unplug the two orange ribbon cables at the top of the motherboard and remove the motherboard from the body. All that is left is the LCD screen in the front housing of the unit.

  4. Disassembling Palm Zire 72v1: 手順 9、 1の画像 1
    • Remove the screen from the front housing and set it aside.

    • Now that you have your Zire open, you can remove and replace the defective part.

終わりに

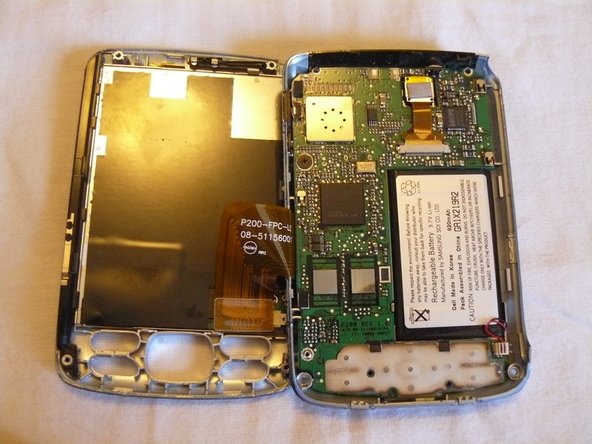
To reassemble your device, follow these instructions in reverse order.

作成者

5人の作成者と共同で作成されました。

Lisa

メンバー登録日: 09/08/11

13 ポイント

1ガイドが承認済み

チーム

University of Maine, Team 1-29, Diaz Fall 2011 University of Maine, Team 1-29, Diaz Fall 2011人のメンバー

UMAINE-DIAZ-F11S1G29

2 メンバー

1のガイドは作成済み

0 件のコメント

コメントを追加

統計データ:

過去 24時間: 0

過去 7 日: 0

過去 30 日: 0

今までの合計 107