メインコンテンツにスキップ

Disassembling Nokia E71 Complete disassembly

必要な工具と部品

  1. Disassembling Nokia E71 Complete disassembly, Disassembling Nokia E71 Complete disassembly: 手順 1、 1の画像 1
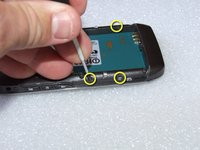
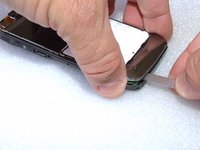
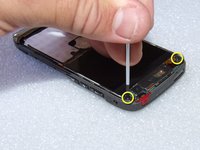
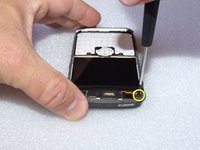
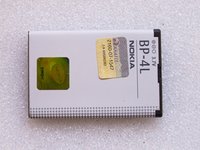
    • First remove back cover, battery, chip and memory card .

  2. Disassembling Nokia E71 Complete disassembly: 手順 2、 2の画像 1 Disassembling Nokia E71 Complete disassembly: 手順 2、 2の画像 2
    • Remove 4 Torx T5 screws.

  3. Disassembling Nokia E71 Complete disassembly: 手順 3、 2の画像 1 Disassembling Nokia E71 Complete disassembly: 手順 3、 2の画像 2
    • Press these four latches (each side has two) to open front cover.

  4. Disassembling Nokia E71 Complete disassembly: 手順 4、 1の画像 1
    • Carefully remove the front cover with blade tool.

  5. Disassembling Nokia E71 Complete disassembly: 手順 5、 2の画像 1 Disassembling Nokia E71 Complete disassembly: 手順 5、 2の画像 2
    • Carefully remove the bottom cover. This cover has no screws, only latches.

  6. Disassembling Nokia E71 Complete disassembly: 手順 6、 1の画像 1
    • Front cover, rubber keyboard and bottom cover removed.

  7. Disassembling Nokia E71 Complete disassembly: 手順 7、 2の画像 1 Disassembling Nokia E71 Complete disassembly: 手順 7、 2の画像 2
    • Remove these two Torx T6 screws at top of the smartphone.

  8. Disassembling Nokia E71 Complete disassembly: 手順 8、 1の画像 1
    • Carefully remove the assembly. Dont forget to move away the plastic clip holding the assembly down. You can find this in the center on the bottom.

  9. Disassembling Nokia E71 Complete disassembly: 手順 9、 1の画像 1
    • Base assembly with small connectors and parts.

  10. Disassembling Nokia E71 Complete disassembly: 手順 10、 1の画像 1
    • Remove the LCD connector.

  11. Disassembling Nokia E71 Complete disassembly: 手順 11、 1の画像 1
    • Carefully open the LCD and keyboard assembly, and remove keyboard connector.

  12. Disassembling Nokia E71 Complete disassembly: 手順 12、 2の画像 1 Disassembling Nokia E71 Complete disassembly: 手順 12、 2の画像 2
    • Both sides of the LCD and keyboard assembly removed.

  13. Disassembling Nokia E71 Complete disassembly: 手順 13、 1の画像 1
    • I think that two small blocks are the gps antenna.

  14. Disassembling Nokia E71 Complete disassembly: 手順 14、 2の画像 1 Disassembling Nokia E71 Complete disassembly: 手順 14、 2の画像 2
    • Both sides of battery - for reference only.

終わりに

To reassemble your device, follow these instructions in reverse order.

33 の人々がこのガイドを完成させました。

作成者

3人の作成者と共同で作成されました。

Jose Gustavo Abreu Murta

メンバー登録日: 07/06/10

4,558 ポイント

9のガイドは作成済み

4 件のコメント

does anyone know if e71 have any battery on board? time and date keep resetting with battery removed.

cyfcyf - 返信

Yes there is, under the keypad, 3/4 of the way down the left side of looking from the front. It is soldered on to the board so take good care.

Samuel Wyatt -

Hi

I have this phone, but I can not charge it ,Because it has short in board ,plus it very short charger soket (female ), i’m use now extirnal charger only

what can i do ?

Dev Abokhadra - 返信

Very clear tutorial !

The pictures are well lit, and the instructions are good :)

Thanks !

James Burton - 返信

コメントを追加

統計データ:

過去 24時間: 3

過去 7 日: 7

過去 30 日: 29

今までの合計 33,500