メインコンテンツにスキップ

このバージョンは誤った内容を含んでいる可能性があります。最新の承認済みスナップショットに切り替えてください。

必要な工具と部品

  1. この手順は未翻訳です。 翻訳を手伝う。

    : 手順 1、 2の画像 1 : 手順 1、 2の画像 2
    • Press thumb against the top of the rear casing as shown and push down as you slide the casing off of the body.

    • You should hear a click as the latches on the casing disengage.

  2. この手順は未翻訳です。 翻訳を手伝う。

    : 手順 2、 3の画像 1 : 手順 2、 3の画像 2 : 手順 2、 3の画像 3
    • To remove the battery, press thumb against the bottom edge of the battery and push towards the top of the phone.

    • Then, lift the bottom edge of the battery upwards out of the body. Gently pull the battery towards yourself, and out of the phone.

  3. この手順は未翻訳です。 翻訳を手伝う。

    : 手順 3、 3の画像 1 : 手順 3、 3の画像 2 : 手順 3、 3の画像 3
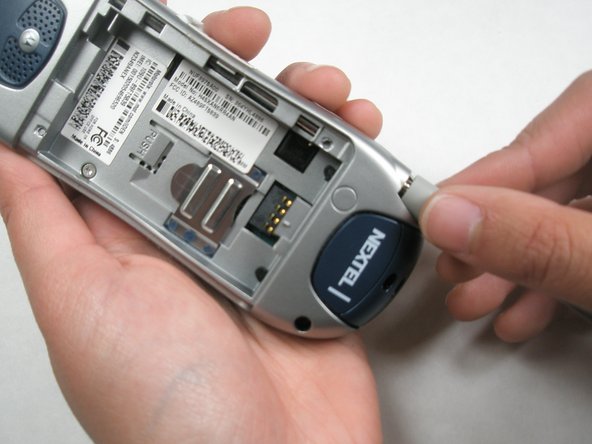
    • To remove SIM card, press thumb against tab marked “PUSH.”

    • While still pressing the PUSH tab, gently press spduger into the groove between the top of the SIM card and the body. Use spudger to slide SIM card toward the PUSH tab, so that when the spudger reaches the metal cover, the card itself is depressing the tab.

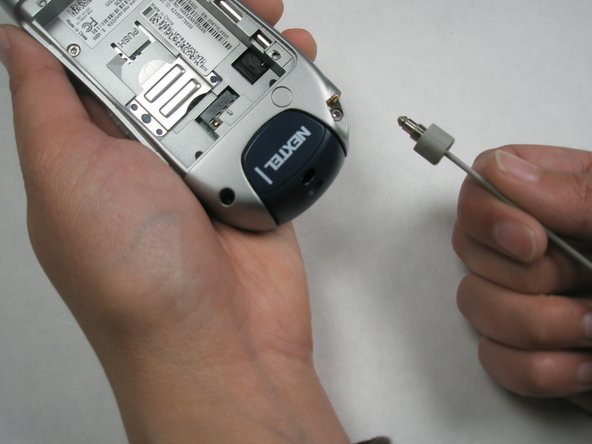
    • Press your thumb against the exposed section of the SIM card, and slide it towards the rear of the phone until it is completely free of the metal cover.

  4. この手順は未翻訳です。 翻訳を手伝う。

    : 手順 4、 3の画像 1 : 手順 4、 3の画像 2 : 手順 4、 3の画像 3
    • To remove the antenna, first extend it all the way.

    • Grab the rubber end connected to the phone and twist counterclockwise until the antenna comes out altogether.

    • If the rubber end won't twist manually, try using pliers to get it started.

  5. この手順は未翻訳です。 翻訳を手伝う。

    : 手順 5、 2の画像 1 : 手順 5、 2の画像 2
    • Locate all five screws on the phone, as indicated.

    • Using a T-6 screwdriver, remove each screw by turning it counterclockwise until it is free of the casing.

  6. この手順は未翻訳です。 翻訳を手伝う。

    : 手順 6、 3の画像 1 : 手順 6、 3の画像 2 : 手順 6、 3の画像 3
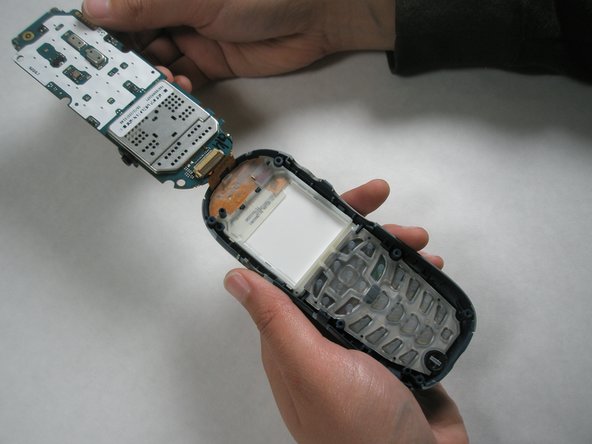
    • Carefully separate the two sides of the casing by pulling each side apart as if opening a book. Do not be alarmed if the rubber volume control button falls out of the casing.

    • Lay the sides of the phone so they are open side up.

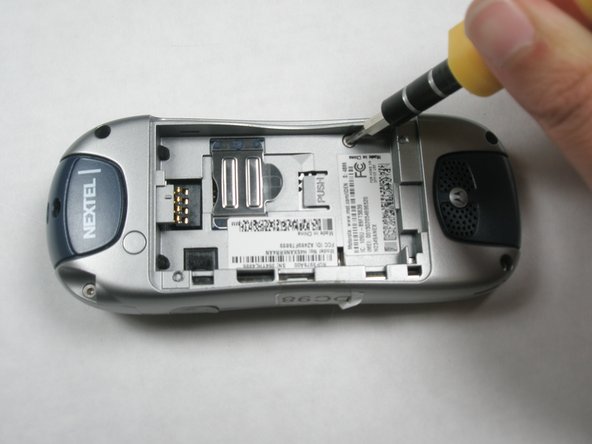
    • On the side of the phone with the logic board, locate the screw as indicated.

    • Use the T-6 screwdriver to remove the screw from this part of the board.

    • Note: Take special care not to lose the white washer that seperates the screw from the logic board.

  7. この手順は未翻訳です。 翻訳を手伝う。

    : 手順 7、 2の画像 1 : 手順 7、 2の画像 2
    • Place your thumb at the bottom of the logic board. Carefully lift up with your thumb to lift the logic board out of the casing.

    • Note: Do not try to completely remove the circuit board from the phone as it will be connected to the electrical strip at the top of the phone.

  8. この手順は未翻訳です。 翻訳を手伝う。

    : 手順 8、 3の画像 1 : 手順 8、 3の画像 2 : 手順 8、 3の画像 3
    • Locate the switch connecting the the logic board to the electrical strip.

    • Slide spudger under the switch and lift up to free the strip. This will separate the logic board from the phone cover

ゴール

作成者

4人の作成者と共同で作成されました。

Jonathan Uder

メンバー登録日: 04/15/10

1 ポイント

6のガイドは作成済み

チーム

Cal Poly, Team 6-15, Maness Spring 2010 Cal Poly, Team 6-15, Maness Spring 2010人のメンバー

CPSU-MANESS-S10S6G15

4 メンバー

6のガイドは作成済み

0 件のコメント

コメントを追加

統計データ:

過去 24時間: 0

過去 7 日: 5

過去 30 日: 6

今までの合計 1,115