メインコンテンツにスキップ

Disassembling Macintosh IIsi Power Supply

必要な工具と部品

  1. Disassembling Macintosh IIsi Power Supply, Top Case: 手順 1、 2の画像 1 Disassembling Macintosh IIsi Power Supply, Top Case: 手順 1、 2の画像 2
    • Start by turning the computer around, and remove this #0 Phillips Screw.

    • There may or may not be a Phillips #0 screw here, depending on whether or not the computer has ever been serviced.

  2. Disassembling Macintosh IIsi Power Supply: 手順 2、 3の画像 1 Disassembling Macintosh IIsi Power Supply: 手順 2、 3の画像 2 Disassembling Macintosh IIsi Power Supply: 手順 2、 3の画像 3
    • Now lift these two clips, and slowly pivot the case up.

    • You can now seperate the top of the computer from the rest of the machine.

  3. Disassembling Macintosh IIsi Power Supply, Floppy Drive: 手順 3、 3の画像 1 Disassembling Macintosh IIsi Power Supply, Floppy Drive: 手順 3、 3の画像 2 Disassembling Macintosh IIsi Power Supply, Floppy Drive: 手順 3、 3の画像 3
    • The "SuperDrive" is mounted similarly to the hard drive, and positioned right next to it.

    • Push these two tabs out, and lift the drive up.

  4. Disassembling Macintosh IIsi Power Supply: 手順 4、 3の画像 1 Disassembling Macintosh IIsi Power Supply: 手順 4、 3の画像 2 Disassembling Macintosh IIsi Power Supply: 手順 4、 3の画像 3
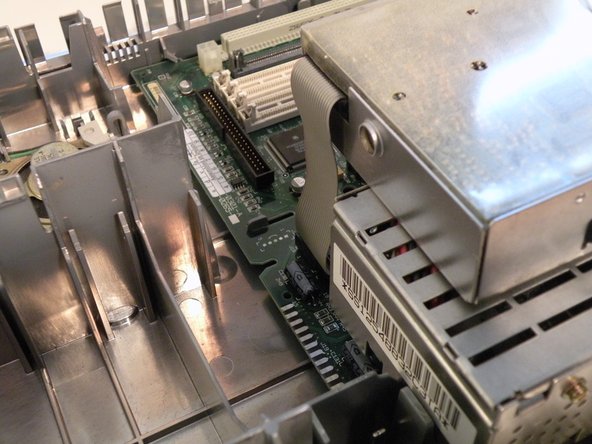
    • Flip the drive so it is on top of the power supply, and remove the "Red-Ribbon" cable.

    • 1.44MB floppy drives need a ribbon cable with a red stripe on one side. 400KB floppy drives use a ribbon cable with a yellow stripe on one side. 800KB floppy drives can use a red, or yellow striped cable.

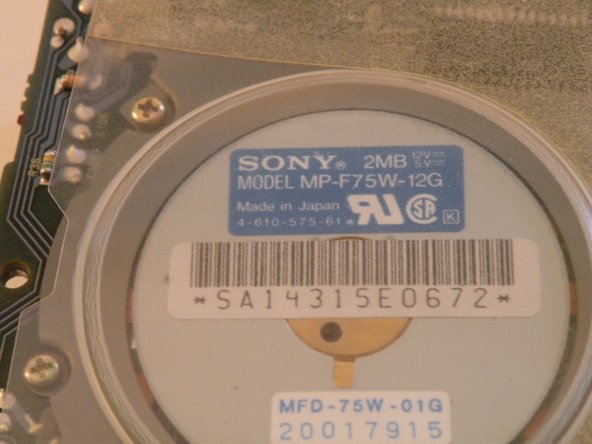
    • This drive was manufactured by Sony in 1990.

    Excellent pictures and easy guide! Thank you very much. My IISI floppy drive started flawlessly after 25y and the disk could be read. however it did it just once. Then I could not eject it any more. It did not work anymore. Can I replace it with a Sony MPF 920E? What type of cableadapter do I need

    Georgu Jörg - 返信

    Generally these old Macs only work with Apple style floppy drives, they use both a different cable and signaling standard than PC drives. If your drive isn't ejecting your best bet is to either replace it with a similar 1.44MB "SuperDrive", or service the drive. There are some good videos floating around the web about how to repair and maintain these old drives, and it isn't actually too hard to disassemble and clean them.

    Chris Green -

  5. Disassembling Macintosh IIsi Power Supply, System Fan: 手順 5、 1の画像 1
    • The fan recieves power from two contacts on the logic board and has no connector.

  6. Disassembling Macintosh IIsi Power Supply: 手順 6、 3の画像 1 Disassembling Macintosh IIsi Power Supply: 手順 6、 3の画像 2 Disassembling Macintosh IIsi Power Supply: 手順 6、 3の画像 3
    • In all of the years that I have worked on this machine, I have found no good way to remove the fan.

    • The best way to start, is to push in here on the side of the fan.

    • Being careful not to exert too much force, try to push in, and wiggle the fan outward as such. (2nd Photo)

    • You can now lift the fan all the way out, and remove it.

    • The Fan Power Contacts on the Logic Board:

    There is no need to pull out the fan. Just take a knife and you can squeeze the tab in step 7

    Willy Kaiser - 返信

    I wanted to second what Willy said; as far as I can tell one is intended to remove the PSU before the fan. You just jam something the right width in between so the PSU tab is depressed, pull it out, and after the PSU is out removing the fan is easy.

    Caleb Hansberry - 返信

  7. Disassembling Macintosh IIsi Power Supply, Power Supply: 手順 7、 2の画像 1 Disassembling Macintosh IIsi Power Supply, Power Supply: 手順 7、 2の画像 2
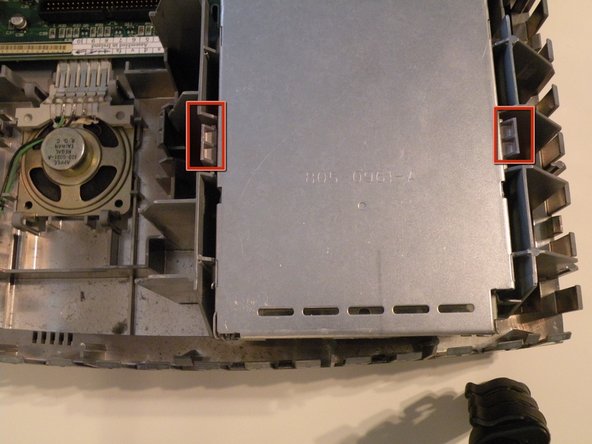
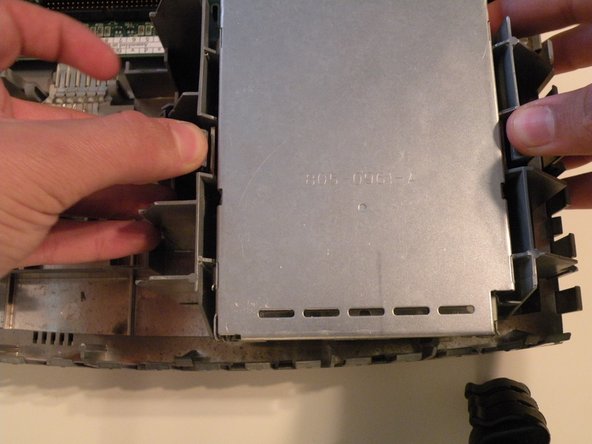
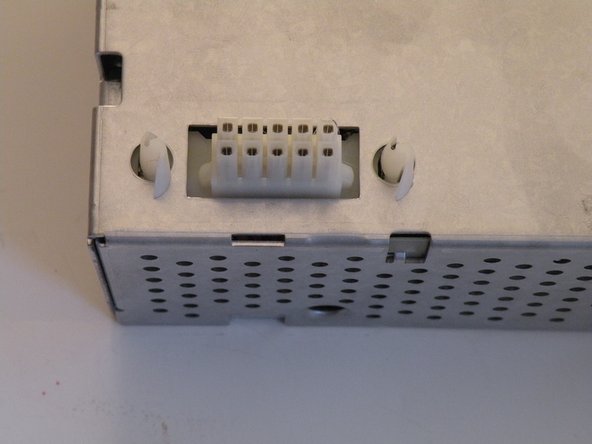
    • To remove the power supply, squeeze these two tabs and lift the front up.

    • On the back of the power supply, there is a tab that also must be pressed to remove the power supply fully. You can then lift it out all the way. A firm tug may be necessary to seperate the power connector.

  8. Disassembling Macintosh IIsi Power Supply: 手順 8、 2の画像 1 Disassembling Macintosh IIsi Power Supply: 手順 8、 2の画像 2
    • Information on the power supply:

    • It was made by Sony in 1990, and uses a 10-Pin power connector.

    The power supply on mine is corroded. Cannot even do a re-cap. Any suggestions for an alternate power supply or where to buy a reasonably cost-effective replacement?

    Charles - 返信

終わりに

To reassemble your device, follow these instructions in reverse order.

2 の人々がこのガイドを完成させました。

作成者

2人の作成者と共同で作成されました。

Chris Green

メンバー登録日: 10/11/09

36,978 ポイント

49のガイドは作成済み

チーム

Master Techs Master Techs人のメンバー

Community

322 メンバー

2,535のガイドは作成済み

コメント 1 件

I was looking for the schematic for the power supply APS-06 pictured here. The information above would be a little helpful if one was really unaware of anything electromechanical,… otherwise, it’s all pretty obvious I think.

nikitesla - 返信

コメントを追加

統計データ:

過去 24時間: 0

過去 7 日: 2

過去 30 日: 10

今までの合計 3,538