メインコンテンツにスキップ

Disassembling Laptop Toshiba Satellite P855 P850 plus Hinge FIX,

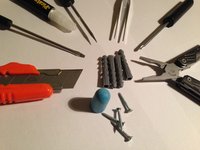
必要な工具と部品

  1. Disassembling Laptop Toshiba Satellite P855 P850 plus Hinge FIX,, First look: 手順 1、 3の画像 1 Disassembling Laptop Toshiba Satellite P855 P850 plus Hinge FIX,, First look: 手順 1、 3の画像 2 Disassembling Laptop Toshiba Satellite P855 P850 plus Hinge FIX,, First look: 手順 1、 3の画像 3
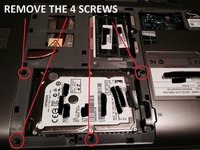
    • To open the laptop, first you have to unscrew the back-screws.

    • 1. remove the plastic/rubber caps

    • 2. unscrew the 12 screws.

    • ATTN: Do not forget!

    • unplug the laptop from power source & remove the batery

    • unscrew the 3 tiny screws behind the battery

    • keep the lid closed till later on

  2. Disassembling Laptop Toshiba Satellite P855 P850 plus Hinge FIX,, Back - HDD, WIFI card,: 手順 2、 3の画像 1 Disassembling Laptop Toshiba Satellite P855 P850 plus Hinge FIX,, Back - HDD, WIFI card,: 手順 2、 3の画像 2 Disassembling Laptop Toshiba Satellite P855 P850 plus Hinge FIX,, Back - HDD, WIFI card,: 手順 2、 3の画像 3
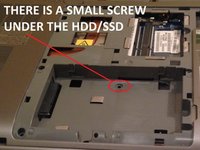
    • Here you have some details regarding the back of the laptop. After you got read of the back cover you can access the following:

    • 1. WIFI card - Easy to change / replace There are two cables attached to it. Remove them, then unscrew the screw that holds the card in place and lift gently up - DONE.

    • 2. HDD / SSD. All you have to do is grab and pull the ribbon (as in photo). There are a few extra steps to change it.

  3. Disassembling Laptop Toshiba Satellite P855 P850 plus Hinge FIX,, Removing the keyboard: 手順 3、 3の画像 1 Disassembling Laptop Toshiba Satellite P855 P850 plus Hinge FIX,, Removing the keyboard: 手順 3、 3の画像 2 Disassembling Laptop Toshiba Satellite P855 P850 plus Hinge FIX,, Removing the keyboard: 手順 3、 3の画像 3
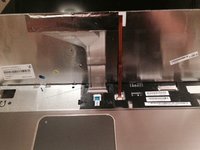
    • Now to remove or change the keyboard

    • 1. Insert gently the cutte (or other sharp tool) and press towards the screen & flip up slowly.

    • To remove it completely unplug the two connectors.

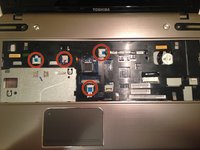
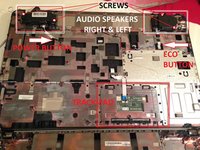
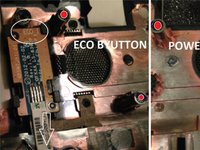
    • After removing the keyboard you find:

    • 1.ECO Button

    • 2. Sound

    • 3. Power button

    • 4. Mouse pad

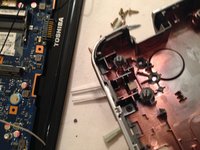
  4. Disassembling Laptop Toshiba Satellite P855 P850 plus Hinge FIX,, Removing the screws to open the case: 手順 4、 3の画像 1 Disassembling Laptop Toshiba Satellite P855 P850 plus Hinge FIX,, Removing the screws to open the case: 手順 4、 3の画像 2 Disassembling Laptop Toshiba Satellite P855 P850 plus Hinge FIX,, Removing the screws to open the case: 手順 4、 3の画像 3
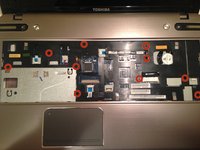
    • remove all the screws as shown in the images.

  5. Disassembling Laptop Toshiba Satellite P855 P850 plus Hinge FIX,, Splitting the case an upper side (under theh keyboard): 手順 5、 3の画像 1 Disassembling Laptop Toshiba Satellite P855 P850 plus Hinge FIX,, Splitting the case an upper side (under theh keyboard): 手順 5、 3の画像 2 Disassembling Laptop Toshiba Satellite P855 P850 plus Hinge FIX,, Splitting the case an upper side (under theh keyboard): 手順 5、 3の画像 3
    • Opening the case is easy, follow the steps as shown.

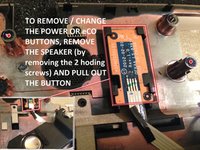
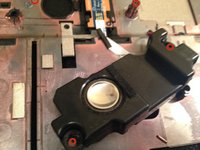
    • To change / remove the speakers remove the screws.

    • To change / remove the Eco/3D button or power button, yo have to remove first the speakers.

  6. Disassembling Laptop Toshiba Satellite P855 P850 plus Hinge FIX,, Change / remove speakers and buttons (Power and Eco/3D): 手順 6、 3の画像 1 Disassembling Laptop Toshiba Satellite P855 P850 plus Hinge FIX,, Change / remove speakers and buttons (Power and Eco/3D): 手順 6、 3の画像 2 Disassembling Laptop Toshiba Satellite P855 P850 plus Hinge FIX,, Change / remove speakers and buttons (Power and Eco/3D): 手順 6、 3の画像 3
    • Still more steps to come :), probably till 12... so min 6 more.

    • I will show you how to repair a broken hinge (plastic broken) - easy.

  7. Disassembling Laptop Toshiba Satellite P855 P850 plus Hinge FIX,, CPU fan cable remove: 手順 7、 1の画像 1
    • Remove the fan cable

    • If you want to change the CPU fan, there are 2 screws that you have to remove (picture)

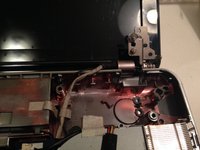
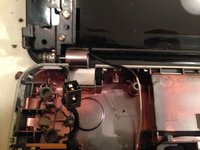
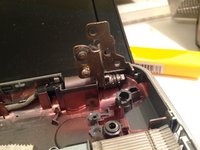
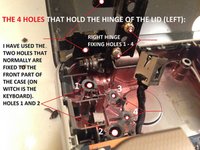
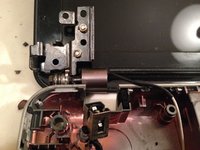
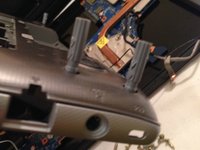
  8. Disassembling Laptop Toshiba Satellite P855 P850 plus Hinge FIX,, Start repairing the broken hinge: 手順 8、 3の画像 1 Disassembling Laptop Toshiba Satellite P855 P850 plus Hinge FIX,, Start repairing the broken hinge: 手順 8、 3の画像 2 Disassembling Laptop Toshiba Satellite P855 P850 plus Hinge FIX,, Start repairing the broken hinge: 手順 8、 3の画像 3
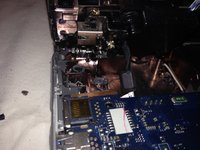
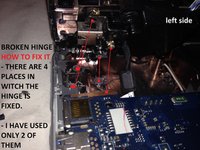
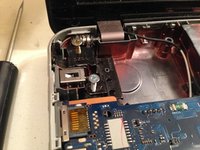
    • Broken hinge, detailed photo

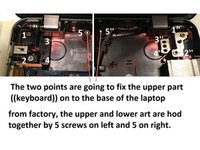
  9. Disassembling Laptop Toshiba Satellite P855 P850 plus Hinge FIX,, Repairing the broken hinge [detailed photo]: 手順 9、 3の画像 1 Disassembling Laptop Toshiba Satellite P855 P850 plus Hinge FIX,, Repairing the broken hinge [detailed photo]: 手順 9、 3の画像 2 Disassembling Laptop Toshiba Satellite P855 P850 plus Hinge FIX,, Repairing the broken hinge [detailed photo]: 手順 9、 3の画像 3
    • Repairing the broken hinge [detailed photo]

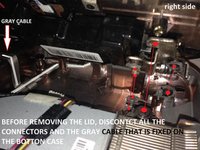
  10. Disassembling Laptop Toshiba Satellite P855 P850 plus Hinge FIX,, Repairing the broken hinge [detailed photo] (2): 手順 10、 3の画像 1 Disassembling Laptop Toshiba Satellite P855 P850 plus Hinge FIX,, Repairing the broken hinge [detailed photo] (2): 手順 10、 3の画像 2 Disassembling Laptop Toshiba Satellite P855 P850 plus Hinge FIX,, Repairing the broken hinge [detailed photo] (2): 手順 10、 3の画像 3
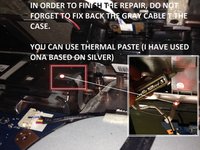
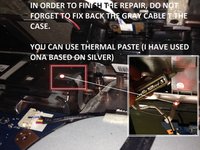
    • do not forget about the grey cable attached on the bottom side.

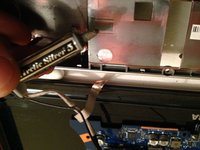
    • When reattaching the cable, put some thermal paste on the contact (gray cable)

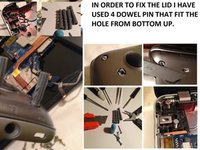
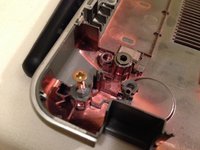
  11. Disassembling Laptop Toshiba Satellite P855 P850 plus Hinge FIX,, Fixing the hinge with plastic dowel pin: 手順 11、 3の画像 1 Disassembling Laptop Toshiba Satellite P855 P850 plus Hinge FIX,, Fixing the hinge with plastic dowel pin: 手順 11、 3の画像 2 Disassembling Laptop Toshiba Satellite P855 P850 plus Hinge FIX,, Fixing the hinge with plastic dowel pin: 手順 11、 3の画像 3
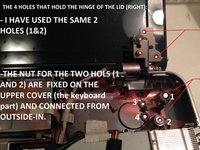
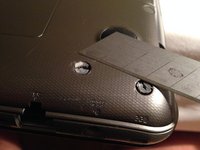
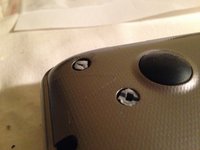
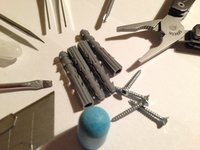
    • insert the plastic dowel pin from bottom-up and level it inside at the same height with other screw holes

  12. Disassembling Laptop Toshiba Satellite P855 P850 plus Hinge FIX,, Detailed img for inserting the plastic dowel pin: 手順 12、 3の画像 1 Disassembling Laptop Toshiba Satellite P855 P850 plus Hinge FIX,, Detailed img for inserting the plastic dowel pin: 手順 12、 3の画像 2 Disassembling Laptop Toshiba Satellite P855 P850 plus Hinge FIX,, Detailed img for inserting the plastic dowel pin: 手順 12、 3の画像 3
    • follow the pics

  13. Disassembling Laptop Toshiba Satellite P855 P850 plus Hinge FIX,: 手順 13、 2の画像 1 Disassembling Laptop Toshiba Satellite P855 P850 plus Hinge FIX,: 手順 13、 2の画像 2
    • add some thermalpaste to the gray cable

  14. Disassembling Laptop Toshiba Satellite P855 P850 plus Hinge FIX,, Outside & inside finishing: 手順 14、 3の画像 1 Disassembling Laptop Toshiba Satellite P855 P850 plus Hinge FIX,, Outside & inside finishing: 手順 14、 3の画像 2 Disassembling Laptop Toshiba Satellite P855 P850 plus Hinge FIX,, Outside & inside finishing: 手順 14、 3の画像 3
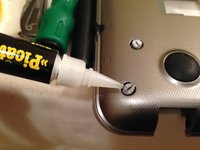
    • Cut the excess plastic from the dowel pin

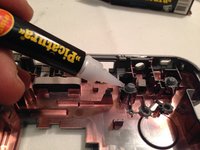
    • Put some super-glue to fix it in place

  15. Disassembling Laptop Toshiba Satellite P855 P850 plus Hinge FIX,, Outside & inside finishing (2): 手順 15、 3の画像 1 Disassembling Laptop Toshiba Satellite P855 P850 plus Hinge FIX,, Outside & inside finishing (2): 手順 15、 3の画像 2 Disassembling Laptop Toshiba Satellite P855 P850 plus Hinge FIX,, Outside & inside finishing (2): 手順 15、 3の画像 3
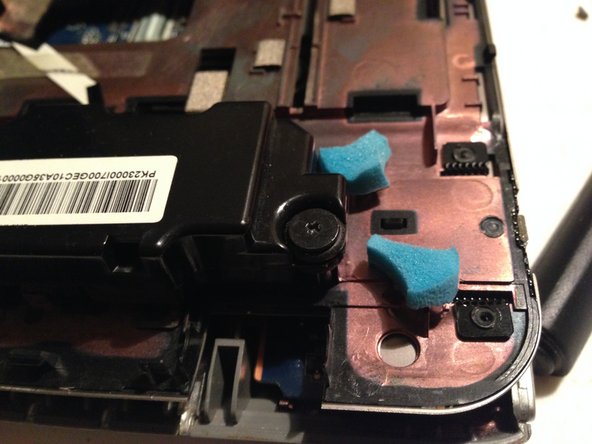
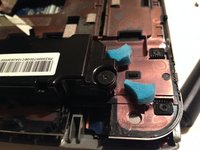
    • I have glued some foam near the speakers in order to protect the aerea

  16. Disassembling Laptop Toshiba Satellite P855 P850 plus Hinge FIX,, Final touches: 手順 16、 3の画像 1 Disassembling Laptop Toshiba Satellite P855 P850 plus Hinge FIX,, Final touches: 手順 16、 3の画像 2 Disassembling Laptop Toshiba Satellite P855 P850 plus Hinge FIX,, Final touches: 手順 16、 3の画像 3
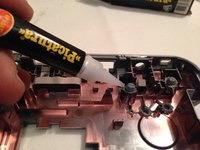
    • Glue inside the plastic dowel pin

    • Use thermal paste to fix the gray cable (i have used silver paste)

終わりに

To reassemble your device, follow these instructions in reverse order.

10 の人々がこのガイドを完成させました。

作成者

2人の作成者と共同で作成されました。

Oscar SOTAN

メンバー登録日: 02/18/15

393 ポイント

1ガイドが承認済み

2 件のコメント

I have a slipped HDMI port. At which step would I be able to access that?

Preston Ruottinen - 返信

My Toshibe C55T-B5349, I want to replace the "lid assembly" which includes the screen and digitizer. Can you give the steps? Thanks

RAM SAINATH - 返信

コメントを追加

統計データ:

過去 24時間: 2

過去 7 日: 10

過去 30 日: 53

今までの合計 35,271