メインコンテンツにスキップ

Disassembling Keurig Mini B-31 Top

必要条件のみ
この修理ガイドは、他のガイドの前提条件として使用されます。それ自体は不完全で、単独で使用されることはありません。

必要な工具と部品

  1. Disassembling Keurig Mini B-31 Top, Top: 手順 1、 3の画像 1 Disassembling Keurig Mini B-31 Top, Top: 手順 1、 3の画像 2 Disassembling Keurig Mini B-31 Top, Top: 手順 1、 3の画像 3
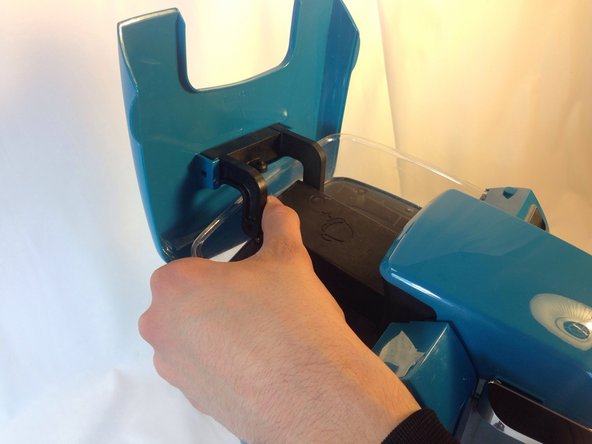
    • Open the top lid of the Keurig.

    • Pull directly outwards on one of the arms that holds the top lid in place. It will take some force to get the arm off the peg. Once one side is off, repeat the process on the second arm.

  2. Disassembling Keurig Mini B-31 Top: 手順 2、 1の画像 1
    • Lay the Keurig on its back with the water reservoir pointing away from you.

  3. Disassembling Keurig Mini B-31 Top: 手順 3、 1の画像 1
    • Avoid the top needle as it may puncture your hand.

    • Unscrew the two 9mm #1 Philips screws that hold the top plastic cover in place.

  4. Disassembling Keurig Mini B-31 Top: 手順 4、 1の画像 1
    • Set the Keurig in an upright position with the front side facing you.

    • Pull the cover off the top of the Keurig. It should come off easily with little force.

  5. Disassembling Keurig Mini B-31 Top: 手順 5、 1の画像 1
    • Firmly grasp the hose and pull it off of the plastic nozzle.

終わりに

To reassemble your device, follow these instructions in reverse order.

作成者

4人の作成者と共同で作成されました。

Andrew Adriance

メンバー登録日: 01/14/14

1,914 ポイント

7のガイドは作成済み

チーム

Cal Poly, Team 17-1, Forte Winter 2014 Cal Poly, Team 17-1, Forte Winter 2014人のメンバー

CPSU-FORTE-W14S17G1

5 メンバー

17のガイドは作成済み

0 件のコメント

コメントを追加

統計データ:

過去 24時間: 0

過去 7 日: 0

過去 30 日: 0

今までの合計 79