はじめに
To take the floppy disk drive out, remove the battery first.
-
-
Slide the highlighted tab to the left.
-
With your finger on the tab, remove the battery by lifting it upwards away from the laptop.
 FixBotに聞いてみる
-
-
-
-
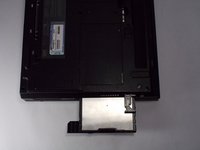
There is a switch located just above and to the right of the drive.
-
Slide the switch to the right. A small, black tab will pop out.
-
-
-
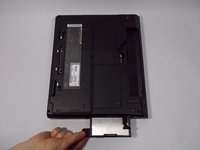
Pull the small black tab away from the computer to access the drive.
-
Gently pull the drive out from the laptop.
-
If there is a problem with your tab, whether it doesn't pop out or it doesn't expose the floppy drive, please check the corresponding entry in the troubleshooting page.
-


To reassemble, place the floppy disk drive back into its bay the way it was facing before
チーム

Cal Poly, Team 4-44, Amido Fall 2010 Cal Poly, Team 4-44, Amido Fall 2010人のメンバー
CPSU-AMIDO-F10S4G44
4 メンバー
26のガイドは作成済み