-
-
Flip the ThinkPad over so that it is upside down.
-
Slide the highlighted tab to the left.
-
With your finger on the tab, remove the battery by lifting it upwards away from the laptop.
-
-
-
Rotate the ThinkPad so that the hard drive bay is facing you.
-
Remove the black cover to reveal a 14.8mm screw.
-
Remove the uncovered screw with a Phillips #0 screwdriver.
-
-
-
Be careful not to pull out the keyboard carelessly; there is a connector underneath it!
-
Lift the front end of the keyboard as shown.
-
Using your fingers, remove the black film cover.
-
-
-
-
-
-
-
Remove the 5.6mm screw on the left side of the three-pronged connector.
-
Remove the other two 16.7mm screws.
-
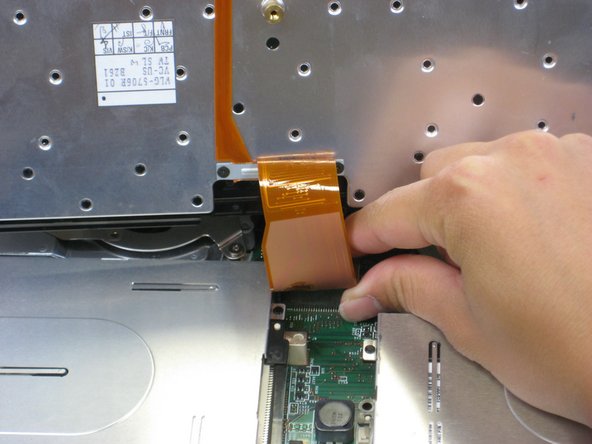
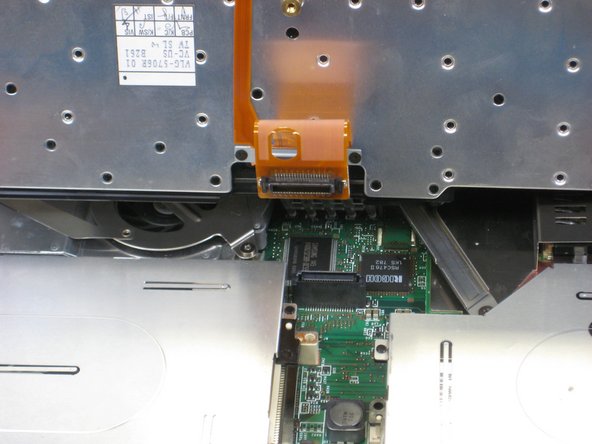
Lift and remove connector.
-
-
-
-
Place the laptop so that the LCD is facing you again.
-
Gently lift the LCD monitor up and out.
-
Remove the black plastic tab.
-
-
-
-
Be careful not to pull too hard. There is a cable attached to the fan.
-
Lift the fan/heatsink assembly up.
-
Locate the fan power cable and pull upwards near the connector.
-
Remove the fan/heatsink assembly.
このガイドを埋め込む
サイズを選択し、以下のコードをコピーして、このガイドを小さなウィジェットとしてサイト/フォーラムに埋め込みます。
プレビュー