はじめに
This guide will show you how to open your Buffalo DriveStation Axis 2TB external storage and remove a faulty internal hard drive. To replace it, follow the directions in reverse with a new hard drive.
必要な工具と部品
-
-
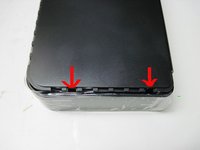
Remove the screw marked with a red arrow to access hidden top tab.
-
Use a pointy tool to press the two tabs around the USB 3 connector. These are accessible via the holes marked with orange arrows.
-
You can slightly lift the back edge up to help free the tabs as you press them in. It doesn't take much to release them, so don't push too hard.
 FixBotに聞いてみる
-
-
-
Along the top edge are the tabs marked in the first picture by the red circles. Use a thin-bladed screw driver to catch and pull back these tabs slightly to release the cover on this edge.
-
Lift on the cover slightly to ensure the tabs are released.
-
-
-
-
The front of the case has two tabs, marked by red arrows in the first pic. Repeat the process of using the screwdriver to gently release the tabs.
-
Continuing gently lifting on the cover while releasing the hidden tabs.
-
-
-
The 3 red arrows indicate the hidden tabs on the last side. Repeat the screwdriver technique from the last two steps.
-
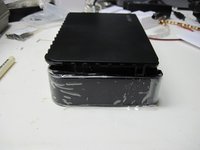
You should be able to remove the cover after all tabs have been released.
-
-
-
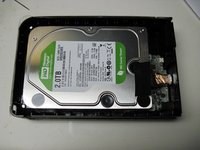
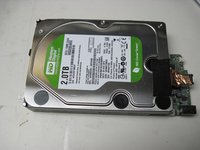
With the cover removed, the hard drive should be exposed--refer to the first picture to locate it.
-
Use the flat blade screwdriver to gently pry out the plastic case the hard drive sits in.
-
The hard drive is only held in the case with rubber bumper style mounts, and will come out with a little finger pulling.
-
-
-
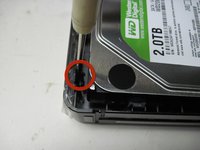
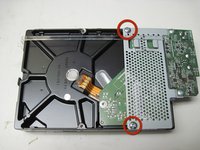
Remove hard drive from plastic case, flip over, and remove the two screws marked by red circles.
-
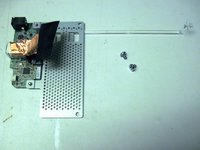
You will be left with the board and interface (seen in 3rd pic), ready to install your new hard drive.
-
Installation is the reverse of removal! Enjoy!
-


To reassemble your device, follow these instructions in reverse order.
10 の人々がこのガイドを完成させました。
5件のガイドコメント
Nice, easy and concise ‘how-to’. You made my task so much easier. Thank you!
Brian Puffer - 返信 共有
Thanks..got the job done.
Jeff Willard - 返信 共有
thank you for the blog. keep it up.
thanks.... just the job.
My God I would never have been able to get this thing apart intact without this guide, THANKS !!