メインコンテンツにスキップ

Disassembling Ericsson CF 388 Circuit Board

必要な工具と部品

  1. Disassembling Ericsson CF 388 Circuit Board, Disassembling Ericsson CF 388 Battery: 手順 1、 3の画像 1 Disassembling Ericsson CF 388 Circuit Board, Disassembling Ericsson CF 388 Battery: 手順 1、 3の画像 2 Disassembling Ericsson CF 388 Circuit Board, Disassembling Ericsson CF 388 Battery: 手順 1、 3の画像 3
    • To remove the battery from the casing, grab the front panel and back panel with opposite hands (as shown). The back panel is the same as the battery.

    • With your index finger, push in the button on the bottom of the battery to release it.

    • Pull the battery away from the phone.

  2. Disassembling Ericsson CF 388 Circuit Board, Phone Casing: 手順 2、 3の画像 1 Disassembling Ericsson CF 388 Circuit Board, Phone Casing: 手順 2、 3の画像 2 Disassembling Ericsson CF 388 Circuit Board, Phone Casing: 手順 2、 3の画像 3
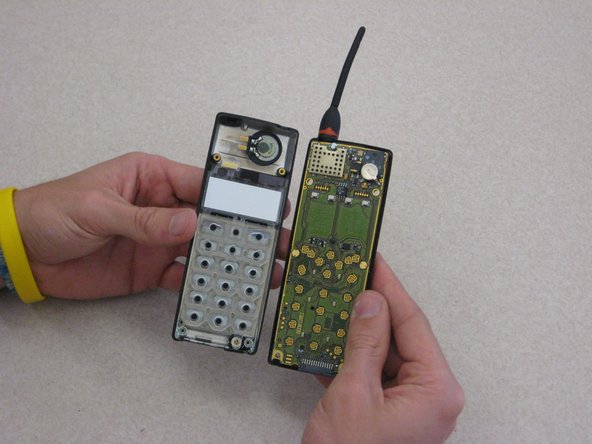
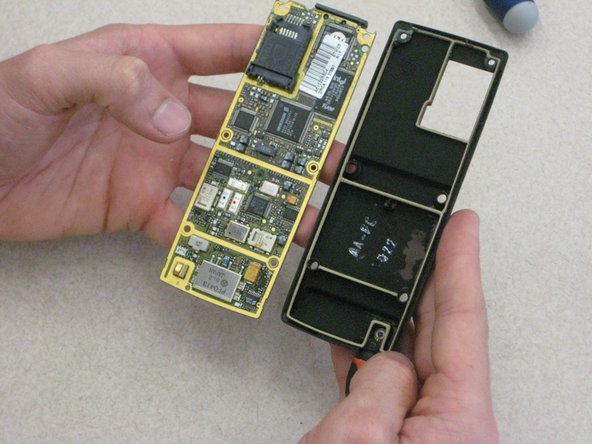
    • After removing the battery, the front phone casing becomes accessible.

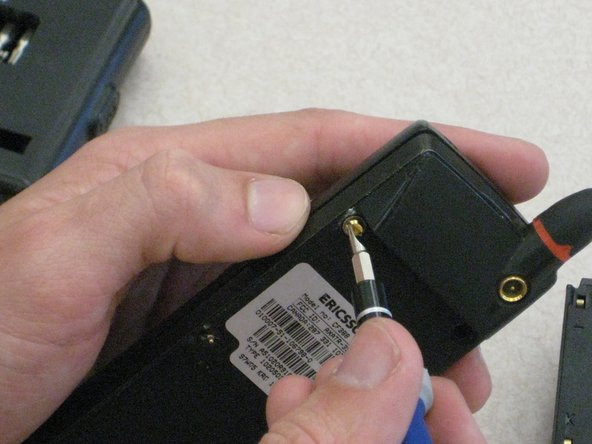
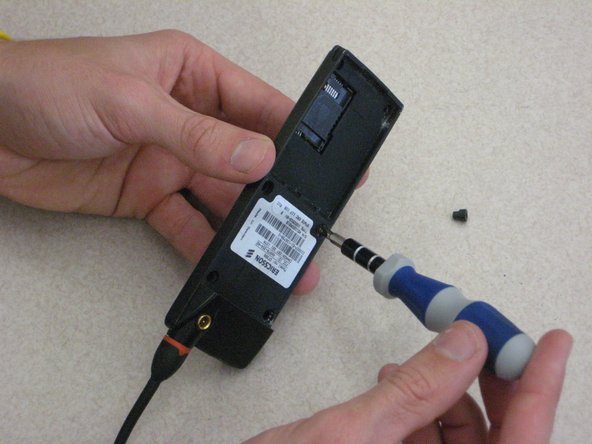
    • Locate the two star-shaped T6 screws on the bottom end of the rear of the phone, underneath the battery, as indicated by the red circles.

    • Remove these two screws using the Torx T6 Screwdriver.

  3. Disassembling Ericsson CF 388 Circuit Board: 手順 3、 3の画像 1 Disassembling Ericsson CF 388 Circuit Board: 手順 3、 3の画像 2 Disassembling Ericsson CF 388 Circuit Board: 手順 3、 3の画像 3
    • Locate the top two U-shaped screws on the back of the phone, as shown by the red circles.

    • Remove these two screws with a SP 2.6 screw driver.

    • Note: Remove gray plastic grommets with screws.

  4. Disassembling Ericsson CF 388 Circuit Board: 手順 4、 2の画像 1 Disassembling Ericsson CF 388 Circuit Board: 手順 4、 2の画像 2
    • Grab opposite panels of the phone casing and carefully open and pull apart the phone, as shown in the image.

    • Note: Be careful not to damage the circuit board and components as you as open the casing.

  5. Disassembling Ericsson CF 388 Circuit Board, Circuit Board: 手順 5、 1の画像 1
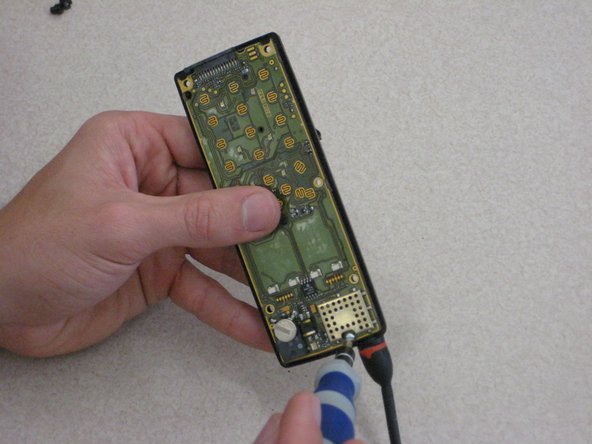
    • Locate the circuit board on the rear side of the front phone casing (right side of image).

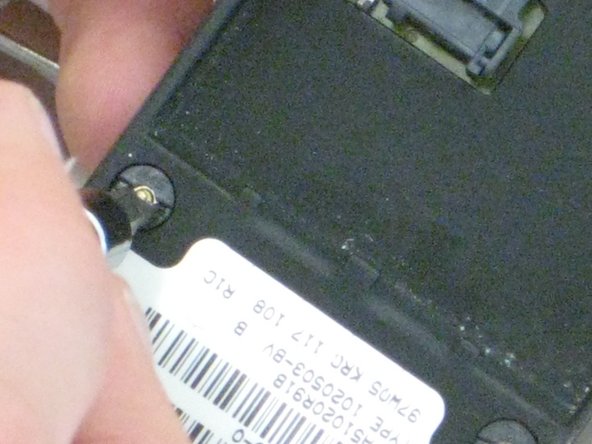
    • Locate the mounting screws (indicated by red circles), which attach the board to the rear side of the front phone casing.

  6. Disassembling Ericsson CF 388 Circuit Board: 手順 6、 3の画像 1 Disassembling Ericsson CF 388 Circuit Board: 手順 6、 3の画像 2 Disassembling Ericsson CF 388 Circuit Board: 手順 6、 3の画像 3
    • Using the SP2.6 u-shaped screw driver in one hand, loosen and remove both center screws. Hold the back part of the screw with the metal tweezers.

  7. Disassembling Ericsson CF 388 Circuit Board: 手順 7、 2の画像 1 Disassembling Ericsson CF 388 Circuit Board: 手順 7、 2の画像 2
    • Completely remove the two center screw as shown.

    • Note: the hand not holding the screw driver is holding the back part of the screw and the panel in place.

  8. Disassembling Ericsson CF 388 Circuit Board: 手順 8、 2の画像 1 Disassembling Ericsson CF 388 Circuit Board: 手順 8、 2の画像 2
    • Locate the final screw at the top of the phone near the antenna, as shown by the red circle.

    • Using the U-shaped screw driver, remove the top screw.

  9. Disassembling Ericsson CF 388 Circuit Board: 手順 9、 2の画像 1 Disassembling Ericsson CF 388 Circuit Board: 手順 9、 2の画像 2
    • With one hand on the circuit board and one hand on the phone casing, carefully pull apart the circuit board from the front panel casing.

終わりに

To reassemble your device, follow these instructions in reverse order.

作成者

5人の作成者と共同で作成されました。

Niccolas Tones

メンバー登録日: 03/09/12

60 ポイント

9のガイドは作成済み

チーム

Clemson, Team 1-1, Benson Spring 2012 Clemson, Team 1-1, Benson Spring 2012人のメンバー

CLEM-BENSON-S12S1G1

3 メンバー

21のガイドは作成済み

0 件のコメント

コメントを追加

統計データ:

過去 24時間: 0

過去 7 日: 1

過去 30 日: 1

今までの合計 1,266