メインコンテンツにスキップ

このバージョンは誤った内容を含んでいる可能性があります。最新の承認済みスナップショットに切り替えてください。

必要な工具と部品

  1. この手順は未翻訳です。 翻訳を手伝う。

    : 手順 1、 2の画像 1 : 手順 1、 2の画像 2
    • Remove the six 19 mm long screws with a #2 Phillips head screwdriver.

  2. この手順は未翻訳です。 翻訳を手伝う。

    : 手順 2、 2の画像 1 : 手順 2、 2の画像 2
    • Release the catch by pushing it in using a plastic opening tool.

    • The catch is off-center, but in line with the middle of the speaker underneath.

  3. この手順は未翻訳です。 翻訳を手伝う。

    : 手順 3、 2の画像 1 : 手順 3、 2の画像 2
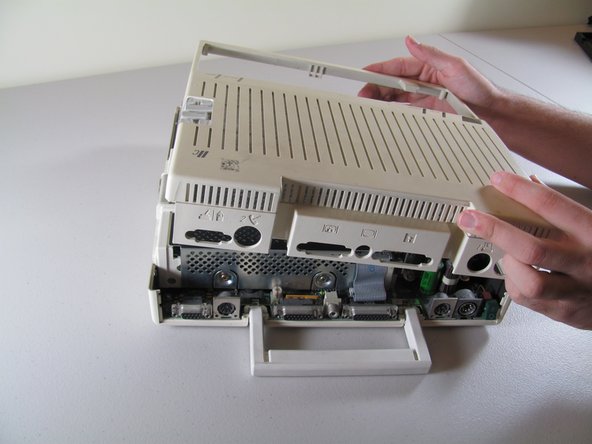
    • Slide the case toward the ports on the back, then grip under the catch and pull up while moving toward the ports to remove.

  4. この手順は未翻訳です。 翻訳を手伝う。

    : 手順 4、 2の画像 1 : 手順 4、 2の画像 2
    • Lift the handle straight up to remove.

ゴール

10 の人々がこのガイドを完成させました。

作成者

11人の作成者と共同で作成されました。

Alexandria Weinberg

メンバー登録日: 10/06/11

601 ポイント

3のガイドは作成済み

チーム

Cal Poly, Team 21-23, Maness Fall 2011 Cal Poly, Team 21-23, Maness Fall 2011人のメンバー

CPSU-MANESS-F11S21G23

4 メンバー

13のガイドは作成済み

3 件のコメント

The //c is designed to be popped open. Remove the 6 screws as described. Flip the handle down and tip the //c 3-4 inches over a hard surface and let it drop. The handle will pop the rear catches off safely.

It looks and sounds scary but it's how Apple trained dealer techs to open the machine. There isn't anything in a //c that is shock sensitive.

Sean Fahey - 返信

Just wanted you to know that your method is superior. I repair a lot of Apple IIC. Spudger method always results in broken plastic tabs. Your method never results in any damage.

Einar Offerdahl III -

Wow! Worked perfectly as described — and nothing broke. Hard to imagine I always had used steps 2, 3 (after removing the ports cover) and 4 in the past. Thanks, Sean!

mthmn1 - 返信

コメントを追加

統計データ:

過去 24時間: 1

過去 7 日: 22

過去 30 日: 119

今までの合計 9,658