メインコンテンツにスキップ

Digital AV Mixer WJ-AVE5 Disassembly

必要な工具と部品

  1. Digital AV Mixer WJ-AVE5 Disassembly, View From Above: 手順 1、 1の画像 1
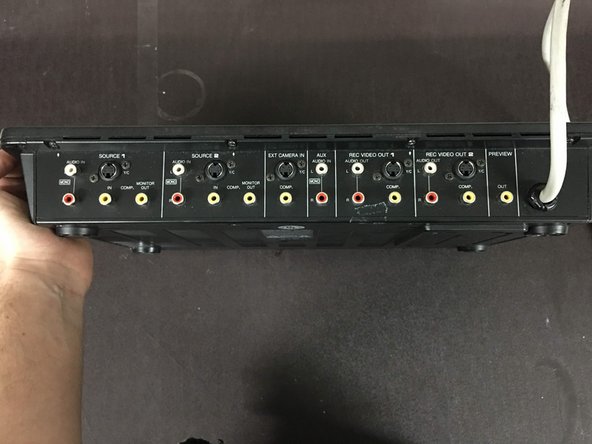
    • This is a Digital AV Mixer (Model WJ-AVE5) and we'll be covering the steps required to remove the top-board and controls.

  2. Digital AV Mixer WJ-AVE5 Disassembly, The Knob: 手順 2、 1の画像 1
    • Unscrew the stick extension by turning it left. If you're running into resistance try holding the shaft of the stick, during previous service this extension may have had Loctite applied to stock it from loosening.

  3. Digital AV Mixer WJ-AVE5 Disassembly, View From Below: 手順 3、 3の画像 1 Digital AV Mixer WJ-AVE5 Disassembly, View From Below: 手順 3、 3の画像 2 Digital AV Mixer WJ-AVE5 Disassembly, View From Below: 手順 3、 3の画像 3
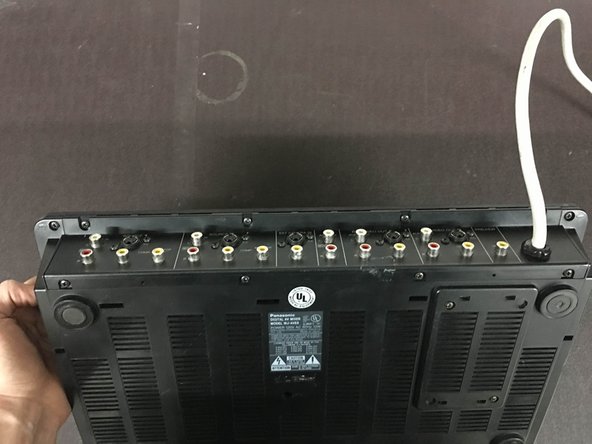
    • This is the bottom of your Digital Mixer. There are Seventeen (17) screws that need to move forward.

  4. Digital AV Mixer WJ-AVE5 Disassembly, The Pizza Box Open: 手順 4、 2の画像 1 Digital AV Mixer WJ-AVE5 Disassembly, The Pizza Box Open: 手順 4、 2の画像 2
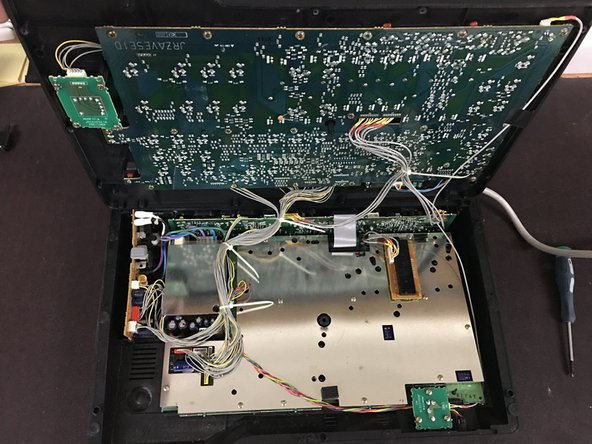
    • Now the top-board should pivot up like a pizza-box allowing access to both the solder side of the top-board and the EMI Shielding for both the Primary Power Board and the Primary Control Board.

  5. Digital AV Mixer WJ-AVE5 Disassembly, Solder-Side of Top-Board: 手順 5、 1の画像 1
    • Shot of the solder-side of the top-board for reference on connector locations, cable routing, and component reference.

  6. Digital AV Mixer WJ-AVE5 Disassembly: 手順 6、 1の画像 1
    • Shot of the bottom-board for reference on connector locations, cable routing, and component reference.

終わりに

To reassemble your device, follow these instructions in reverse order.

3 の人々がこのガイドを完成させました。

作成者

1人の作成者と共同作成されました。

Bridgetown Electronics Repair

メンバー登録日: 01/26/17

739 ポイント

3のガイドは作成済み

チーム

Bridgetown Repair Bridgetown Repair人のメンバー

Business

2 メンバー

7のガイドは作成済み

0 件のコメント

コメントを追加

統計データ:

過去 24時間: 0

過去 7 日: 1

過去 30 日: 8

今までの合計 648