メインコンテンツにスキップ

DigiLand DL8006 LCD Screen Replacement

必要な工具と部品

  1. DigiLand DL8006 LCD Screen Replacement, LCD Screen: 手順 1、 3の画像 1 DigiLand DL8006 LCD Screen Replacement, LCD Screen: 手順 1、 3の画像 2 DigiLand DL8006 LCD Screen Replacement, LCD Screen: 手順 1、 3の画像 3
    • Place the device laying down on its front with the back facing upwards.

    • Use the opening tool to gently pry the edges of the back cover off the device. Slowly work all the way around the device until the panel comes loose.

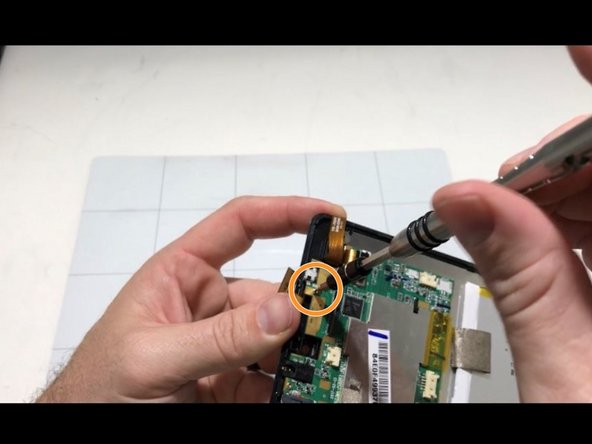
    • After removing the panel, remove the silver/metallic tape on the lower end of the tablet.

  2. DigiLand DL8006 LCD Screen Replacement: 手順 2、 3の画像 1 DigiLand DL8006 LCD Screen Replacement: 手順 2、 3の画像 2 DigiLand DL8006 LCD Screen Replacement: 手順 2、 3の画像 3
    • Remove the red and black cord connecting the motherboard and the bottom end of the tablet.

    • Remove the ribbon cable running over the battery. This can be done by prying the locking tab of the ZIF connector, up and then pulling the cable from the connector.

  3. DigiLand DL8006 LCD Screen Replacement: 手順 3、 2の画像 1 DigiLand DL8006 LCD Screen Replacement: 手順 3、 2の画像 2
    • Remove the red and black cord that connects the motherboard and the camera. This cord is found on the upper end of the device.

    • Remove the red and blue cord connecting the battery to the motherboard.

    • Remove the tape connecting the back of the LED screen and the motherboard.

  4. DigiLand DL8006 LCD Screen Replacement: 手順 4、 2の画像 1 DigiLand DL8006 LCD Screen Replacement: 手順 4、 2の画像 2
    • Remove the cable connecting the motherboard to the left side of the device.

    • Remove both cables connecting the camera to the motherboard.

  5. DigiLand DL8006 LCD Screen Replacement: 手順 5、 3の画像 1 DigiLand DL8006 LCD Screen Replacement: 手順 5、 3の画像 2 DigiLand DL8006 LCD Screen Replacement: 手順 5、 3の画像 3
    • Remove the screw on the left corner of the motherboard with a Phillips #0 screwdriver.

    • Remove the screw under the ribbon cable with a Phillips #0 screwdriver.

    • Remove the screw on the top of the motherboard with a Phillips #0 screwdriver.

  6. DigiLand DL8006 LCD Screen Replacement: 手順 6、 1の画像 1
    • Gently lift the motherboard out of the device and place it aside.

  7. DigiLand DL8006 LCD Screen Replacement: 手順 7、 3の画像 1 DigiLand DL8006 LCD Screen Replacement: 手順 7、 3の画像 2 DigiLand DL8006 LCD Screen Replacement: 手順 7、 3の画像 3
    • Remove the 3 screws anchoring down the LED screen down with a Phillips #0 screwdriver. These screws can be found in the top right, bottom right, and bottom left of the device.

  8. DigiLand DL8006 LCD Screen Replacement: 手順 8、 1の画像 1
    • Using an opening tool, gently pry the LCD screen and glass screen apart.

    • Remove the battery by using the opening tool, or by removing the tape on the upper and lower end of the battery. From here, a new LCD screen can be inserted.

終わりに

To reassemble your device, follow these instructions in reverse order.

作成者

4人の作成者と共同で作成されました。

Landon Choi

メンバー登録日: 10/30/19

379 ポイント

3のガイドは作成済み

チーム

University of Memphis, Team S2-G5, Kim Fall 2019 University of Memphis, Team S2-G5, Kim Fall 2019人のメンバー

UM-KIM-F19S2G5

3 メンバー

5のガイドは作成済み

0 件のコメント

コメントを追加

統計データ:

過去 24時間: 1

過去 7 日: 1

過去 30 日: 1

今までの合計 259