はじめに
En esta guía mostramos los pasos a seguir para proceder a desmontar el teclado de Apple A1243. Siga estos pasos bajo su responsabilidad y con cautela ya que éste puede llegar a quedar inutilizado
必要な工具と部品
-
-
La parte inferior del teclado está fijada por una capa de adhesivo que cubre toda la superficie. No hay tornillos que sujeten la cubierta trasera en su lugar.
-
-
-
Se puede usar un desmontador, preferiblemente de plástico, para levantar la cubierta trasera del teclado.
-
-
-
El uso de una pistola de calor en posición baja se puede usar con cuidado para calentar la cubierta posterior y suavizar el adhesivo. Trabaje en secciones calentando y luego separando gradualmente las secciones.
-
Evite usar demasiado calor, de lo contrario deformará o derretirá la cubierta u otras piezas de plástico. No use fuerza excesiva para quitar la cubierta ya que la aleación es delgada y se dobla fácilmente. El teclado quedaría permanentemente deformado.
-
-
-
-
La placa posterior del teclado principal está sujeta por docenas de puntos de soldadura, ¡la única forma de desmontarlos aún más es quitarlos con un taladro!
-
La placa lógica está asegurada con tornillos de cabeza Philips. Dos cables planos conectan el teclado a la placa lógica. El daño de un cable provocará que secciones enteras del teclado no funcionen.
-
-
-
Prácticamente no hay piezas reparables dentro del teclado que no sean la placa lógica, pero aún así, debido a la contrucción del teclado, no hay piezas de repuesto disponibles para comprar, aunque si se pudiera. Hay pocas razones para desmontar el teclado.
-
-
-
Cypress CY7C63923 (Controlador del periférico USB de baja velocidad).
-
ST 95040W (4kbit EEPROM)
-
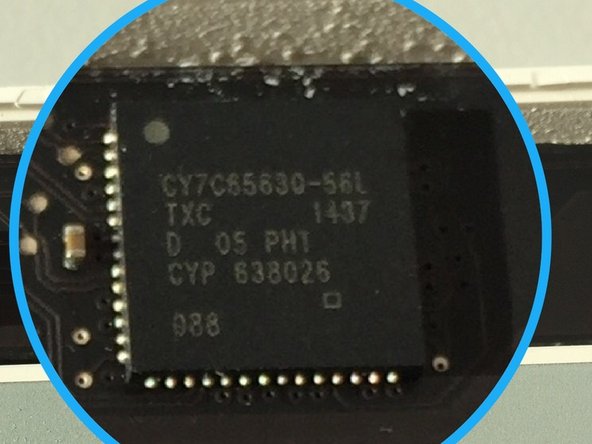
Cypress CY7C65630-56L (Hub de Baja potencia USB 2.0).
-
Microchip 2026-1YM (Switch de alimentación de distribución Doble Canal )
-
-
-
El elemento del círculo amarillo es un Cypress CY7C63923-PVXC, a "Controlador del periférico de USB de baja velocidad " .
-
El círculo azul es un Cypress CYC65630, "Controlador del Hub USB 2.0 de baja potencia".
-


以下の翻訳者の皆さんにお礼を申し上げます:
100%


これらの翻訳者の方々は世界を修理する私たちのサポートをしてくれています。 あなたも貢献してみませんか?
翻訳を始める ›
19 件のコメント
Any hope of replacement of a defective key switch?
I think I will need to open mine to replace the USB wire.
One day, my keyboard stopped working, keys affected are 5tgb and 6yhn. It guess they are joined inside. No reason at all. No spill. My keyboard is hooked to an unpowered USB hub, which is hooked to my MacbookPro. I use also a logitech wired mouse attached to the USB port. When I arrived last Monday morning to my office with the mac, I plugged everything as described and the problem appeared. Now I don't know that to do to fix it. Some guys recommend springing water on it but it seems some kind of joke. I can't believe I spend so much money in this keyboard and now it doesn't work. A couple of months ago, I realised that the Magic Mouse 2 was another bummer because of it problem tracking the hand movements. I started to doubt about Apple hardware, except for the Macbook Pro, which has 5 years of intense use and never had a problem at all.
Yes, washing these types of aluminum apple keyboards with water will usually resolve the problem, just pure water, and a few days of drying… it doesn’t make sense, but I have fixed a dozen of these that way before! It’s no guarantee, but it could resolve it. The reason the keys went out together is that the buttons’ are organized into columns and rows electronically. When the circuit is connected on the sixth column and the second row, that equals a 5 key. Sixth column third row would be the T key, etc. So your problem is not at the keys, but with the column contacts for those two columns. Whether cleaning them will help is anyones guess. Somehow, you have a break in the circuit for those two columns of the keyboard. It sounds like the problem will be on the logic board of the keyboard. Check for hairs or something shorting out any chips, etc.