はじめに
Esta guía proporcionará información sobre cómo desensamblar un Intel NUC5i7RYH o similar.
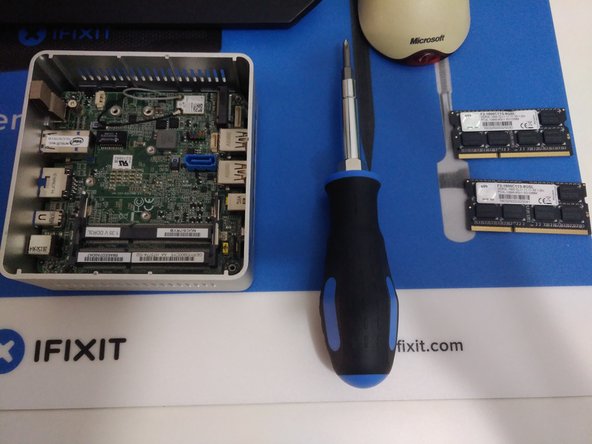
必要な工具と部品
-
-
Coloxa la NUC boca abajo y comienza usando un destornillador de cabeza Phillips para quitar los tornillos inferiores en la puerta de la caja inferior.
-
Estos tornillos se sujetan con retenedores, para que no se caigan al voltear la tapa.
-
-
-
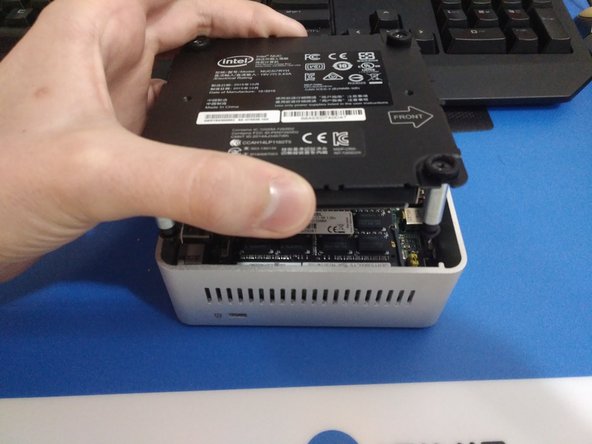
Levanta la puerta y vigila los cables que se conectan a la placa base de la NUC. Estos cables son los cables de alimentación y de datos para el compartimiento para disco duro de 2.5 ".
-
Desenchufe con cuidado los cables de la placa base y coloque el soporte a un lado.
-
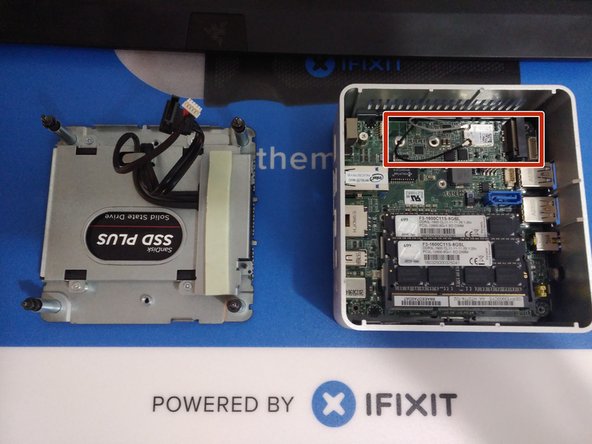
En la última foto, se marca la ranura para un disco SSD. Aquí es donde debería instalar la SSD de la cuchilla y usar un tornillo para mantenerla en su lugar.
-
-
-
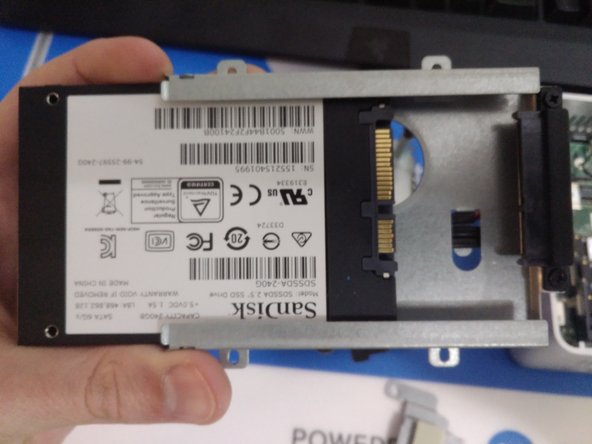
Retire los 4 tornillos plateados que sujetan el disco duro en el soporte. El protector de metal con almohadilla térmica en la caja roja saldrá: esto es útil si tienes una SSD de hoja instalada, ya que la aísla del metal.
-
Con cuidado, deslice la unidad de disco duro o SSD de 2.5 "fuera de su caja.
-
-
-
-
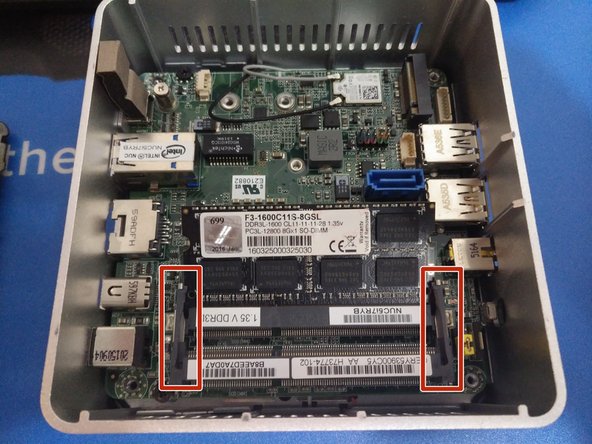
La extracción de la RAM en estas unidades es como en una computadora portátil estándar: doble ligeramente cada brazo en cada lado del chip, y permita que aparezca antes de deslizarlo fuera del zócalo.
-
Si usa dos barras de RAM, repita este proceso para la barra inferior debajo.
-
-
-
La placa base se sujeta con dos tornillos de cabeza Phillips negros, ubicados en el lado izquierdo.
-
Asegúrese de desenchufar los cables de antena de la tarjeta inalámbrica antes de extraer la placa base.
-
Sujete el puerto de ethernet y levante la placa de la carcasa.
I’m trying to disassemble an NUC 54250WYKH (released 2013), due to a now hopelessly broken fan. Removing the mother board has been proven to be very hard.I’m suspecting that it is just “stuck” to the top or that the headphone jack/IR receiver part is stuck.
After removing the two screws above: is it just a matter of applying a bit of force?
Hi Linus,
The motherboard in my NUC lifts out without much force at all, so try and make sure none of the connectors are catching on the case.
Does it budge at all? There’s a chance the I/O ports are catching on the case of the NUC when lifting the motherboard up.
After trying to brute force the Motherboard out, i tried to remove the black plastic cover for the jackstick. You have to press the plastic from inside and out. There is a “holder" you need to press from its metalframe. After i got the cover out, I could see the jackstick that was behind the cover, was sticking further out the metal case, therefore holding the motherboard., As it got stuck on the metal frame.
Then getting it out from the opposite side (LAN and power side) was easy.
This was in the D54250wykh.
Sadly I cannot add pictures of it in this comment.
-
-
-
La placa base debe levantarse directamente de la caja.
-
Para quitar el ventilador, desatornille los dos tornillos de cabeza Phillips que lo sujetan. Luego, puede desenchufarlo de la placa base.
Thank you for this tutorial - it was lifesaver for us.
Our NUC was overheating and after we disassembled motherboard and cleaned tons of dust in fan NUC is working propery again.
Thans a lot :)
BR, Alan
-
-
-
Esta unidad es relativamente fácil de desmontar y volver a montar. ¡Buena suerte!
The case is a tight fit. It's easiest if you put the front side all the way down and in place and push down on the top of the ethernet port to reseat the motherboard.
-


Para volver a armar tu dispositivo, sigue estas instrucciones en orden inverso.
Para volver a armar tu dispositivo, sigue estas instrucciones en orden inverso.
20 の人々がこのガイドを完成させました。
以下の翻訳者の皆さんにお礼を申し上げます:
100%


これらの翻訳者の方々は世界を修理する私たちのサポートをしてくれています。 あなたも貢献してみませんか?
翻訳を始める ›

15 件のコメント
Congrats! Thanks for letting me know, and I’m glad to hear your machine is running cooler!
hello. I need a replacement audio jack (port) for this nuc, model 5i5ryh, can’t find it anywhere, any suggestions?
You can try looking on eBay for replacement audio jacks. From what I’m seeing, you could potentially use a universal one and solder a few jumper wires to their corresponding pins and make something work.
Generally, no. The CPUs in these are BGA soldered to the board. If you were very crafty with a reflow station and had a replacement CPU that you knew was compatible with the motherboard, you could attempt it. But generally, it’s recommended that you just get a new machine.
Oh ok thanks for kind answer! Then, can I place Radeon 550 on NUC, or any graphic card? If yes can you please tell me the steps? I’m planning to buy NUC8i5BEK and I want to make it as gaming PC. So I would like to place the Radeon Graphic car…
Addition, I found that there is way to connect VGA with 16x-1x connector, but is there any way to connect 1x in intel nuc?
Great description, I have used it on NUC5i5RYH.
I have cleaned fan and after dust is gone NUC is working perfectly again.
Thanks
I have a 5i7 that’s 4 years old now. Bought it in 2016 as a barebones from an Ebay buyer who didn’t like it because it ran too hot. He said he had it for 3 months- they were a fairly new model at the time. The 5i7’s do run warm when heavily tasked- the thing is that you CAN push these things. I’m not quite sure where he used this thing- I suspect it was in an area with lots of pets and lots of cigarette smoke. I went ahead and cleaned it out and it runs fine.
This is a pretty heavy duty processor stuffed into a small case with small heat sink cooling passages.. not really any worse than any i7 notebook out there. However it’s really easy to disassemble, so I make it a point to take it apart and clean the fan and the heat sink passages about every 4 months. I also changed the fan about a years ago as it was starting to get noisy.
Along with a Mac Mini, I still use it daily, running Windows 7 Ultimate, 2.5 Intel SSD and 16Gb of ram. Still a great little machine. I’ll be moving to Ubuntu on it soon.
Used this guide to disassemble and clean my 5 year old NUC6i5SYH. As a result the CPU temperature dropped by 30 degrees, excellent!
Glad to hear it helped you out!
Hey! Any recommendations on where to find a replacement for the thermal pad on the hard drive enclosure? I'm having a hard time finding the correct thickness.
Thanks!
Erga David - 返信