メインコンテンツにスキップ

Dell XPS 18 Touch Control Board Replacement

必要な工具と部品

  1. Dell XPS 18 Touch Control Board Replacement, Back Cover: 手順 1、 1の画像 1
    • Turn the device on its screen.

    • Remove the ten 4mm screws using a T8 Torx screwdriver.

  2. Dell XPS 18 Touch Control Board Replacement: 手順 2、 1の画像 1
    • Gently flip out support feet located near the bottom of device.

  3. Dell XPS 18 Touch Control Board Replacement: 手順 3、 1の画像 1
    • Gently lift the back cover off the device. The back cover should come off easily.

  4. Dell XPS 18 Touch Control Board Replacement, Internal Cover: 手順 4、 1の画像 1
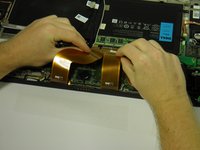
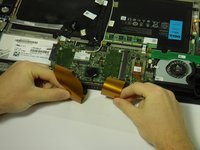
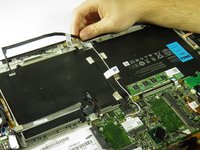
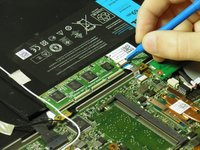
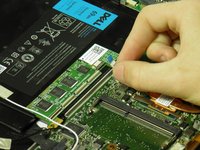
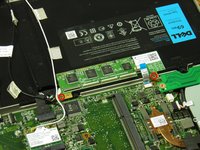
    • Use the opening tool's angled edge to lift the clasps securing the screen and motherboard cables.

  5. Dell XPS 18 Touch Control Board Replacement: 手順 5、 2の画像 1 Dell XPS 18 Touch Control Board Replacement: 手順 5、 2の画像 2
    • Disconnect the screen and copper colored motherboard cables and tuck them under the device to prevent future hassle.

  6. Dell XPS 18 Touch Control Board Replacement: 手順 6、 2の画像 1 Dell XPS 18 Touch Control Board Replacement: 手順 6、 2の画像 2
    • Remove the two black 3mm screws from the internal cover with a Phillips 00 screwdriver.

    • Remove the internal cover.

  7. Dell XPS 18 Touch Control Board Replacement, Touch Control Board: 手順 7、 2の画像 1 Dell XPS 18 Touch Control Board Replacement, Touch Control Board: 手順 7、 2の画像 2
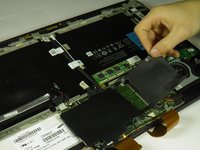
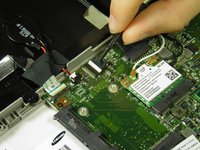
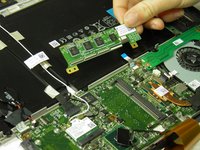
    • Disconnect the black camera cable and pull it back to prevent future hassle.

  8. Dell XPS 18 Touch Control Board Replacement: 手順 8、 2の画像 1 Dell XPS 18 Touch Control Board Replacement: 手順 8、 2の画像 2
    • Use the angled edge of the plastic opening tool to lift the clasp securing the touch control board cable.

    • Disconnect the silver and blue touch control board cable.

  9. Dell XPS 18 Touch Control Board Replacement: 手順 9、 2の画像 1 Dell XPS 18 Touch Control Board Replacement: 手順 9、 2の画像 2
    • Remove the two silver 3mm screws holding the touch control board in place with a Phillips 00 screwdriver.

    • Remove the touch control board.

終わりに

To reassemble your device, follow these instructions in reverse order.

4 の人々がこのガイドを完成させました。

作成者

4人の作成者と共同で作成されました。

Austin Weir

メンバー登録日: 01/31/15

1,287 ポイント

8のガイドは作成済み

チーム

Cal Poly, Team 6-29, Amido Winter 2015 Cal Poly, Team 6-29, Amido Winter 2015人のメンバー

CPSU-AMIDO-W15S6G29

4 メンバー

16のガイドは作成済み

2 件のコメント

It worked perfectly. Thank you.

Kenneth Macdonald - 返信

Which of Torx screwdrivers is used in step 1? As I can see, it is T8, but right above the Introduction section it is stated it is Torx T9...

Евгений Громов - 返信

コメントを追加

統計データ:

過去 24時間: 0

過去 7 日: 3

過去 30 日: 8

今までの合計 1,895