メインコンテンツにスキップ

Dell XPS 15 9510 SSD Replacement

必要な工具と部品

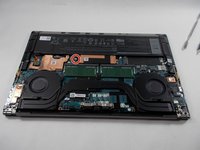
  1. Dell XPS 15 9510 SSD Replacement, Rear Panel: 手順 1、 1の画像 1
    • Make sure the laptop is powered off and unplug all cables before beginning any repair.

    • Remove eight 3 mm screws from the underside of the case using a T5 Torx screwdriver.

  2. Dell XPS 15 9510 SSD Replacement: 手順 2、 1の画像 1
    • The metal case of the XPS 15 9510 is extremely sharp, so be careful not to run your fingers along the edge when disassembling the laptop.

    • Wedge the case apart with a nylon spudger.

    • If the plastic one isn't possible to insert, use the metal spudger to carefully create a small gap first.

    • Slide spudger along each side of the laptop

  3. Dell XPS 15 9510 SSD Replacement: 手順 3、 1の画像 1
    • The metal case of the XPS 15 9510 is extremely sharp, so be careful not to run your fingers along the edge when disassembling the laptop.

    • Lift the back panel of the laptop off and set it aside.

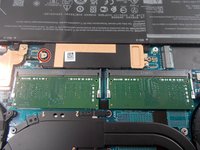
  4. Dell XPS 15 9510 SSD Replacement, SSD: 手順 4、 2の画像 1 Dell XPS 15 9510 SSD Replacement, SSD: 手順 4、 2の画像 2
    • Remove the single screw from the left side of the SSD using a Phillips #00 screwdriver.

    • The SSD is spring-released; it will pop up after removing the screw.

  5. Dell XPS 15 9510 SSD Replacement: 手順 5、 1の画像 1
    • Use your fingers to carefully remove the SSD from the laptop.

終わりに

To reassemble your device, follow these instructions in reverse order.

3 の人々がこのガイドを完成させました。

作成者

3人の作成者と共同で作成されました。

Austin Sa

メンバー登録日: 03/30/22

432 ポイント

3のガイドは作成済み

チーム

UMass Dartmouth, Team 1-3, Mellen Spring 2022 UMass Dartmouth, Team 1-3, Mellen Spring 2022人のメンバー

UMASSD-MELLEN-S22S1G3

3 メンバー

5のガイドは作成済み

0 件のコメント

コメントを追加

統計データ:

過去 24時間: 1

過去 7 日: 17

過去 30 日: 67

今までの合計 3,485