メインコンテンツにスキップ

Dell XPS 13 Track Pad Replacement

アーカイブされたガイド
このガイドは将来的な使用のためにのみ保存されてます。ご自身の修理作業には更新バージョンをご利用ください。

必要な工具と部品

  1. Dell XPS 13 Track Pad Replacement, Back Cover: 手順 1、 2の画像 1 Dell XPS 13 Track Pad Replacement, Back Cover: 手順 1、 2の画像 2
    • Remove the eight 4 mm T5 Torx screws from the bottom cover.

  2. Dell XPS 13 Track Pad Replacement: 手順 2、 2の画像 1 Dell XPS 13 Track Pad Replacement: 手順 2、 2の画像 2
    • Use a plastic opening tool to pry open the 'XPS' flap in the middle.

  3. Dell XPS 13 Track Pad Replacement: 手順 3、 1の画像 1
    • Remove the single Phillips screw hidden beneath the flap.

  4. Dell XPS 13 Track Pad Replacement: 手順 4、 1の画像 1
    • Use opening picks or a plastic pry tool to pry open the case clips, beginning from the back edge.

  5. Dell XPS 13 Track Pad Replacement: 手順 5、 1の画像 1
    • Remove the bottom cover.

  6. Dell XPS 13 Track Pad Replacement, Battery Disconnection: 手順 6、 2の画像 1 Dell XPS 13 Track Pad Replacement, Battery Disconnection: 手順 6、 2の画像 2
    • Pull the battery cable connector towards the battery to disconnect it from its socket.

    • If the connector is stubborn, push a little at one side, then the other, to "walk" it out of its socket.

    • If you have trouble walking the connector out of the socket, use the point of a spudger to gently push on the connector indent to slide the connector out.

    • Do not pull up.

    • Open the display and press the power button for five seconds to drain any remaining charge from the system.

  7. Dell XPS 13 Track Pad Replacement, Battery: 手順 7、 2の画像 1 Dell XPS 13 Track Pad Replacement, Battery: 手順 7、 2の画像 2
    • Remove the four 3 mm Phillips #0 screws located on each corner of the battery.

  8. Dell XPS 13 Track Pad Replacement: 手順 8、 2の画像 1 Dell XPS 13 Track Pad Replacement: 手順 8、 2の画像 2
    • Pull the battery cable connector towards the battery to disconnect it from its socket.

    • Do not pull up.

  9. Dell XPS 13 Track Pad Replacement: 手順 9、 1の画像 1
    • Peel up any tape securing the speaker cables to the battery.

    • You do not need to remove the speakers, only the tape, allowing the battery to be removed out under the speaker cables.

  10. Dell XPS 13 Track Pad Replacement: 手順 10、 1の画像 1
    • Remove the battery.

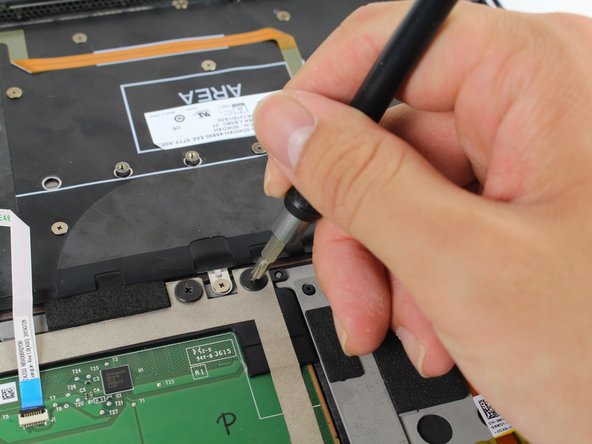
  11. Dell XPS 13 Track Pad Replacement, Track Pad: 手順 11、 2の画像 1 Dell XPS 13 Track Pad Replacement, Track Pad: 手順 11、 2の画像 2
    • Remove the four 3 mm Phillips #1 screws from the trackpad.

  12. Dell XPS 13 Track Pad Replacement: 手順 12、 1の画像 1
    • Use tweezers to gently lift the upper-right corner of the track pad.

    • Remove the track pad by slowly pulling it up and away from you.

終わりに

To reassemble your device, follow these instructions in reverse order.

4 の人々がこのガイドを完成させました。

作成者

3人の作成者と共同で作成されました。

Arvind Krish

メンバー登録日: 04/26/17

179 ポイント

1ガイドが承認済み

チーム

Cal Poly, Team S21-G6, Livingston Spring 2017 Cal Poly, Team S21-G6, Livingston Spring 2017人のメンバー

CPSU-LIVINGSTON-S17S21G6

5 メンバー

30のガイドは作成済み

0 件のコメント

コメントを追加

統計データ:

過去 24時間: 3

過去 7 日: 27

過去 30 日: 128

今までの合計 13,257