はじめに
Full disassembly … for a keyboard.
必要な工具と部品
-
-
Dell XPS L321X was considered one of the great laptops of its time, with lightweight, performance, and comfort all together in one.
-
IN YEAR 2012.
-
The Intel i7-2636 processor and the Intel Graphics 3000 was certainly off the shelf today, but this thing still can put up a fight ...
-
When it had a external fan.
-
A decent laptop cooler can lower the CPU temperature by roughly 20 degrees (farenheit) under almost all conditions. A must-have.
-
-
-
The left was the power, the PRIMARY USB, and the headphone jack.
-
The right sported a MINI DisplayPort and another USB. Someone says that you can connect a EXTERNAL GRAPHICS CARD!!!
-
Did you notice the holes and the small button on the right?
-
It let you check how much battery there are. One light means 20%. Surely one of the rarer design, but clearly DELL kept the line up since ... their Studio XPS?
-
-
-
TORX 5 SCREWS guarding the back cover. Hmm ...
-
People are changing the tools around constantly. This is not true. THIS IS T5.
-
I am properly armed, and I unscrewed them (as seen in pic), but I lost the bit for reassembly.
-
But that means I can do whatever I want to it when necessary, until new bit came so I can put the rear cover up
-
-
-
The regulatory is fixed to the little flap on the back cover, which locks in place with metal tabs and are kept on the machine with rubber hinges.
-
There is nothing connected to the backcover, so it's very straight forward.
-
Dell says the back cover is made of carbon fiber. To me this is just ordinary plastic.
-
But it's so strong ... and light.
-
-
-
The entire thing was fixed to the palm rest, as most modern computers do.
-
Weird ...
-
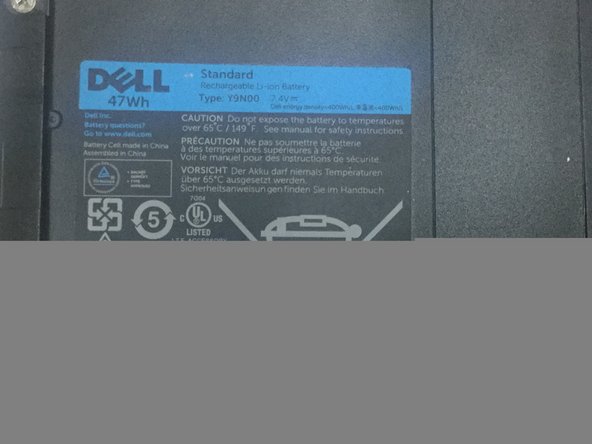
The tabs holding down the 47 WH battery had cracked on mine due to age. Make sure these screws are not screwed in too tight during reassembly.
-
The screws are also a bit prone to rusting for some reason, but so far none of mine had stripped.
-
-
-
-
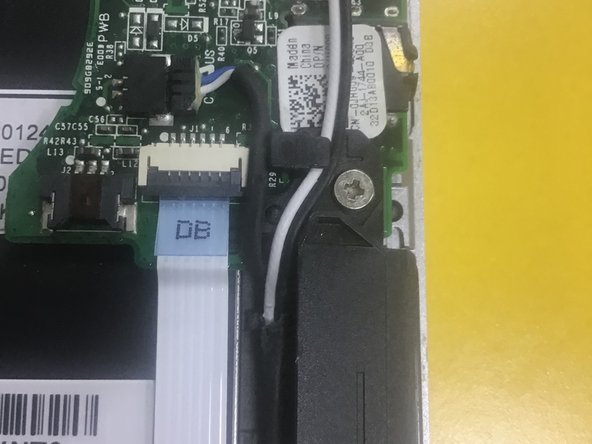
The ribbon cable connects basically half of the machine to the other.
-
Electricity from the plug is directly connected to the motherboard through a plug beneath it.
-
Don't forget about the keyboard's TWO cables-the "keys" and the backlight. They are held down by unnecessary adhesive. (but keep them there, so you won't snag them)
-
Use a tweezer/opener on the cable housing, but it's OKAY to use hand as long as you are gentle. I would recommend ... plastic spoons.
-
-
-
Do you have all of them?
-
Left to right: tiny black one (philips, for keyboard and the lining), small black ones (torx, for the back cover), small white ones (small philips, for touchpad), medium white ones (small philips, for SINGLE-LAYER items like speaker, battery), medium black one (medium philips, for the hinges), and long white ones (medium philips, for the board)
-
All of the screws have the same thread
-
Lie. All the white ones have the same thread, and the external torx screw share this thread. The hinge screws are larger (and therefore won't fit), and the screws for the lining also appears to have their own thread.
-
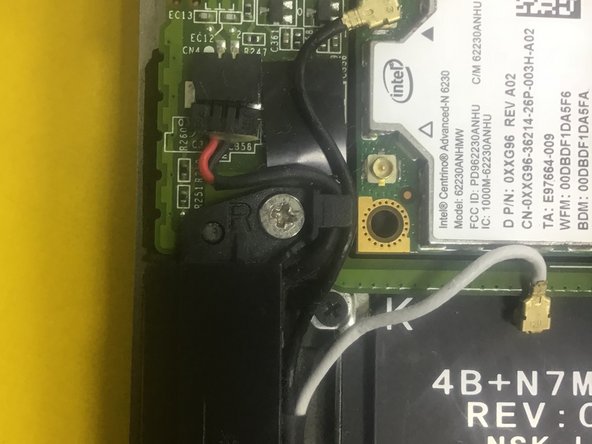
There is this one screw, though, that are slightly larger than the keyboard screw (same size as the Torx screw), but is Philips. I reason that this particular screw belongs to the holding bracket (for the WLAN card).
-
-
-
Now, lift that big slab of battery off. (basically taking everything you can out of the thing.) Then the fan.
-
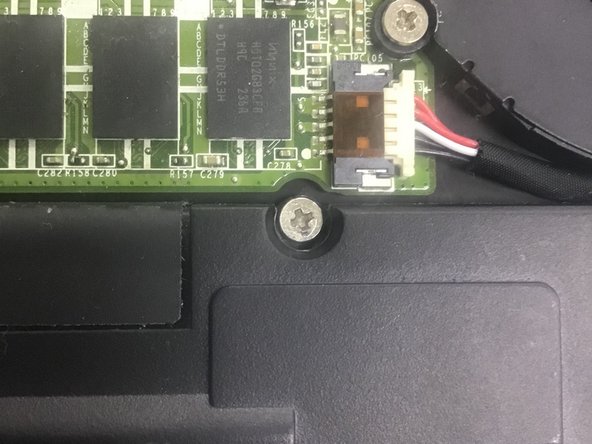
The screw in this picture is a big white one (it may be not), because you end up with one extra big white one after using up all the multi-layer holes.
-
Now it's a good time to wash the fan. (it's okay to do it with water, I did it that way.) Just make sure they are 200% dry before connecting them to power.
-
Take out those speakers--those are going to get into your way when you try to lift off the motherboard.
-
At least, the right one.
-
Pictured are the proper wiring of the left and right speakers. (ESPECIALLY the right sided one -- the one on the motherboard)
-
-
-
Your device ...
-
Oh nooooo.... what did you do to your laptop?
-
I cleaned it.
-
should now look like this, after the removal of speakers, battery and daoguterboard and the fan.
-
Ignore that Samsung 860 SSD on the board. I put it there.
-
It was originally one from Toshiba, but age mean that it inevitably failed
-
-
-
FOURTY screw holes? What is this keyboard made of, paper?
-
Immediate headache.
-
Take off ALL the screws you encounter. I think it is 27. I lost count.
-
But there are more holes then there are for screws!
-
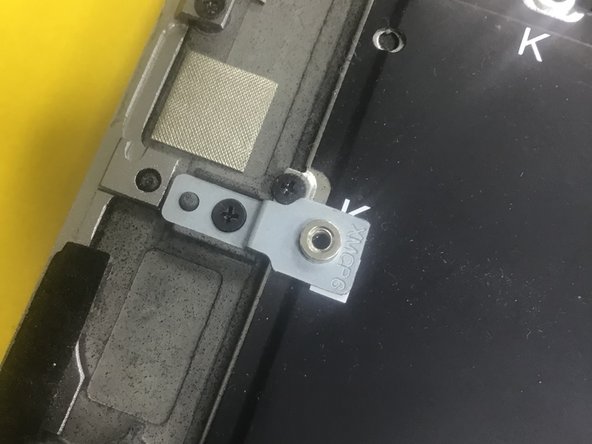
Well, the screw holes with letter "K" NEARBY (within 3mm radius) are for keyboard screws. The other ones are not. (and are for, for example, the motherboard.)
-
Now, this one right above the touchpad IS a keyboard screw, despite the fact that it don't have letter 'K' on it. (they can't print it on the ribbon cable, duh)
-
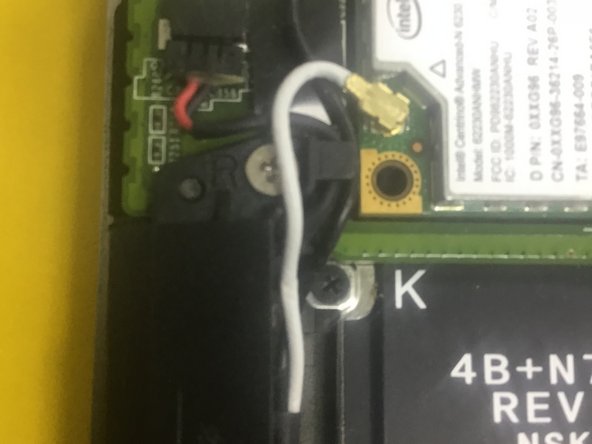
Don't forget this ... what should I call it? Bracket thing for the WLAN card. The picture here is the WRONG screw -- you should have a slightly larger Philips screw to secure this down.
-
-
-
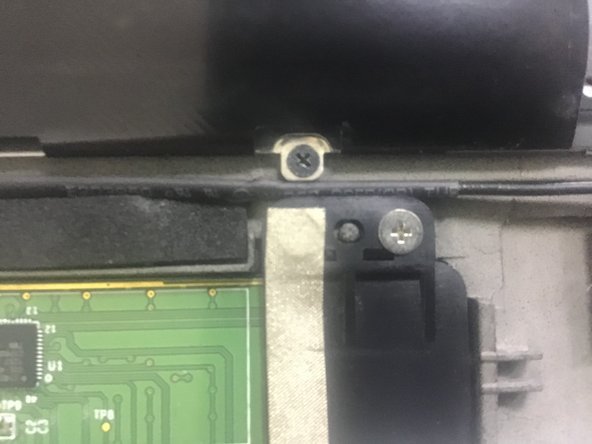
The hinge?
-
TOUGH screws. Use Philips #0 for the sake of your screwdriver ( and the screws!)
-
One side is the display thing. the other is the antenna...
-
There are three holes, but only two holes for the screws to go to (on the "palm rest")
-
Ah, and Dell had a cute little screw here to keep the power button in place! Lovely.
-
Too bad that for some reason I can't unscrew it. Bummer.
-
-
-
Now that, is a wrap.
-
Just look at the amount of screws in that white box.
-
The black thing keyboard is on is the SCREEN, not the "palmrest". palmrest is over to the left (of the picture)
-
You can change the display assembly before you remove the motherboard, but you have to do it after removing the daughterboard and the battery, because you need to free the antenna.
-
And I will do a little trick later to show you how to take apart the display(the hinge part) because it keeps getting loose.
-


2 の人々がこのガイドを完成させました。
