はじめに
This guide instructs you on how to replace the Optical Disc Drive from the Dell Vostro 1700 laptop. This very short and straight forward guide will help make your device read from and write to discs again.
必要な工具と部品
-
-
Power off the device before disassembly.
-
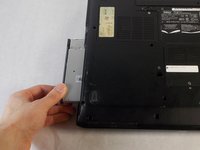
Remove the single 8mm Phillips #1 screw just beneath the lock symbol on the bottom of the laptop.
-
-


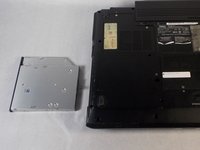
To reassemble your device, follow these instructions in reverse order.
To reassemble your device, follow these instructions in reverse order.
ある他の人がこのガイドを完成しました。
チーム

UMass Dartmouth, Team S3-G1, Peak Spring 2018 UMass Dartmouth, Team S3-G1, Peak Spring 2018人のメンバー
UMASSD-PEAK-S18S3G1
3 メンバー
5のガイドは作成済み