メインコンテンツにスキップ

Dell Vostro 1400 Speakers Replacement

必要な工具と部品

  1. Dell Vostro 1400 Speakers Replacement, Battery: 手順 1、 1の画像 1
    • Be sure the power is off and all cables are unplugged from the device before starting.

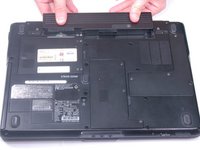
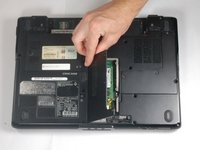
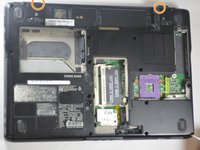
    • After flipping over the laptop, the battery is on the bottom side of the laptop.

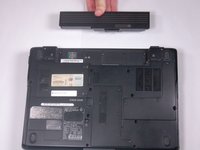
    • Find the tabs on both the left and right side of the battery.

  2. Dell Vostro 1400 Speakers Replacement: 手順 2、 1の画像 1
    • Push tabs toward the outside of the laptop until they lock in place.

  3. Dell Vostro 1400 Speakers Replacement: 手順 3、 2の画像 1 Dell Vostro 1400 Speakers Replacement: 手順 3、 2の画像 2
    • Push the battery forward to eject it from the laptop.

  4. Dell Vostro 1400 Speakers Replacement, Hard Drive: 手順 4、 2の画像 1 Dell Vostro 1400 Speakers Replacement, Hard Drive: 手順 4、 2の画像 2
    • Please ensure that your device is turned off and everything is unplugged before working on it.

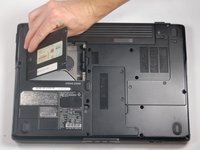
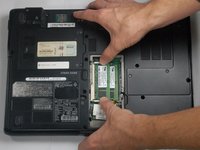
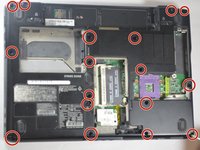
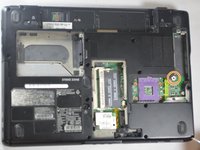
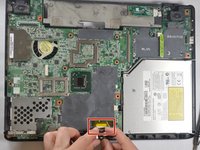
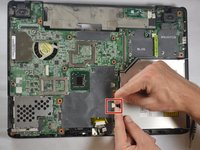
    • Unscrew both screws on the hard drive panel until the panel is able to be removed.

    • The screws will not come off of the panel.

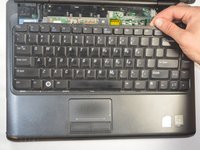
    • Once screws have been loosened, remove the panel from the laptop.

  5. Dell Vostro 1400 Speakers Replacement: 手順 5、 1の画像 1
    • Remove the hard drive by pulling up on the black tab on the right side of the hard drive.

  6. Dell Vostro 1400 Speakers Replacement, RAM: 手順 6、 2の画像 1 Dell Vostro 1400 Speakers Replacement, RAM: 手順 6、 2の画像 2
    • Make sure the laptop is turned off and all cables are unplugged.

    • Loosen the three 3 mm screws on the RAM cover.

    • Screws will not completely come out.

    • Lift the cover and remove it from the laptop.

  7. Dell Vostro 1400 Speakers Replacement: 手順 7、 2の画像 1 Dell Vostro 1400 Speakers Replacement: 手順 7、 2の画像 2
    • Pull tabs apart on both the top and bottom of the memory card.

    • Lift memory card and remove it from the laptop.

    • Repeat the process for the second memory card.

  8. Dell Vostro 1400 Speakers Replacement, Speakers: 手順 8、 3の画像 1 Dell Vostro 1400 Speakers Replacement, Speakers: 手順 8、 3の画像 2 Dell Vostro 1400 Speakers Replacement, Speakers: 手順 8、 3の画像 3
    • Make sure device is turned off

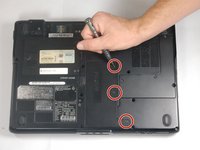
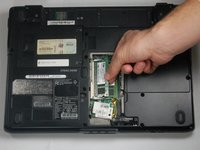
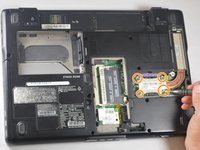
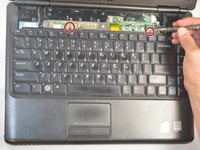
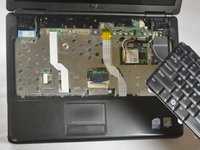
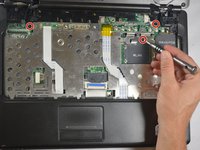
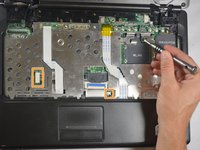
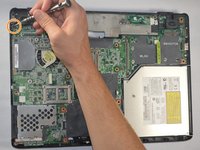
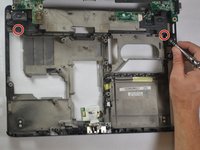
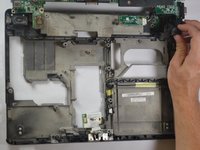
    • Loosen the 3 screws holding down the panel for the CPU processor door.

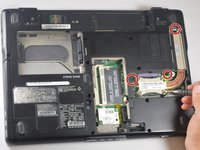
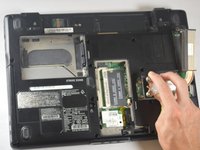
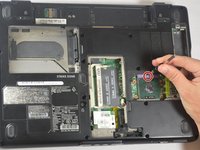
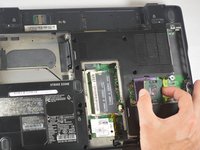
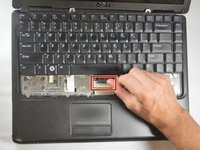
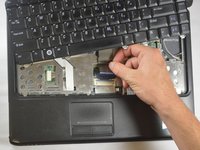
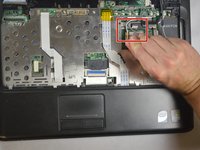
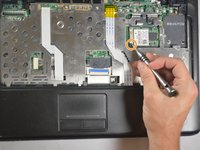
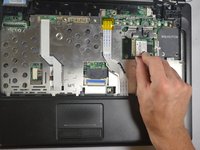
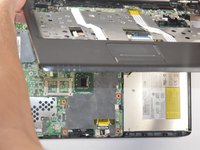
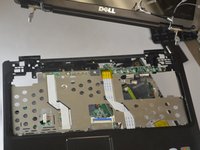
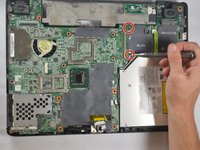
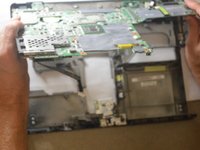
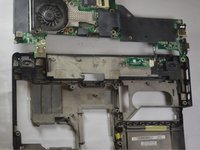
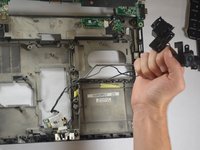
    • Loosen the 4 heat sink screws and lift the heat sink away from the motherboard.

  9. Dell Vostro 1400 Speakers Replacement: 手順 9、 2の画像 1 Dell Vostro 1400 Speakers Replacement: 手順 9、 2の画像 2
    • Use a flat head screw driver to turn the CPU locking screw counter clockwise to 180 degrees.

    • Lift CPU processor away from the motherboard

  10. Dell Vostro 1400 Speakers Replacement: 手順 10、 2の画像 1 Dell Vostro 1400 Speakers Replacement: 手順 10、 2の画像 2
    • Remove the seventeen 8mm bottom base screws.

    • Remove the two 8mm screws from the back.

  11. Dell Vostro 1400 Speakers Replacement: 手順 11、 2の画像 1 Dell Vostro 1400 Speakers Replacement: 手順 11、 2の画像 2
    • Remove the three 3mm bottom base screws.

    • Remove the 5mm bottom base screw.

  12. Dell Vostro 1400 Speakers Replacement: 手順 12、 2の画像 1 Dell Vostro 1400 Speakers Replacement: 手順 12、 2の画像 2
    • Turn over the laptop and open it.

    • Using a flat head screw driver, pry up the power button cover starting right to left.

  13. Dell Vostro 1400 Speakers Replacement: 手順 13、 2の画像 1 Dell Vostro 1400 Speakers Replacement: 手順 13、 2の画像 2
    • Unscrew the (2) 2mm x 3mm screws.

    • Carefully lift the keyboard and hold it over the power button.

  14. Dell Vostro 1400 Speakers Replacement: 手順 14、 3の画像 1 Dell Vostro 1400 Speakers Replacement: 手順 14、 3の画像 2 Dell Vostro 1400 Speakers Replacement: 手順 14、 3の画像 3
    • Carefully lift up the blue latch on the keyboard cable connector and slide the cable out.

  15. Dell Vostro 1400 Speakers Replacement: 手順 15、 1の画像 1
    • Remove the left and the right hinge covers.

  16. Dell Vostro 1400 Speakers Replacement: 手順 16、 3の画像 1 Dell Vostro 1400 Speakers Replacement: 手順 16、 3の画像 2 Dell Vostro 1400 Speakers Replacement: 手順 16、 3の画像 3
    • Unplug the WLAN antenna cables.

    • Unscrew the 2mm x 3mm screw.

    • Remove the WLAN card from the motherboard.

  17. Dell Vostro 1400 Speakers Replacement: 手順 17、 1の画像 1
    • Remove the 2mm x 3mm screw on the media button circuit board.

    • Loosen the media button circuit board and take the antenna cables from under it.

  18. Dell Vostro 1400 Speakers Replacement: 手順 18、 1の画像 1
    • Unplug LCD cable

    • Lift LCD assembly away from the laptop

  19. Dell Vostro 1400 Speakers Replacement: 手順 19、 2の画像 1 Dell Vostro 1400 Speakers Replacement: 手順 19、 2の画像 2
    • Remove the (3) 2.5mm x 5mm top palmrest screws

    • Unplug palm rest cables

  20. Dell Vostro 1400 Speakers Replacement: 手順 20、 2の画像 1 Dell Vostro 1400 Speakers Replacement: 手順 20、 2の画像 2
    • Remove the palm rest from the base of the laptop

  21. Dell Vostro 1400 Speakers Replacement: 手順 21、 3の画像 1 Dell Vostro 1400 Speakers Replacement: 手順 21、 3の画像 2 Dell Vostro 1400 Speakers Replacement: 手順 21、 3の画像 3
    • Unplug the audio board cable and the speakers.

    • Remove the 2.5mm x 5mm screw.

  22. Dell Vostro 1400 Speakers Replacement: 手順 22、 3の画像 1 Dell Vostro 1400 Speakers Replacement: 手順 22、 3の画像 2 Dell Vostro 1400 Speakers Replacement: 手順 22、 3の画像 3
    • Remove the (2) 2mm x 3mm screws.

    • Lift the motherboard out of the base and flip it over.

  23. Dell Vostro 1400 Speakers Replacement: 手順 23、 3の画像 1 Dell Vostro 1400 Speakers Replacement: 手順 23、 3の画像 2 Dell Vostro 1400 Speakers Replacement: 手順 23、 3の画像 3
    • Remove the two 2.5mm x 5mm Right and Left speaker screws

    • Lift the speakers away from the base of the laptop.

終わりに

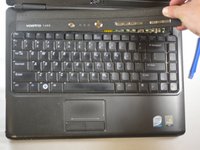
To reassemble your device, follow these instructions in reverse order.

ある他の人がこのガイドを完成しました。

作成者

7人の作成者と共同で作成されました。

David Hogg

メンバー登録日: 03/20/17

727 ポイント

5のガイドは作成済み

チーム

Texas Tech, Team S8-G2, Bennett Spring 2017 Texas Tech, Team S8-G2, Bennett Spring 2017人のメンバー

TTU-BENNETT-S17S8G2

4 メンバー

5のガイドは作成済み

0 件のコメント

コメントを追加

統計データ:

過去 24時間: 1

過去 7 日: 2

過去 30 日: 6

今までの合計 977