メインコンテンツにスキップ

Dell Venue 7 Motherboard Replacement

必要な工具と部品

  1. Dell Venue 7 Motherboard Replacement, Rear Case: 手順 1、 2の画像 1 Dell Venue 7 Motherboard Replacement, Rear Case: 手順 1、 2の画像 2
    • Use a spudger or your fingers to pry off the back case.

    • If your case is badly damaged, use caution because the fragments may be sharp.

  2. Dell Venue 7 Motherboard Replacement, Battery: 手順 2、 1の画像 1
    • Gently disconnect the battery from the motherboard using your fingers or a pair of tweezers.

  3. Dell Venue 7 Motherboard Replacement: 手順 3、 1の画像 1
    • Remove the battery by pulling it from the edges and carefully peeling it off of the base.

    • There is adhesive keeping the battery in place, so don't be afraid to use a little extra force.

    • Do not bend or warp the battery in any way as it can be a fire hazard.

  4. Dell Venue 7 Motherboard Replacement, Rear Facing Camera: 手順 4、 1の画像 1
    • Use a spudger to disconnect the camera from the motherboard.

  5. Dell Venue 7 Motherboard Replacement: 手順 5、 1の画像 1
    • Remove the camera from the device.

  6. Dell Venue 7 Motherboard Replacement, Speaker: 手順 6、 2の画像 1 Dell Venue 7 Motherboard Replacement, Speaker: 手順 6、 2の画像 2
    • Use a spudger to remove the ribbon cable that is around the speaker wire.

  7. Dell Venue 7 Motherboard Replacement: 手順 7、 2の画像 1 Dell Venue 7 Motherboard Replacement: 手順 7、 2の画像 2
    • Disconnect the speaker wire from the motherboard by prying the connector upwards with the spudger.

  8. Dell Venue 7 Motherboard Replacement: 手順 8、 1の画像 1
    • Remove the plastic covering on the speaker.

  9. Dell Venue 7 Motherboard Replacement: 手順 9、 2の画像 1 Dell Venue 7 Motherboard Replacement: 手順 9、 2の画像 2
    • Gently pull on the wire and remove the speaker.

  10. Dell Venue 7 Motherboard Replacement, Motherboard: 手順 10、 3の画像 1 Dell Venue 7 Motherboard Replacement, Motherboard: 手順 10、 3の画像 2 Dell Venue 7 Motherboard Replacement, Motherboard: 手順 10、 3の画像 3
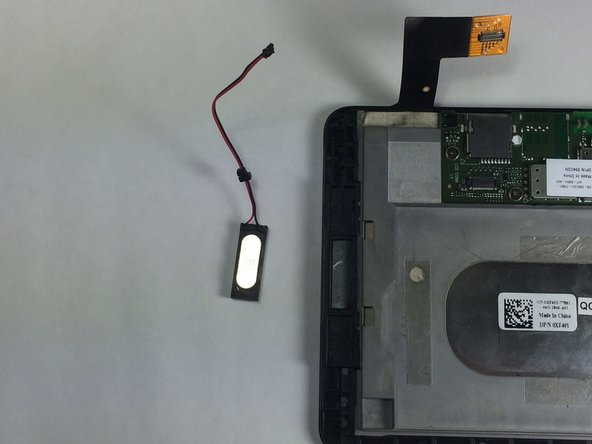
    • Disconnect the two remaining connections on the motherboard.

    • To remove the first connector, lift up the clasp and remove the ribbon cable.

    • To remove the second one, use a spudger to gently pry the connector from the motherboard.

  11. Dell Venue 7 Motherboard Replacement: 手順 11、 2の画像 1 Dell Venue 7 Motherboard Replacement: 手順 11、 2の画像 2
    • Remove all 8 of the 2.1mm Phillips head screws from the motherboard.

  12. Dell Venue 7 Motherboard Replacement: 手順 12、 1の画像 1
    • Lift and remove the motherboard from the device.

終わりに

To reassemble your device, follow these instructions in reverse order.

8 の人々がこのガイドを完成させました。

作成者

2人の作成者と共同で作成されました。

Stephen Rousseau

メンバー登録日: 01/20/15

663 ポイント

4のガイドは作成済み

チーム

USF Tampa, Team 11-4, Blackwell Winter 2015 USF Tampa, Team 11-4, Blackwell Winter 2015人のメンバー

USFT-BLACKWELL-W15S11G4

4 メンバー

10のガイドは作成済み

2 件のコメント

unable to open the lock, can the mother board be changed

Amitabh Mishra - 返信

コメントを追加

統計データ:

過去 24時間: 0

過去 7 日: 5

過去 30 日: 10

今までの合計 4,416