メインコンテンツにスキップ

Dell Precision 7560 Keyboard Replacement

必要な工具と部品

  1. Dell Precision 7560 Keyboard Replacement, Battery: 手順 1、 3の画像 1 Dell Precision 7560 Keyboard Replacement, Battery: 手順 1、 3の画像 2 Dell Precision 7560 Keyboard Replacement, Battery: 手順 1、 3の画像 3
    • The screws holding the back cover in place can not be removed.

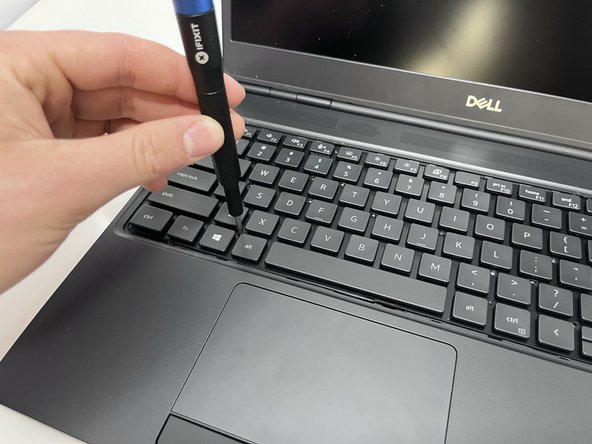
    • Use a Phillips #0 screwdriver to loosen the the eight 5 mm captive screws in the bottom cover.

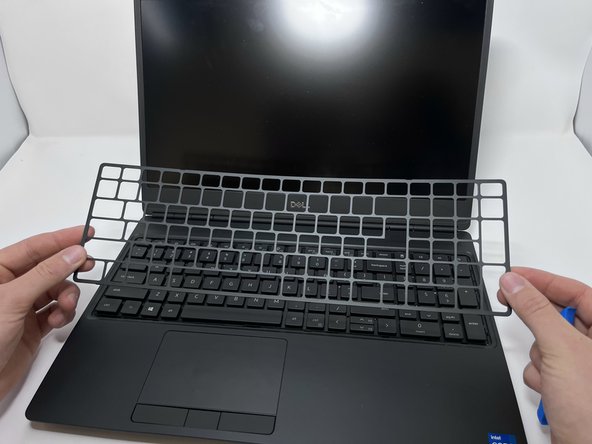
    • Remove the back cover by lifting at the corners.

  2. Dell Precision 7560 Keyboard Replacement: 手順 2、 3の画像 1 Dell Precision 7560 Keyboard Replacement: 手順 2、 3の画像 2 Dell Precision 7560 Keyboard Replacement: 手順 2、 3の画像 3
    • Unscrew and remove the five 2 mm screws that secure the battery.

    • Locate the battery connector.

  3. Dell Precision 7560 Keyboard Replacement: 手順 3、 3の画像 1 Dell Precision 7560 Keyboard Replacement: 手順 3、 3の画像 2 Dell Precision 7560 Keyboard Replacement: 手順 3、 3の画像 3
    • Pull the connector towards you to disconnect it.

    • Use your fingers or a plastic opening tool to pry the battery up and remove it from the laptop.

  4. Dell Precision 7560 Keyboard Replacement, Keyboard: 手順 4、 3の画像 1 Dell Precision 7560 Keyboard Replacement, Keyboard: 手順 4、 3の画像 2 Dell Precision 7560 Keyboard Replacement, Keyboard: 手順 4、 3の画像 3
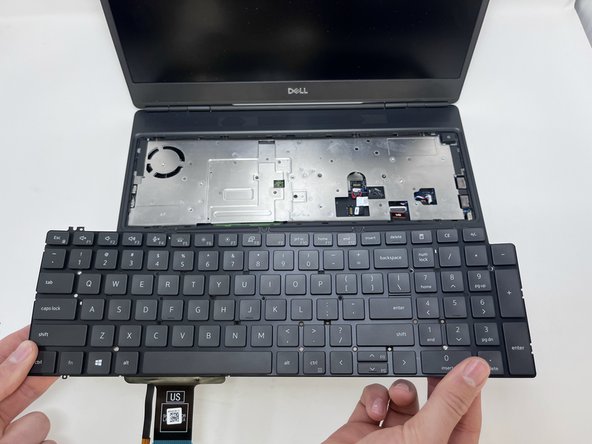
    • With the back cover and battery removed, locate the ribbon cables connected to the keyboard.

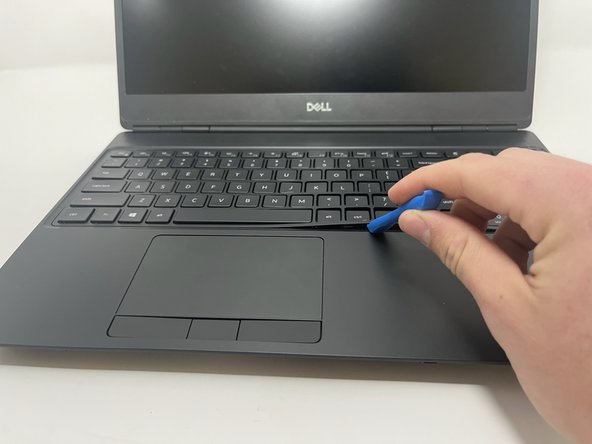
    • Pulling from the tab, carefully remove the connector.

  5. Dell Precision 7560 Keyboard Replacement: 手順 5、 3の画像 1 Dell Precision 7560 Keyboard Replacement: 手順 5、 3の画像 2 Dell Precision 7560 Keyboard Replacement: 手順 5、 3の画像 3
    • Turn the device over and open the screen to expose the keyboard.

    • Using an opener tool, pry along the edges of the keyboard to remove the keyboard's plate cover.

  6. Dell Precision 7560 Keyboard Replacement: 手順 6、 3の画像 1 Dell Precision 7560 Keyboard Replacement: 手順 6、 3の画像 2 Dell Precision 7560 Keyboard Replacement: 手順 6、 3の画像 3
    • With the plate cover removed, use the screwdriver to remove each of the six 2 mm screws.

    • Carefully remove the keyboard from the device.

終わりに

To reassemble your device, follow these instructions in reverse order.

2 の人々がこのガイドを完成させました。

作成者

2人の作成者と共同で作成されました。

Jack Allred

メンバー登録日: 02/09/23

336 ポイント

2のガイドは作成済み

チーム

Utah Tech University, Team 1-1, McMurrin Spring 2023 Utah Tech University, Team 1-1, McMurrin Spring 2023人のメンバー

UTAHTECH-MCMURRIN-S23S1G1

3 メンバー

6のガイドは作成済み

コメント 1 件

Guide is close, but not completely correct. Just need a little more attention to detail.

Barry Todd - 返信

コメントを追加

統計データ:

過去 24時間: 3

過去 7 日: 13

過去 30 日: 56

今までの合計 738