メインコンテンツにスキップ

Dell Precision 5510 Screen Replacement

必要な工具と部品

  1. Dell Precision 5510 Screen Replacement, Base Cover: 手順 1、 1の画像 1
    • Open the system badge flap over to reveal the screws underneath (marked 1 on the image).

    • Remove the 12 screws that secure the base cover to the computer.

  2. Dell Precision 5510 Screen Replacement: 手順 2、 1の画像 1
    • Pry the edges base cover and lift it to remove it from computer.

  3. Dell Precision 5510 Screen Replacement, Battery: 手順 3、 2の画像 1 Dell Precision 5510 Screen Replacement, Battery: 手順 3、 2の画像 2
    • Unplug the connection that links the battery to the computer.

  4. Dell Precision 5510 Screen Replacement: 手順 4、 2の画像 1 Dell Precision 5510 Screen Replacement: 手順 4、 2の画像 2
    • Remove the four 4.0 mm JIS #0 screws surrounding the battery.

  5. Dell Precision 5510 Screen Replacement: 手順 5、 2の画像 1 Dell Precision 5510 Screen Replacement: 手順 5、 2の画像 2
    • Carefully remove the battery from the computer.

  6. Dell Precision 5510 Screen Replacement, Screen: 手順 6、 2の画像 1 Dell Precision 5510 Screen Replacement, Screen: 手順 6、 2の画像 2
    • Remove the six 4.0 mm Phillips #1 screws.

  7. Dell Precision 5510 Screen Replacement: 手順 7、 2の画像 1 Dell Precision 5510 Screen Replacement: 手順 7、 2の画像 2
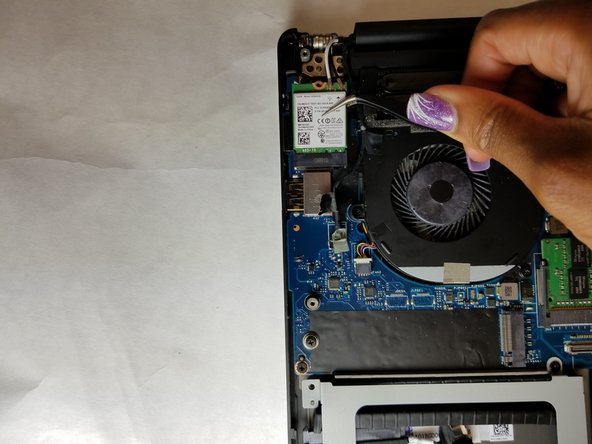
    • Unscrew the one 4.0 mm Phillips #1 screw from the WiFi chip, then remove it.

  8. Dell Precision 5510 Screen Replacement: 手順 8、 2の画像 1 Dell Precision 5510 Screen Replacement: 手順 8、 2の画像 2
    この手順で使用する道具:
    Tweezers
    $4.99
    購入する
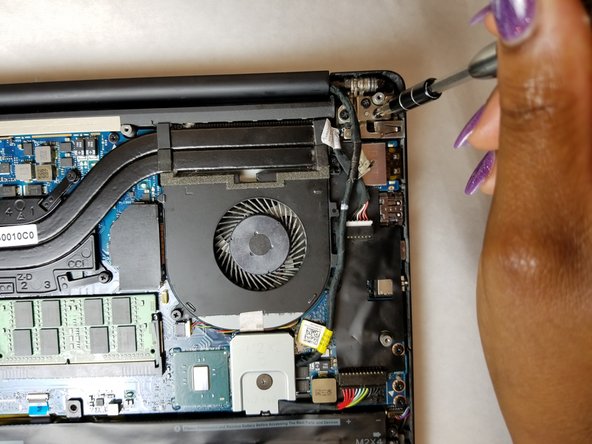
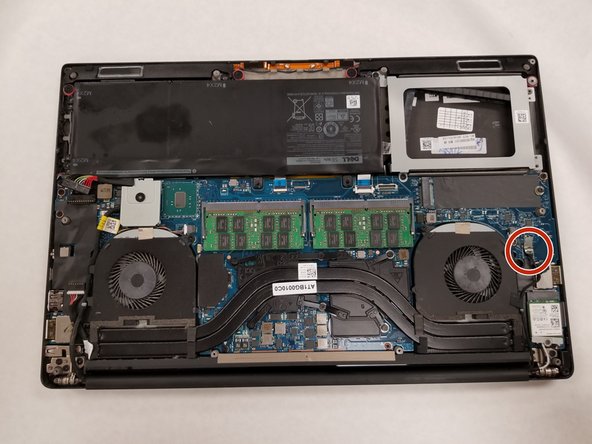
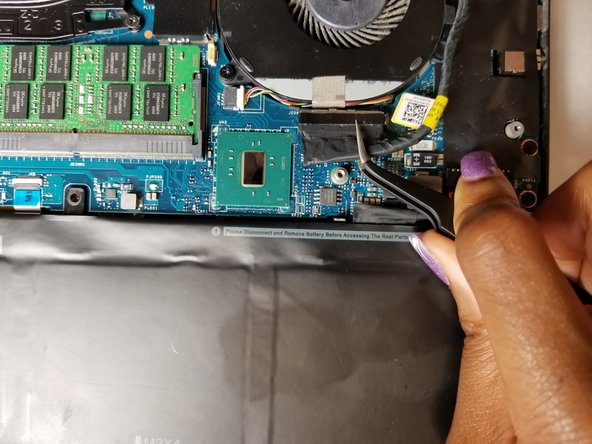
    • Disconnect the black wire. Use tweezers to help.

  9. Dell Precision 5510 Screen Replacement: 手順 9、 2の画像 1 Dell Precision 5510 Screen Replacement: 手順 9、 2の画像 2
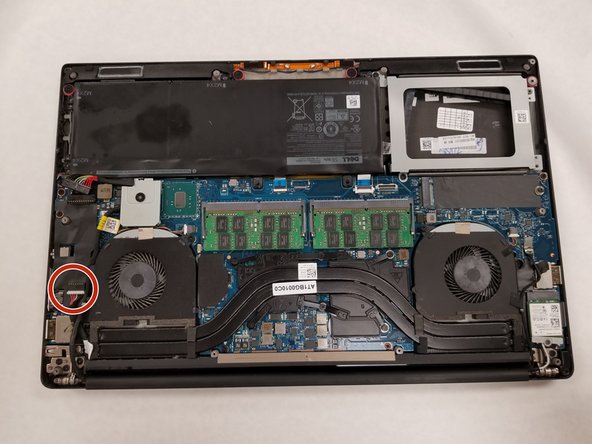
    • Disconnect the multi wire. Use tweezers to help.

  10. Dell Precision 5510 Screen Replacement: 手順 10、 2の画像 1 Dell Precision 5510 Screen Replacement: 手順 10、 2の画像 2
    • Remove the 1.0 mm Phillips #1 screw.

  11. Dell Precision 5510 Screen Replacement: 手順 11、 2の画像 1 Dell Precision 5510 Screen Replacement: 手順 11、 2の画像 2
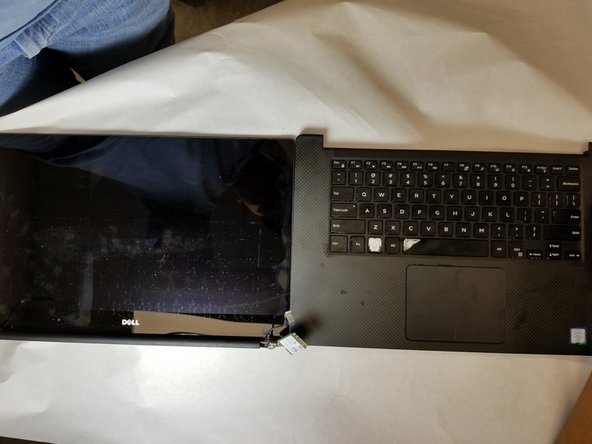
    • Flip the laptop over, so it is sitting in the normal upright position. Hold onto the screen, and pull the keyboard up and away from the screen.

終わりに

To reassemble your device, follow these instructions in reverse order.

ある他の人がこのガイドを完成しました。

作成者

3人の作成者と共同で作成されました。

Atlanta Phelps

メンバー登録日: 08/28/18

400 ポイント

3のガイドは作成済み

チーム

IUPUI, Team S1-G5, Arle Fall 2018 IUPUI, Team S1-G5, Arle Fall 2018人のメンバー

IUPUI-ARLE-F18S1G5

3 メンバー

6のガイドは作成済み

コメント 1 件

Can I just change the LCD? Or is changing the entire display assembly the only option?

John Gaines - 返信

コメントを追加

統計データ:

過去 24時間: 0

過去 7 日: 3

過去 30 日: 30

今までの合計 4,010