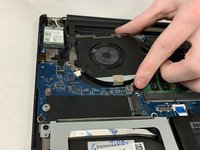
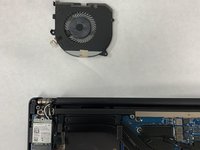
メインコンテンツにスキップ

Dell Precision 5510 Fans Replacement

必要な工具と部品

  1. Dell Precision 5510 Fans Replacement, Base Cover: 手順 1、 1の画像 1
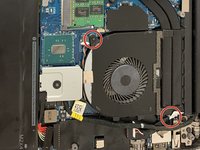
    • Open the system badge flap over to reveal the screws underneath (marked 1 on the image).

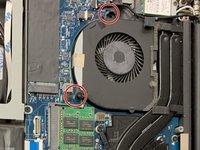
    • Remove the 12 screws that secure the base cover to the computer.

  2. Dell Precision 5510 Fans Replacement: 手順 2、 1の画像 1
    • Pry the edges base cover and lift it to remove it from computer.

  3. Dell Precision 5510 Fans Replacement, Fans: 手順 3、 2の画像 1 Dell Precision 5510 Fans Replacement, Fans: 手順 3、 2の画像 2
    • There are two screws on each fan circled in the images shown. Use a Phillips #0 screwdriver to remove all four screws.

    • Each fan has one 3.7mm screw and one 4.65mm screw.

  4. Dell Precision 5510 Fans Replacement: 手順 4、 2の画像 1 Dell Precision 5510 Fans Replacement: 手順 4、 2の画像 2
    • Each of the fans are plugged into the motherboard. Use tweezers to pull the plug out.

    • Do not grab by the wires, grab by the white rectangular region.

  5. Dell Precision 5510 Fans Replacement: 手順 5、 2の画像 1 Dell Precision 5510 Fans Replacement: 手順 5、 2の画像 2
    • Carefully extract the fan from its housing bed. It should remove easily if all parts have been disconnected.

終わりに

To reassemble your device, follow these instructions in reverse order.

作成者

4人の作成者と共同で作成されました。

Amelia Andrews

メンバー登録日: 03/31/22

97 ポイント

1ガイドが承認済み

チーム

IUPUI, Team 2-1, Harley Spring 2022 IUPUI, Team 2-1, Harley Spring 2022人のメンバー

IUPUI-HARLEY-S22S2G1

4 メンバー

4のガイドは作成済み

0 件のコメント

コメントを追加

統計データ:

過去 24時間: 0

過去 7 日: 3

過去 30 日: 14

今までの合計 454