メインコンテンツにスキップ

Dell Latitude E7440 Service Panel Replacement

必要条件のみ
この修理ガイドは、他のガイドの前提条件として使用されます。それ自体は不完全で、単独で使用されることはありません。

必要な工具と部品

  1. Dell Latitude E7440 Service Panel Replacement, Prepare the laptop: 手順 1、 1の画像 1
    • Power off your laptop before starting.

    • Flip the device over so that the vents on the bottom are facing away from you.

  2. Dell Latitude E7440 Service Panel Replacement, Release the battery: 手順 2、 3の画像 1 Dell Latitude E7440 Service Panel Replacement, Release the battery: 手順 2、 3の画像 2 Dell Latitude E7440 Service Panel Replacement, Release the battery: 手順 2、 3の画像 3
    • Place your finger on the latch located in the center of the laptop.

    • Slide the latch to the right, applying enough force to reveal a red indicator.

    • You will hear a soft click when the latch has been disengaged.

  3. Dell Latitude E7440 Service Panel Replacement, Remove the battery: 手順 3、 1の画像 1
    • Lift the battery by the top, away from the laptop body.

  4. Dell Latitude E7440 Service Panel Replacement, Remove the bottom screws: 手順 4、 2の画像 1 Dell Latitude E7440 Service Panel Replacement, Remove the bottom screws: 手順 4、 2の画像 2
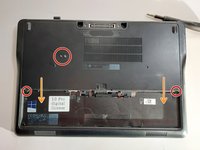
    • After removing the battery, remove the 2 screws securing the service panel.

    • Slide the panel off after removing the screws.

終わりに

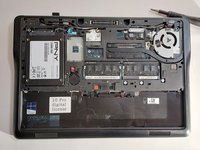
To reassemble your device, follow these instructions in reverse order.

作成者

1人の作成者と共同作成されました。

Nick

メンバー登録日: 11/10/09

89,837 ポイント

52のガイドは作成済み

チーム

Master Techs Master Techs人のメンバー

Community

321 メンバー

1,516のガイドは作成済み

0 件のコメント

コメントを追加

統計データ:

過去 24時間: 0

過去 7 日: 0

過去 30 日: 2

今までの合計 87