はじめに
If you are running low on storage space or your hard drive has failed, it is likely time to replace it. Replacing your hard drive (Latitude E7440 base models contain SSHDs) with a faster SSD will greatly improve the overall speed of your device as well. This guide will outline the steps on how to replace your drive.
必要な工具と部品
-
-
Power off your laptop before starting.
-
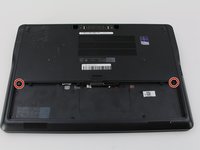
Flip the device over so that the vents on the bottom are facing away from you.
-
-
-
Place your finger on the latch located in the center of the laptop.
-
Slide the latch to the right, applying enough force to reveal a red indicator.
-
-
-
-
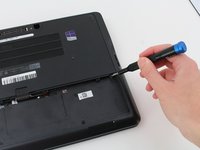
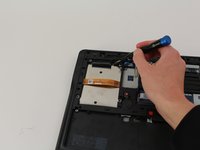
Remove two M2 x 3mm Phillips #0 screws from the base cover.
-
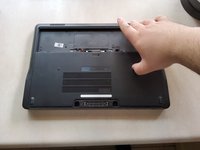
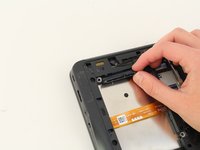
Slide the service tray using the middle stand offs to then be able to lift the tray off.
-


To reassemble your device, follow these instructions in reverse order.
To reassemble your device, follow these instructions in reverse order.
4 の人々がこのガイドを完成させました。
チーム

Cal Poly, Team S2-G5, White Winter 2019 Cal Poly, Team S2-G5, White Winter 2019人のメンバー
CPSU-WHITE-W19S2G5
4 メンバー
5のガイドは作成済み
3 件のコメント
Hi, my problem is the opposite, I have an hard drive but seems like my HDD connector doesn't plug in the small port. I can send you a pic, I need help
I want to use a Seagate hard disk, but when I start it, it demands me a password. Can you help me in this case please?
It sounds like your BIOS is locked to only work with that hard drive