メインコンテンツにスキップ

Dell Latitude E6510 Hard Drive Replacement

必要な工具と部品

  1. Dell Latitude E6510 Hard Drive Replacement, Battery: 手順 1、 1の画像 1
    • Unlock the two latches on the back by sliding them inwards.

  2. Dell Latitude E6510 Hard Drive Replacement: 手順 2、 2の画像 1 Dell Latitude E6510 Hard Drive Replacement: 手順 2、 2の画像 2
    • Slide the battery out from the laptop.

  3. Dell Latitude E6510 Hard Drive Replacement, Hard Drive: 手順 3、 2の画像 1 Dell Latitude E6510 Hard Drive Replacement, Hard Drive: 手順 3、 2の画像 2
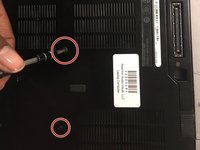
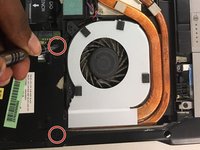
    • After removing the battery, unscrew the four 3 mm screws on the back plate using a Phillips #1 screwdriver.

    • The back plate does not need to be removed. Removed only for a clear view.

  4. Dell Latitude E6510 Hard Drive Replacement: 手順 4、 2の画像 1 Dell Latitude E6510 Hard Drive Replacement: 手順 4、 2の画像 2
    • The hard drive should slide out of the laptop. However, if not, use a spudger to pry the hard drive out of the laptop.

終わりに

To reassemble your device, follow these instructions in reverse order.

ある他の人がこのガイドを完成しました。

作成者

3人の作成者と共同で作成されました。

Kolin Doyle

メンバー登録日: 11/06/17

500 ポイント

4のガイドは作成済み

チーム

Baylor, Team S8-G4, Johnson Fall 2017 Baylor, Team S8-G4, Johnson Fall 2017人のメンバー

BU-JOHNSON-F17S8G4

1 メンバー

4のガイドは作成済み

0 件のコメント

コメントを追加

統計データ:

過去 24時間: 2

過去 7 日: 6

過去 30 日: 35

今までの合計 3,917