はじめに
In order to remove the speakers you must remove everything obstructing them. The speakers are deep within the laptop and require removal of many other components before contacting the them. In order to proceed with this guide ensure your device is turned off and unplugged.
必要な工具と部品
-
-
Take out the battery by pulling the tabs.
-
Unscrew 2 screws and remove the hard drive (Phillips Head 1 2.5mm x 5mm).
-
-
-
Press and remove the SD card protector.
-
Press and remove the pull tab on DVD Drive.
-
-
-
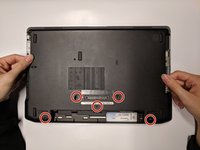
Unscrew the five screws (Phillips Head 1 2.5mm x 5mm).
-
Remove the backplate by pulling from the battery to the front.
-
-
-
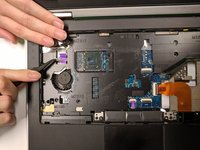
Remove the track pad wire by carefully pulling up.
-
Flip the laptop over to top.
-
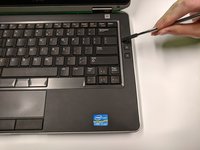
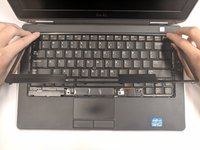
Remove the bezel from the keyboard by prying under the bezel and unclipping it.
-
Pull the bezel from the track pad to the screen to remove it.
-
-
-
-
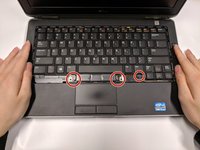
Unscrew the three screws (Phillips Head 1 2mm x 3mm).
-
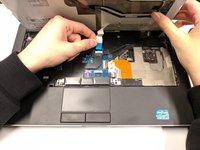
Unclip the keyboard wire harness, then slide the wire towards the screen to remove it.
-
Unclip the trackpad wire harness, sliding the wire towards the front of the laptop to remove it.
-
-
-
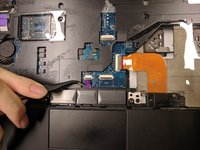
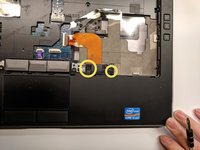
Grab the wire harness and pull towards the track pad to remove it.
-
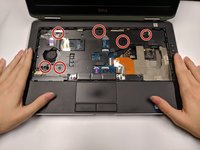
Remove the six screws (Phillips Head 1 2.5mm x 5mm).
-
Remove the two screws (Phillips Head 1 2mm x 3mm).
-
-
-
Remove the nine screws labeled P (Phillips Head 1 2.5 x 5mm).
-
Remove the two screws (Phillips Head 1 2 x 3mm).
-
-
-
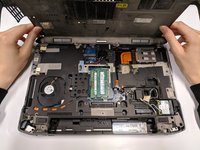
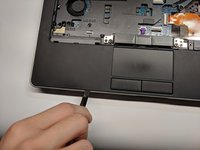
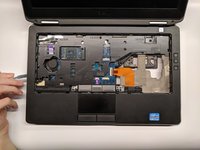
Insert spudger tool into crease of palmrest, prying in a downward motion.
-
Move along the edges of the palmrest, relieving all clips from laptop base.
-
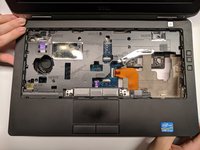
Remove palmrest in a upwards motion.
-
-
-
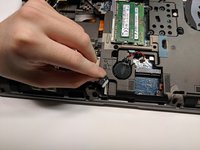
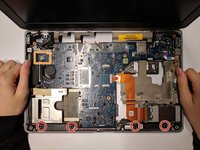
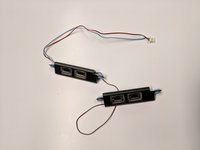
Remove the four screws to the speakers (Phillips Head 1 2.5 x 7mm).
-
Remove the speaker wire harness. Pull towards the track pad to remove it.
-
-
-
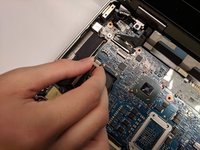
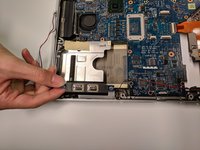
Remove or move tape out of the way in order to release the wire.
-
Remove the speakers.
-


To reassemble your device, follow these instructions in reverse order.
To reassemble your device, follow these instructions in reverse order.
ある他の人がこのガイドを完成しました。
チーム

University of Advancing Technology, Team S1-G8, Beam Summer 2019 University of Advancing Technology, Team S1-G8, Beam Summer 2019人のメンバー
Community
2 メンバー
1のガイドは作成済み