メインコンテンツにスキップ

Dell Latitude D430 Keyboard Replacement

必要な工具と部品

  1. Dell Latitude D430 Keyboard Replacement, Keyboard: 手順 1、 1の画像 1
    • Lay the laptop flat with the screen facing upward. This will allow you to have the most room while performing the keyboard replacement.

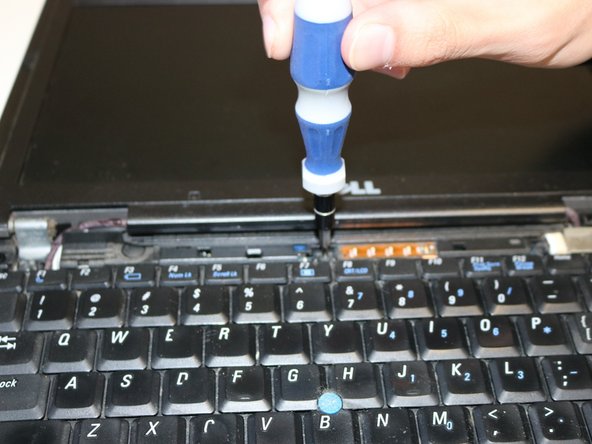
  2. Dell Latitude D430 Keyboard Replacement: 手順 2、 2の画像 1 Dell Latitude D430 Keyboard Replacement: 手順 2、 2の画像 2
    • Identify the plastic cover located directly below the screen.

    • Carefully remove the plastic cover by lifting both ends of the cover.

    • This piece is very fragile, so be sure not to break this piece. It requires minimal force to remove this piece.

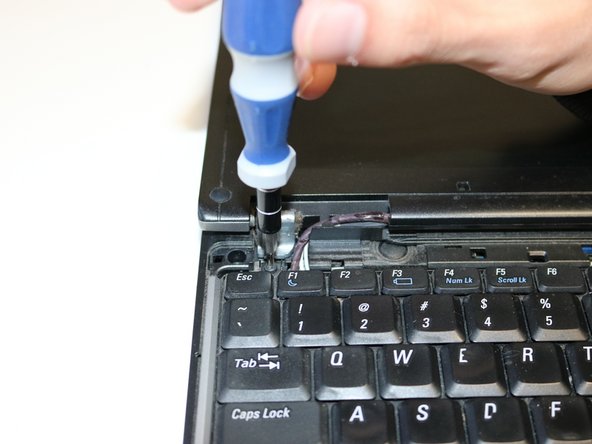
  3. Dell Latitude D430 Keyboard Replacement: 手順 3、 3の画像 1 Dell Latitude D430 Keyboard Replacement: 手順 3、 3の画像 2 Dell Latitude D430 Keyboard Replacement: 手順 3、 3の画像 3
    • There are 3 screws that should be exposed now.

    • Use a Phillips 00 screwdriver to remove all 3 of the screws shown in the pictures.

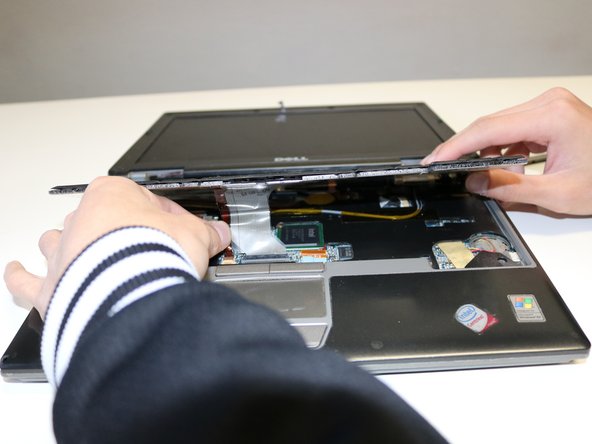
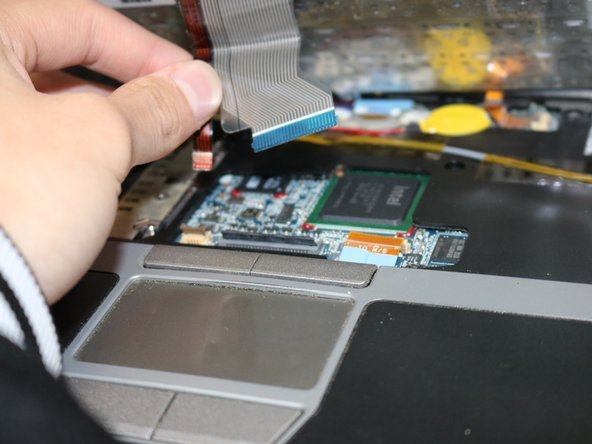
  4. Dell Latitude D430 Keyboard Replacement: 手順 4、 3の画像 1 Dell Latitude D430 Keyboard Replacement: 手順 4、 3の画像 2 Dell Latitude D430 Keyboard Replacement: 手順 4、 3の画像 3
    • Gently lift the keyboard from the top.

    • At the bottom of the keyboard, there will be ribbons connecting it to the motherboard. Be sure not to tear the ribbons.

    • Lift the clamps that are holding the ribbons in place in order to remove them. You should be able to remove the keyboard at this point.

終わりに

To reassemble your device, follow these instructions in reverse order.

ある他の人がこのガイドを完成しました。

作成者

1人の作成者と共同作成されました。

Jacob Pham

メンバー登録日: 09/21/18

109 ポイント

1ガイドが承認済み

チーム

University of North Texas, Team S2-G1, Riccardelli Fall 2018 University of North Texas, Team S2-G1, Riccardelli Fall 2018人のメンバー

UNT-RICCARDELLI-F18S2G1

3 メンバー

4のガイドは作成済み

0 件のコメント

コメントを追加

統計データ:

過去 24時間: 0

過去 7 日: 2

過去 30 日: 5

今までの合計 391