メインコンテンツにスキップ

Dell Latitude 9410 2-in-1 Battery Replacement

必要な工具と部品

  1. Dell Latitude 9410 2-in-1 Battery Replacement, Base Panel: 手順 1、 1の画像 1
    • Ensure that the laptop is unplugged and powered off before beginning.

    • Place the laptop upside down on a flat surface.

  2. Dell Latitude 9410 2-in-1 Battery Replacement: 手順 2、 2の画像 1 Dell Latitude 9410 2-in-1 Battery Replacement: 手順 2、 2の画像 2
    • Use a Phillips #00 screwdriver to loosen the ten captive screws.

    • The screws are permanently fastened to the base panel; do not attempt to remove them.

  3. Dell Latitude 9410 2-in-1 Battery Replacement: 手順 3、 3の画像 1 Dell Latitude 9410 2-in-1 Battery Replacement: 手順 3、 3の画像 2 Dell Latitude 9410 2-in-1 Battery Replacement: 手順 3、 3の画像 3
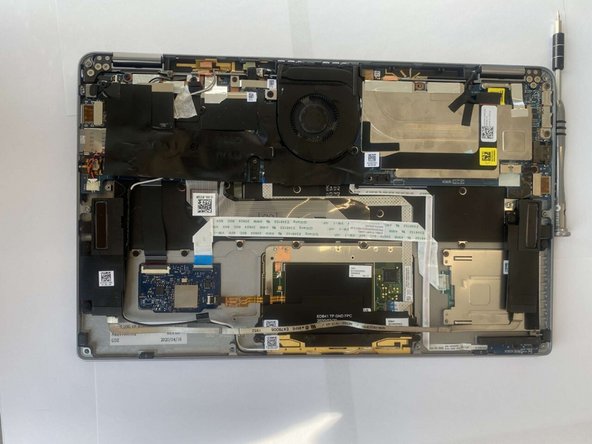
    • Carefully lift off the back panel.

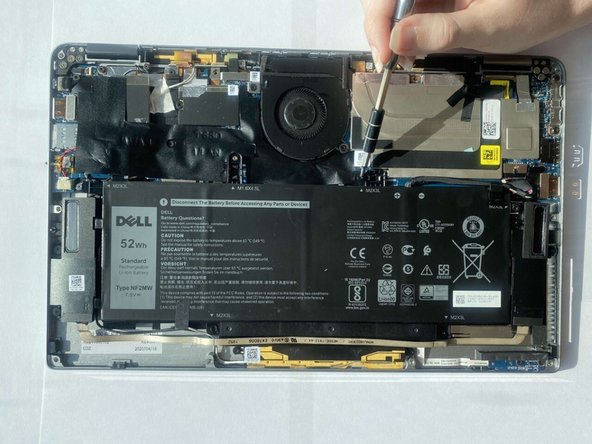
  4. Dell Latitude 9410 2-in-1 Battery Replacement, Battery: 手順 4、 2の画像 1 Dell Latitude 9410 2-in-1 Battery Replacement, Battery: 手順 4、 2の画像 2
    • Use a Philips #00 screwdriver to remove the five 3mm screws that secure the battery.

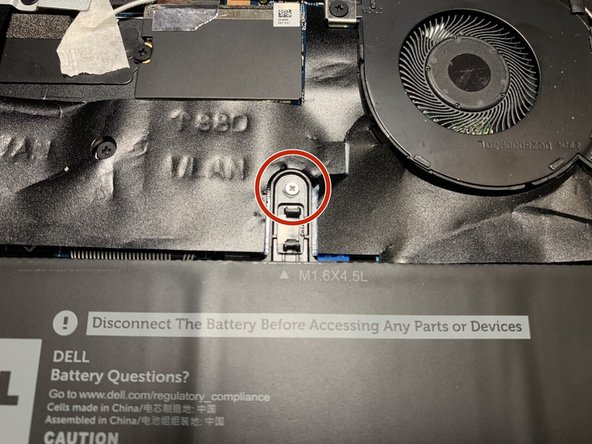
  5. Dell Latitude 9410 2-in-1 Battery Replacement: 手順 5、 3の画像 1 Dell Latitude 9410 2-in-1 Battery Replacement: 手順 5、 3の画像 2 Dell Latitude 9410 2-in-1 Battery Replacement: 手順 5、 3の画像 3
    • Use a Philips #00 screwdriver to remove one 4.5 mm screw.

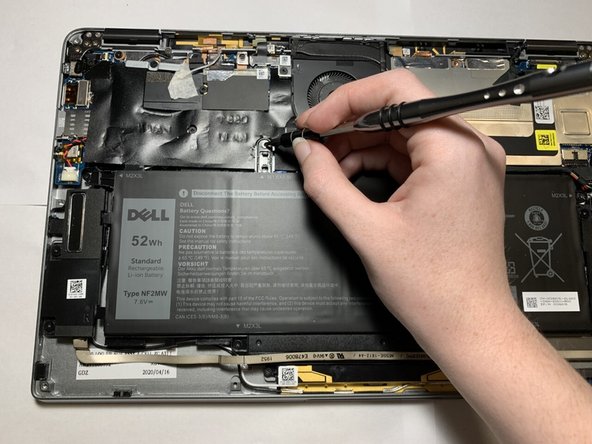
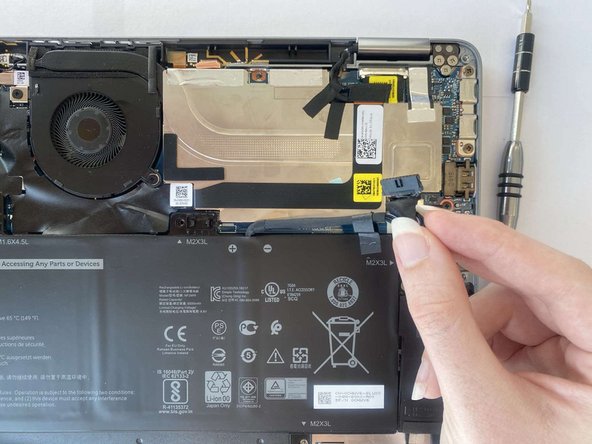
  6. Dell Latitude 9410 2-in-1 Battery Replacement: 手順 6、 2の画像 1 Dell Latitude 9410 2-in-1 Battery Replacement: 手順 6、 2の画像 2
    • Grip the battery cable near the plug and pull it straight out, in the direction of the cable.

  7. Dell Latitude 9410 2-in-1 Battery Replacement: 手順 7、 2の画像 1 Dell Latitude 9410 2-in-1 Battery Replacement: 手順 7、 2の画像 2
    この手順で使用する道具:
    Tweezers
    $4.99
    購入する
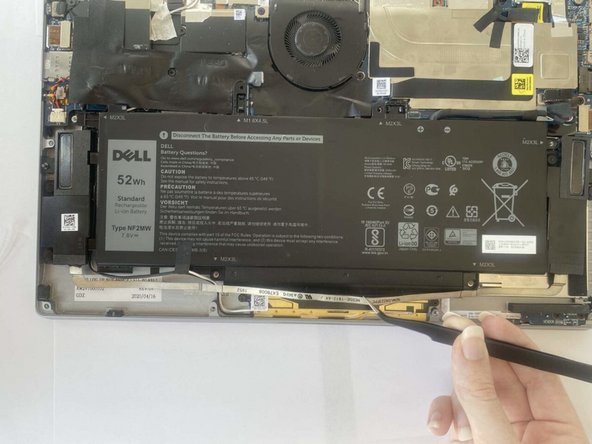
    • Use tweezers to gently move the speaker ribbon cable away from the bottom of the battery.

    • The ribbon cable is thin and fragile; handle it carefully.

    • The ribbon cable only needs to be moved so that the battery can be removed; do not completely remove the ribbon cable.

  8. Dell Latitude 9410 2-in-1 Battery Replacement: 手順 8、 2の画像 1 Dell Latitude 9410 2-in-1 Battery Replacement: 手順 8、 2の画像 2
    • Lift the battery out with two hands.

終わりに

To reassemble your device, follow these instructions in reverse order.

ある他の人がこのガイドを完成しました。

作成者

6人の作成者と共同で作成されました。

Jessica Stephens

メンバー登録日: 02/08/22

558 ポイント

5のガイドは作成済み

チーム

Western Carolina University, Team 1-2, Virtue Spring 2022 Western Carolina University, Team 1-2, Virtue Spring 2022人のメンバー

WCU-VIRTUE-S22S1G2

4 メンバー

11のガイドは作成済み

2 件のコメント

This is a fantastic guide. Thanks for posting it.

EAR - 返信

Just one question about the speaker ribbon glued to the battery (Step 7). I can't remove the ribbon from my battery. The glue is very strong. I've pulled firmly, and I'm worried about breaking the cable. Any ideas about how to loosen the glue without damaging the computer, perhaps by applying heat or some sort of solvent?

EAR - 返信

コメントを追加

統計データ:

過去 24時間: 3

過去 7 日: 11

過去 30 日: 57

今までの合計 892