メインコンテンツにスキップ

Dell Latitude 5480 Display Replacement

必要な工具と部品

  1. Dell Latitude 5480 Display Replacement, Lower Case: 手順 1、 1の画像 1
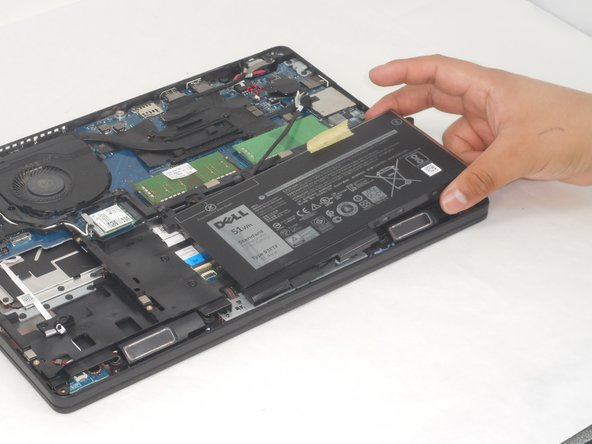
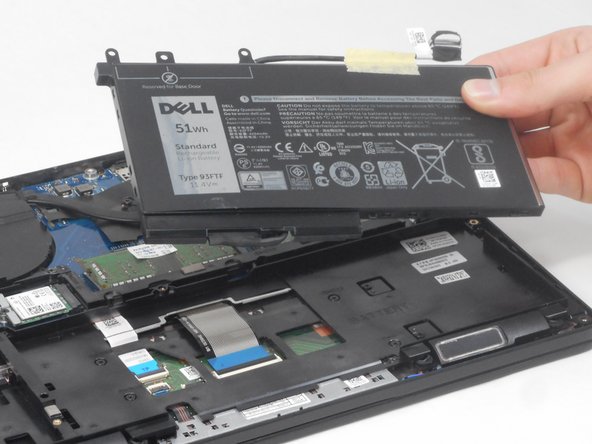
    • Use a Phillips screwdriver to remove the eight 5.6 mm screws that secure the lower case.

  2. Dell Latitude 5480 Display Replacement: 手順 2、 3の画像 1 Dell Latitude 5480 Display Replacement: 手順 2、 3の画像 2 Dell Latitude 5480 Display Replacement: 手順 2、 3の画像 3
    • Insert an opening tool into the seam between the lower case and chassis.

    • Pry up around the perimeter of the device until the lower case fully releases.

    • Lift off the lower case.

  3. Dell Latitude 5480 Display Replacement, Battery: 手順 3、 2の画像 1 Dell Latitude 5480 Display Replacement, Battery: 手順 3、 2の画像 2
    • Remove the four 5.6 mm Phillips screws that secure the battery.

  4. Dell Latitude 5480 Display Replacement: 手順 4、 3の画像 1 Dell Latitude 5480 Display Replacement: 手順 4、 3の画像 2 Dell Latitude 5480 Display Replacement: 手順 4、 3の画像 3
    • Lift the battery up and out of the chassis.

  5. Dell Latitude 5480 Display Replacement, Display: 手順 5、 3の画像 1 Dell Latitude 5480 Display Replacement, Display: 手順 5、 3の画像 2 Dell Latitude 5480 Display Replacement, Display: 手順 5、 3の画像 3
    • Insert a plastic card between the bezel and the display.

    • Slide the plastic card beneath the entire bezel to sever the adhesive that secures the bezel.

    • Lift the bezel off of the display.

  6. Dell Latitude 5480 Display Replacement: 手順 6、 3の画像 1 Dell Latitude 5480 Display Replacement: 手順 6、 3の画像 2 Dell Latitude 5480 Display Replacement: 手順 6、 3の画像 3
    • Remove the four 5.6 mm Phillips head screws, one at each corner, to release the display assembly.

    • Gently lift away the display panel and set it on top of the keyboard.

    • Take care not to strain the display assemble cable.

  7. Dell Latitude 5480 Display Replacement: 手順 7、 3の画像 1 Dell Latitude 5480 Display Replacement: 手順 7、 3の画像 2 Dell Latitude 5480 Display Replacement: 手順 7、 3の画像 3
    • On the bottom of the back of the display panel, remove the tape that secures the cable connecting the screen to the base of the computer.

    • Flip up the display cable locking bar.

    • Disconnect the display connector.

    • Remove the display.

終わりに

To reassemble your device, follow these instructions in reverse order.

作成者

3人の作成者と共同で作成されました。

Valencia Vidrine

メンバー登録日: 02/16/24

457 ポイント

5のガイドは作成済み

チーム

University of Memphis, Team 2-2, Sneed Spring 2024 University of Memphis, Team 2-2, Sneed Spring 2024人のメンバー

UM-SNEED-S24S2G2

4 メンバー

7のガイドは作成済み

0 件のコメント

コメントを追加

統計データ:

過去 24時間: 1

過去 7 日: 4

過去 30 日: 29

今までの合計 70