メインコンテンツにスキップ

Dell Latitude 10-ST2e Rear Facing Camera Replacement

必要な工具と部品

  1. Dell Latitude 10-ST2e Rear Facing Camera Replacement, Motherboard: 手順 1、 3の画像 1 Dell Latitude 10-ST2e Rear Facing Camera Replacement, Motherboard: 手順 1、 3の画像 2 Dell Latitude 10-ST2e Rear Facing Camera Replacement, Motherboard: 手順 1、 3の画像 3
    • Using the blue opening tool, separate the back plastic cover from the device. Start in a corner, and work your way around the tablet.

  2. Dell Latitude 10-ST2e Rear Facing Camera Replacement: 手順 2、 2の画像 1 Dell Latitude 10-ST2e Rear Facing Camera Replacement: 手順 2、 2の画像 2
    • Remove the four 4.0mm black screws on the perimeter of the device using a JIS #00 screwdriver

  3. Dell Latitude 10-ST2e Rear Facing Camera Replacement: 手順 3、 2の画像 1 Dell Latitude 10-ST2e Rear Facing Camera Replacement: 手順 3、 2の画像 2
    • Remove the two 4.0mm silver screws using the JIS #00 screwdriver.

  4. Dell Latitude 10-ST2e Rear Facing Camera Replacement: 手順 4、 1の画像 1
    • Disconnect the connection of the front camera clamp by releasing the clamp with tweezers.

    • Pull up on the connection from the motherboard.

    • Avoid damaging the connection.

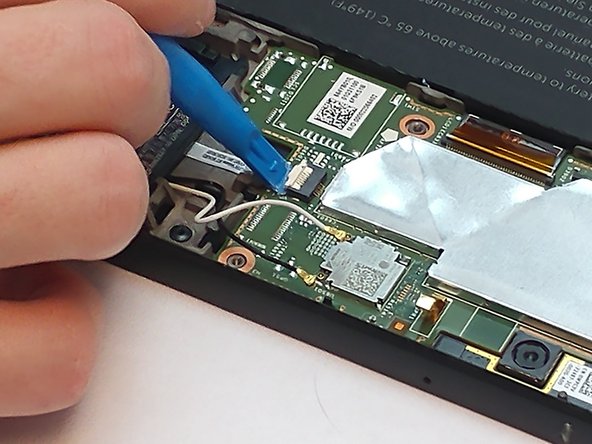
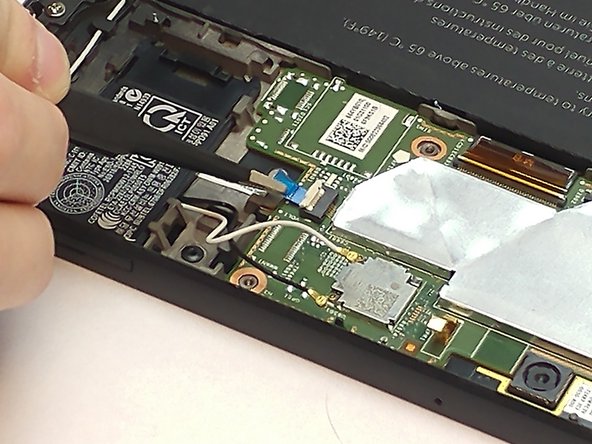
  5. Dell Latitude 10-ST2e Rear Facing Camera Replacement: 手順 5、 3の画像 1 Dell Latitude 10-ST2e Rear Facing Camera Replacement: 手順 5、 3の画像 2 Dell Latitude 10-ST2e Rear Facing Camera Replacement: 手順 5、 3の画像 3
    • Using an opening tool, lift upwards on the white clamp, and pull the blue tab out of the connection with tweezers.

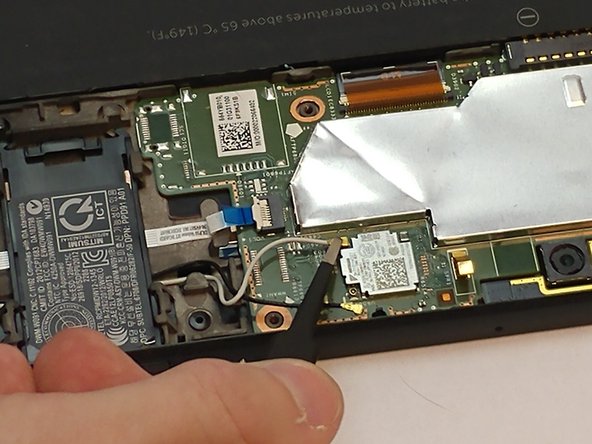
  6. Dell Latitude 10-ST2e Rear Facing Camera Replacement: 手順 6、 2の画像 1 Dell Latitude 10-ST2e Rear Facing Camera Replacement: 手順 6、 2の画像 2
    • Using tweezers, disconnect the white and black wires from the bottom of the motherboard.

    • Pull upwards while holding the brass connections. Do not pull on the wires.

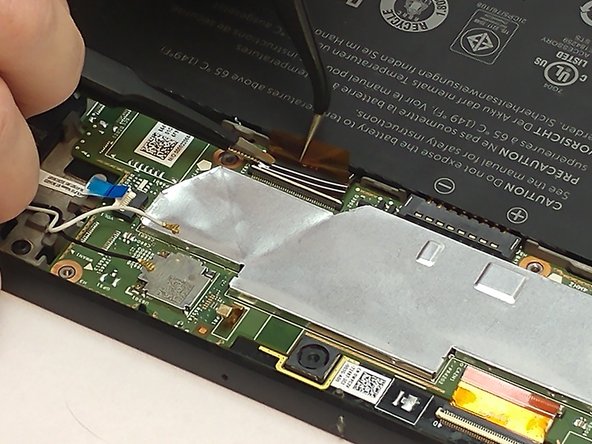
  7. Dell Latitude 10-ST2e Rear Facing Camera Replacement: 手順 7、 3の画像 1 Dell Latitude 10-ST2e Rear Facing Camera Replacement: 手順 7、 3の画像 2 Dell Latitude 10-ST2e Rear Facing Camera Replacement: 手順 7、 3の画像 3
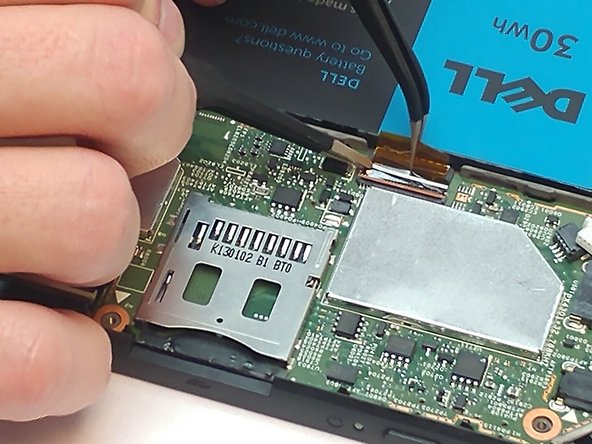
    • Disconnect the two clamps, one orange and one white, using tweezers next to the battery.

  8. Dell Latitude 10-ST2e Rear Facing Camera Replacement: 手順 8、 1の画像 1
    • Remove the four 7.0mm screws securing the battery with a JIS #00 screwdriver.

  9. Dell Latitude 10-ST2e Rear Facing Camera Replacement: 手順 9、 2の画像 1 Dell Latitude 10-ST2e Rear Facing Camera Replacement: 手順 9、 2の画像 2
    • With the blue opening tool, gently lift up and remove the battery from the tablet.

    • Do not damage, puncture, cut, or bend the battery, as this may cause bodily harm.

  10. Dell Latitude 10-ST2e Rear Facing Camera Replacement: 手順 10、 3の画像 1 Dell Latitude 10-ST2e Rear Facing Camera Replacement: 手順 10、 3の画像 2 Dell Latitude 10-ST2e Rear Facing Camera Replacement: 手順 10、 3の画像 3
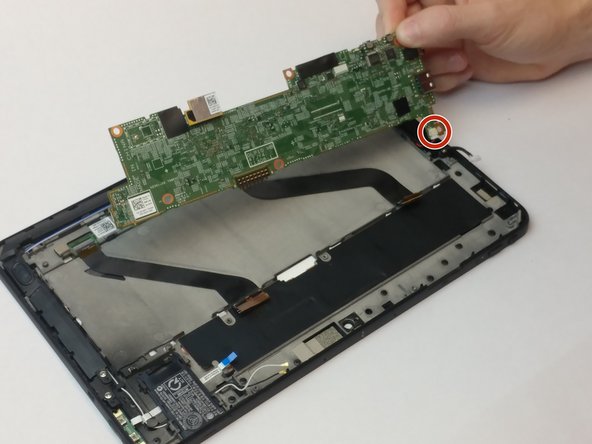
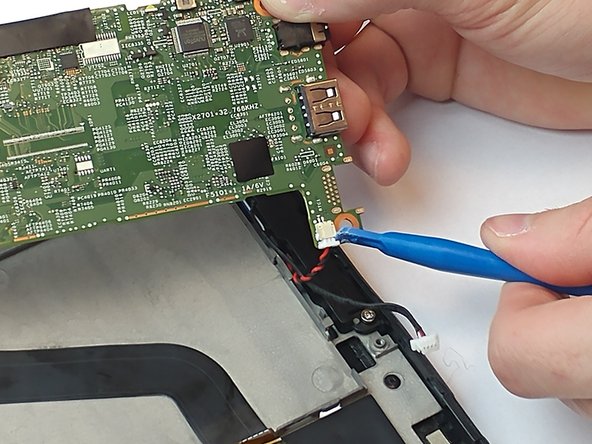
    • Rotate the motherboard upwards from the tablet using tweezers, but do not remove completely from the device. As you lift, disconnect the black and red wire located underneath the motherboard before removing it completely from the tablet.

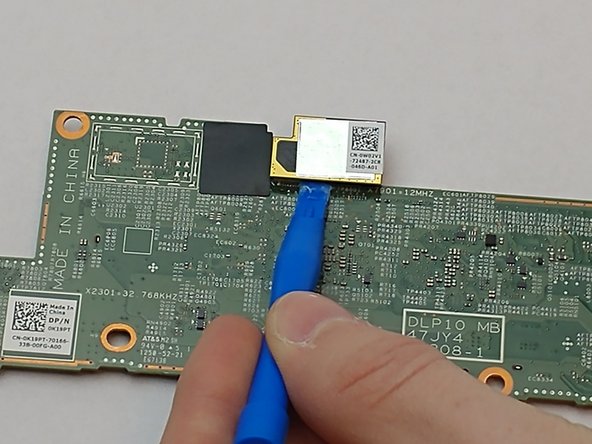
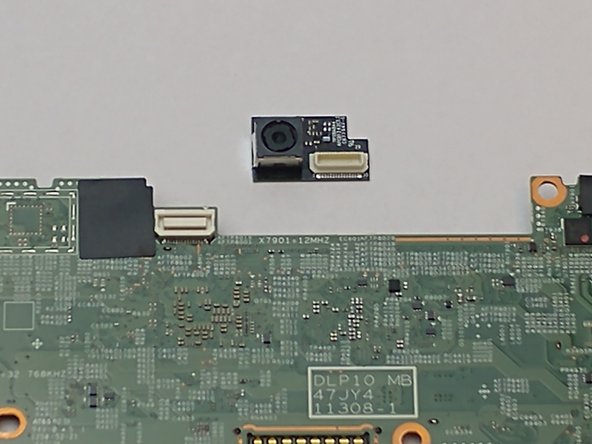
  11. Dell Latitude 10-ST2e Rear Facing Camera Replacement, Rear Facing Camera: 手順 11、 3の画像 1 Dell Latitude 10-ST2e Rear Facing Camera Replacement, Rear Facing Camera: 手順 11、 3の画像 2 Dell Latitude 10-ST2e Rear Facing Camera Replacement, Rear Facing Camera: 手順 11、 3の画像 3
    • Once the motherboard is removed, place on a flat surface facing down. Use the plastic opening tool to disconnect and remove the camera from the motherboard.

終わりに

To reassemble your device, follow these instructions in reverse order.

ある他の人がこのガイドを完成しました。

作成者

3人の作成者と共同で作成されました。

Jan Camacho

メンバー登録日: 09/27/17

140 ポイント

1ガイドが承認済み

チーム

USF Tampa, Team S16-G4, Eyestone Fall 2017 USF Tampa, Team S16-G4, Eyestone Fall 2017人のメンバー

USFT-EYESTONE-F17S16G4

4 メンバー

13のガイドは作成済み

0 件のコメント

コメントを追加

統計データ:

過去 24時間: 0

過去 7 日: 1

過去 30 日: 1

今までの合計 242