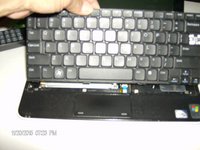
メインコンテンツにスキップ

Dell Inspiron Mini 1012 Keyboard Replacement

必要な工具と部品

  1. Dell Inspiron Mini 1012 Keyboard Replacement, Keyboard: 手順 1、 3の画像 1 Dell Inspiron Mini 1012 Keyboard Replacement, Keyboard: 手順 1、 3の画像 2 Dell Inspiron Mini 1012 Keyboard Replacement, Keyboard: 手順 1、 3の画像 3
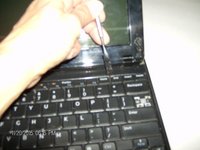
    • Unlock the two tabs on the bottom of the laptop.

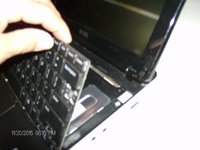
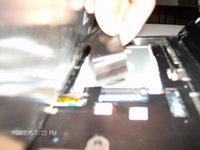
    • Use your fingernail or a spudger to pull the battery pack out of the laptop.

  2. Dell Inspiron Mini 1012 Keyboard Replacement: 手順 2、 1の画像 1
    • Remove the three screws with a Phillips #00 screwdriver.

  3. Dell Inspiron Mini 1012 Keyboard Replacement: 手順 3、 2の画像 1 Dell Inspiron Mini 1012 Keyboard Replacement: 手順 3、 2の画像 2
    • Insert the spudger between the top of the keyboard and the laptop body.

    • Carefully pry the keyboard up.

    • Be gentle! You don't want to damage the laptops ribbon cable connector by pulling too hard.

    • It's not recommended to use a metal spudger for this repair as the photo shows. A regular nylon spudger will work just fine.

  4. Dell Inspiron Mini 1012 Keyboard Replacement: 手順 4、 2の画像 1 Dell Inspiron Mini 1012 Keyboard Replacement: 手順 4、 2の画像 2
    • Unlock the connector to release the ribbon cable.

    • Carefully pull on the clear tab to remove the keyboard from the device.

  5. Dell Inspiron Mini 1012 Keyboard Replacement: 手順 5、 3の画像 1 Dell Inspiron Mini 1012 Keyboard Replacement: 手順 5、 3の画像 2 Dell Inspiron Mini 1012 Keyboard Replacement: 手順 5、 3の画像 3
    • Take the new keyboard and insert the ribbon cable into the connector on the laptop.

    • Lay the keyboard back onto the device and gently snap it back into place.

終わりに

To reassemble your device, follow these instructions in reverse order starting at step two.

作成者

5人の作成者と共同で作成されました。

sabinabarajas

メンバー登録日: 10/17/15

372 ポイント

3のガイドは作成済み

チーム

Gateway, Team 2-2, Kuhn Fall 2015 Gateway, Team 2-2, Kuhn Fall 2015人のメンバー

GCC-KUHN-F15S2G2

1 メンバー

6のガイドは作成済み

0 件のコメント

コメントを追加

統計データ:

過去 24時間: 0

過去 7 日: 1

過去 30 日: 8

今までの合計 622