メインコンテンツにスキップ
リペアコミュニティに参加 - アカウントの作成

Dell Inspiron M5010 Hard Drive Replacement

必要な工具と部品

  1. Dell Inspiron M5010 Hard Drive Replacement, Battery: 手順 1、 2の画像 1 Dell Inspiron M5010 Hard Drive Replacement, Battery: 手順 1、 2の画像 2
    • Make sure laptop is powered off before removing the battery.

    • Slide both arrow tabs towards the outer edge of the computer to release the battery.

    • Battery is not shown.

    FixBotに聞いてみる
  2. Dell Inspiron M5010 Hard Drive Replacement, Remove keyboard retaining screw: 手順 2、 1の画像 1
    • Remove Keyboard retaining screw from bottom of laptop.

    FixBotに聞いてみる
  3. Dell Inspiron M5010 Hard Drive Replacement: 手順 3、 3の画像 1 Dell Inspiron M5010 Hard Drive Replacement: 手順 3、 3の画像 2 Dell Inspiron M5010 Hard Drive Replacement: 手順 3、 3の画像 3
    • Insert the 6 inch metal ruler, or another flat object into the holes in the top left of the keyboard, the top middle of the keyboard, and the top right of the keyboard to release the keyboard from the computer.

    • There are a number of screws on the bottom that required to be removed prior to the keyboard being able to be lifted up.

    FixBotに聞いてみる
  4. Dell Inspiron M5010 Hard Drive Replacement: 手順 4、 1の画像 1
    • Lift the keyboard up slightly and push forward in order to release bottom tabs.

    FixBotに聞いてみる
  5. Dell Inspiron M5010 Hard Drive Replacement: 手順 5、 1の画像 1
    • Pull the black tab up and then pull left on keyboard plug to release keyboard.

    FixBotに聞いてみる
  6. Dell Inspiron M5010 Hard Drive Replacement, Palm Rest: 手順 6、 1の画像 1
    • Flip the laptop, so the bottom of the laptop is facing up.

    • Remove the seven 6.0mm Phillip #000 screws indicated using the Phillips #000 screwdriver.

    FixBotに聞いてみる
  7. Dell Inspiron M5010 Hard Drive Replacement: 手順 7、 2の画像 1 Dell Inspiron M5010 Hard Drive Replacement: 手順 7、 2の画像 2
    • Flip the laptop back over, so that the top of the laptop is facing up.

    • Open the laptop.

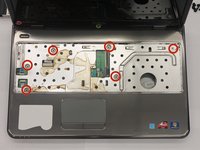
    • Remove all of the indicated 6.0 mm screws with the Phillips #000 screwdriver.

    FixBotに聞いてみる
  8. Dell Inspiron M5010 Hard Drive Replacement: 手順 8、 1の画像 1
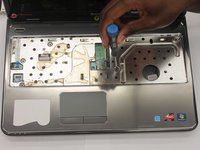
    • Unplug the palm rest cables by lifting the black tab up and then pulling on the blue tabs.

    FixBotに聞いてみる
  9. Dell Inspiron M5010 Hard Drive Replacement: 手順 9、 3の画像 1 Dell Inspiron M5010 Hard Drive Replacement: 手順 9、 3の画像 2 Dell Inspiron M5010 Hard Drive Replacement: 手順 9、 3の画像 3
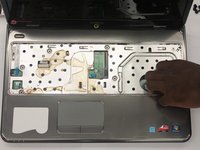
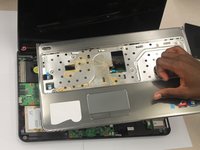
    • Carefully unsnap and remove the palm rest.

    • Place your fingers inside the large circle in the lower right corner to get a good grip.

    FixBotに聞いてみる
  10. Dell Inspiron M5010 Hard Drive Replacement, Hard Drive: 手順 10、 1の画像 1
    • Remove the 4 mm Hard Drive screws with the Phillips #000 screwdriver.

    FixBotに聞いてみる
  11. Dell Inspiron M5010 Hard Drive Replacement: 手順 11、 2の画像 1 Dell Inspiron M5010 Hard Drive Replacement: 手順 11、 2の画像 2
    • Flip laptop over.

    • Open lap top.

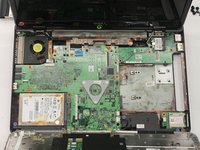
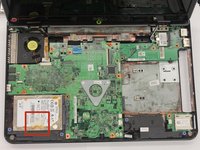
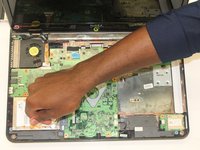
    • Pull the clear tab attached to the hard drive and gently lift up the hard drive.

    FixBotに聞いてみる
終わりに

To reassemble your device, follow these instructions in reverse order.

12 の人々がこのガイドを完成させました。

作成者

4人の作成者と共同で作成されました。

Sydney Moseley

メンバー登録日: 10/13/14

452 ポイント

1ガイドが承認済み

チーム

Clemson, Team 1-5, Benson Fall 2014 Clemson, Team 1-5, Benson Fall 2014人のメンバー

CLEM-BENSON-F14S1G5

4 メンバー

11のガイドは作成済み

1件のガイドコメント

Thank you it was very helpful.

John Peel - 返信 共有

コメントを追加

統計データ:

過去 24時間: 2

過去 7 日: 6

過去 30 日: 41

今までの合計 9,849