メインコンテンツにスキップ

Dell Inspiron E1405 LCD Screen Replacement

必要な工具と部品

  1. Dell Inspiron E1405 LCD Screen Replacement, Battery: 手順 1、 1の画像 1
    • Save your work, power the laptop off, and ensure that the charging cable is unplugged before removing the battery.

    • Flip the laptop over.

    • Locate the battery release switch on the bottom of the laptop.

  2. Dell Inspiron E1405 LCD Screen Replacement: 手順 2、 3の画像 1 Dell Inspiron E1405 LCD Screen Replacement: 手順 2、 3の画像 2 Dell Inspiron E1405 LCD Screen Replacement: 手順 2、 3の画像 3
    • Slide the battery release switch away from the lock symbol until you hear the battery click.

    • Slide the battery towards the back of the laptop until it comes free.

  3. Dell Inspiron E1405 LCD Screen Replacement, LCD Screen: 手順 3、 3の画像 1 Dell Inspiron E1405 LCD Screen Replacement, LCD Screen: 手順 3、 3の画像 2 Dell Inspiron E1405 LCD Screen Replacement, LCD Screen: 手順 3、 3の画像 3
    • Use your fingers or a spudger to remove the six small rubber covers off the display assembly.

    • Remove the six 5.7 mm screws with a Phillips #00 screwdriver.

  4. Dell Inspiron E1405 LCD Screen Replacement: 手順 4、 1の画像 1
    • Use your fingers to gently pry the front bezel off the display assembly. Start at a corner and work your way around.

    • Remove the front display bezel when it comes free.

  5. Dell Inspiron E1405 LCD Screen Replacement: 手順 5、 3の画像 1 Dell Inspiron E1405 LCD Screen Replacement: 手順 5、 3の画像 2 Dell Inspiron E1405 LCD Screen Replacement: 手順 5、 3の画像 3
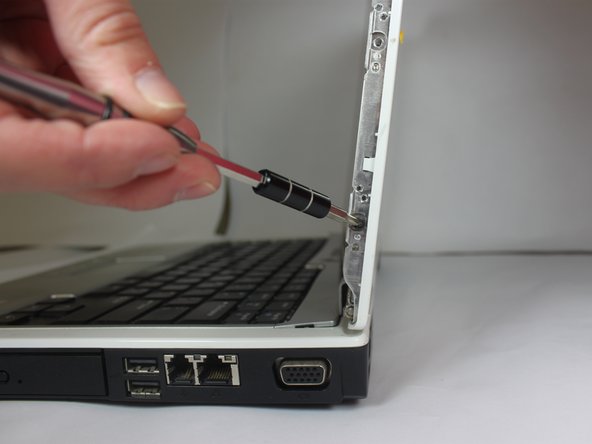
    • Remove the three 3.6 mm screws using a Phillips #00 screwdriver on both sides of the display.

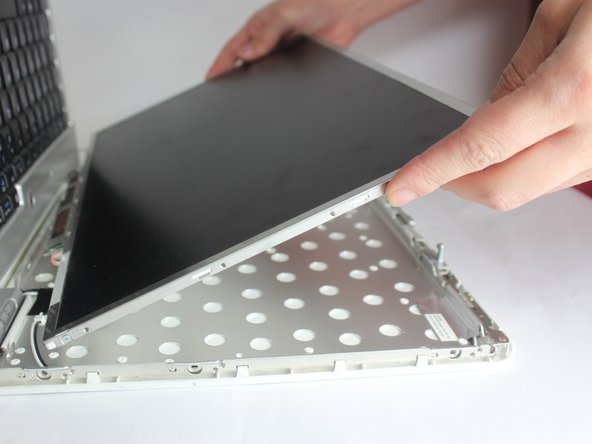
    • Remove the LCD screen from the display assembly.

  6. Dell Inspiron E1405 LCD Screen Replacement: 手順 6、 2の画像 1 Dell Inspiron E1405 LCD Screen Replacement: 手順 6、 2の画像 2
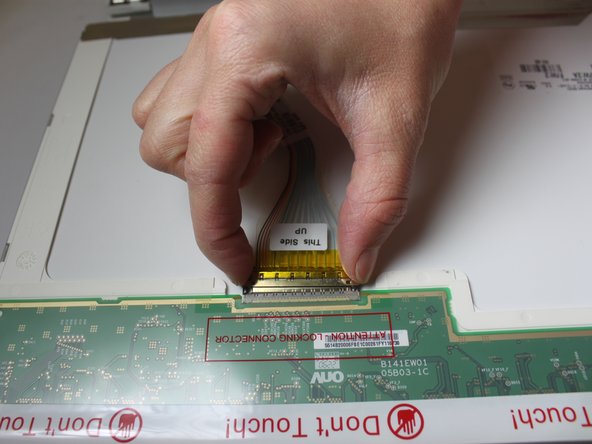
    • Unplug the VGA cable by pushing the two metal sides towards the middle of the strip.

    • Gently pull the VGA cable away to release the strip.

  7. Dell Inspiron E1405 LCD Screen Replacement: 手順 7、 2の画像 1 Dell Inspiron E1405 LCD Screen Replacement: 手順 7、 2の画像 2
    • Remove the next connection by pressing the two metal sides towards the middle. Then gently pull up the ribbon.

終わりに

To reassemble your device, follow these instructions in reverse order.

ある他の人がこのガイドを完成しました。

作成者

2人の作成者と共同で作成されました。

Sarah Neal Secrest

メンバー登録日: 03/20/17

597 ポイント

5のガイドは作成済み

チーム

Texas Tech, Team S8-G3, Bennett Spring 2017 Texas Tech, Team S8-G3, Bennett Spring 2017人のメンバー

TTU-BENNETT-S17S8G3

3 メンバー

5のガイドは作成済み

コメント 1 件

I need complete body *Dell INSPIRON E1405 .

St Master Fun - 返信

コメントを追加

統計データ:

過去 24時間: 0

過去 7 日: 1

過去 30 日: 2

今までの合計 437