メインコンテンツにスキップ

Dell Inspiron 8600 Top Case Replacement

必要な工具と部品

  1. Dell Inspiron 8600 Top Case Replacement, Battery: 手順 1、 1の画像 1
    • Remove the battery from the bottom left of the laptop as shown.

    • Remove the battery before operating on the computer to avoid electrocution.

  2. Dell Inspiron 8600 Top Case Replacement, Power Button: 手順 2、 3の画像 1 Dell Inspiron 8600 Top Case Replacement, Power Button: 手順 2、 3の画像 2 Dell Inspiron 8600 Top Case Replacement, Power Button: 手順 2、 3の画像 3
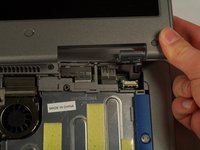
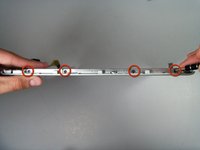
    • Locate the small opening at the upper left of the top blue panel which houses the power button.

    • Use a spudger to lift up and remove the blue panel.

    • Caution: The hinge cover is still connected to the interior of the computer by a small black tab.

  3. Dell Inspiron 8600 Top Case Replacement: 手順 3、 1の画像 1
    • Locate the black tab at the upper right corner of the keyboard, and gently pull the black tab to the left to disconnect the hinge cover.

    • You should now be able to completely remove the hinge cover.

  4. Dell Inspiron 8600 Top Case Replacement, Display Module: 手順 4、 2の画像 1 Dell Inspiron 8600 Top Case Replacement, Display Module: 手順 4、 2の画像 2
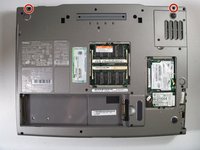
    • Flip the laptop over and remove the indicated screws.

    • Flip the laptop back over.

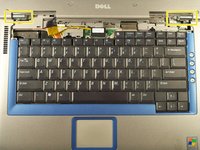
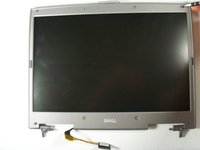
    • Find the two places where the display module is attached to the base of the computer.

  5. Dell Inspiron 8600 Top Case Replacement: 手順 5、 1の画像 1
    • Disconnect the video card from the display module by gently lifting upwards on the black tab.

  6. Dell Inspiron 8600 Top Case Replacement: 手順 6、 2の画像 1 Dell Inspiron 8600 Top Case Replacement: 手順 6、 2の画像 2
    • Lift the display module directly upwards from the base of the computer.

  7. Dell Inspiron 8600 Top Case Replacement: 手順 7、 1の画像 1
    • Now remove the display module.

  8. Dell Inspiron 8600 Top Case Replacement, Top Case: 手順 8、 3の画像 1 Dell Inspiron 8600 Top Case Replacement, Top Case: 手順 8、 3の画像 2 Dell Inspiron 8600 Top Case Replacement, Top Case: 手順 8、 3の画像 3
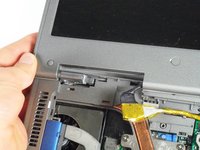
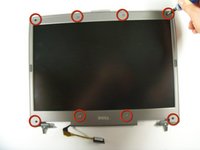
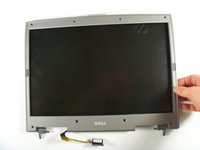
    • First, remove all tabs using a flat head/ finger.

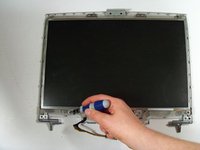
    • Next, remove all screws using a #1 Philips screwdriver.

    • Pull apart top case from the lower case. It will be quite difficult to separate.

  9. Dell Inspiron 8600 Top Case Replacement: 手順 9、 3の画像 1 Dell Inspiron 8600 Top Case Replacement: 手順 9、 3の画像 2 Dell Inspiron 8600 Top Case Replacement: 手順 9、 3の画像 3
    • Remove all screws on the top of the lcd

    • There all several screw on each side of the LCD. Remove all.

  10. Dell Inspiron 8600 Top Case Replacement: 手順 10、 1の画像 1
    • LCD should remove smoothly.

    • The top case will be what remains.

終わりに

To reassemble your device, follow these instructions in reverse order.

ある他の人がこのガイドを完成しました。

作成者

7人の作成者と共同で作成されました。

Perry

メンバー登録日: 04/12/11

251 ポイント

4のガイドは作成済み

チーム

Cal Poly, Team 18-22, Garner Spring 2011 Cal Poly, Team 18-22, Garner Spring 2011人のメンバー

CPSU-GARNER-S11S18G22

4 メンバー

16のガイドは作成済み

0 件のコメント

コメントを追加

統計データ:

過去 24時間: 0

過去 7 日: 0

過去 30 日: 3

今までの合計 2,162